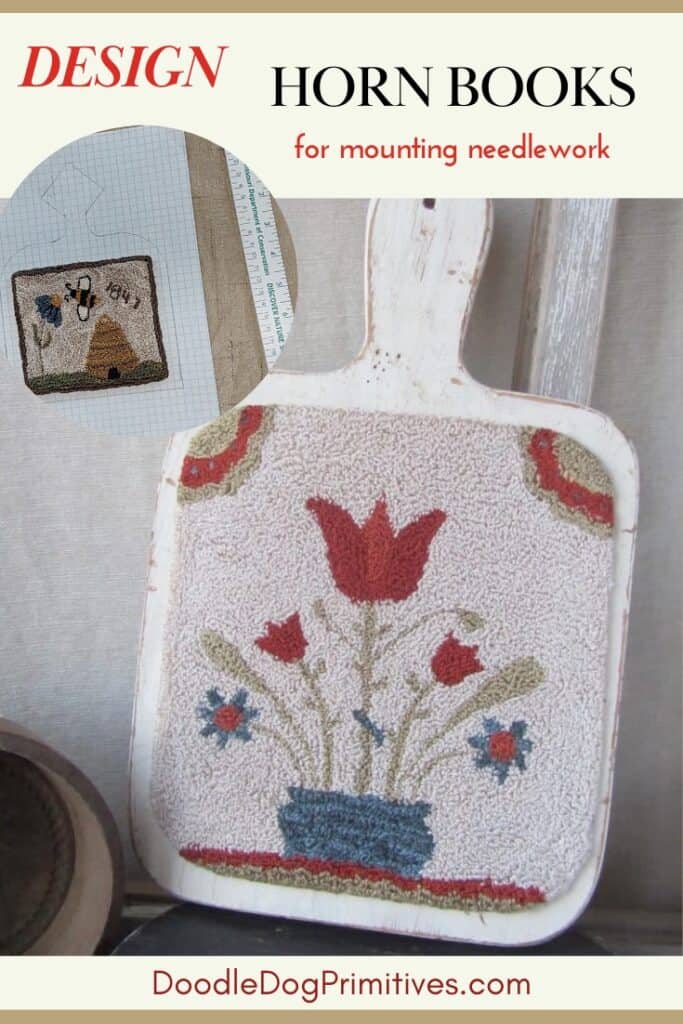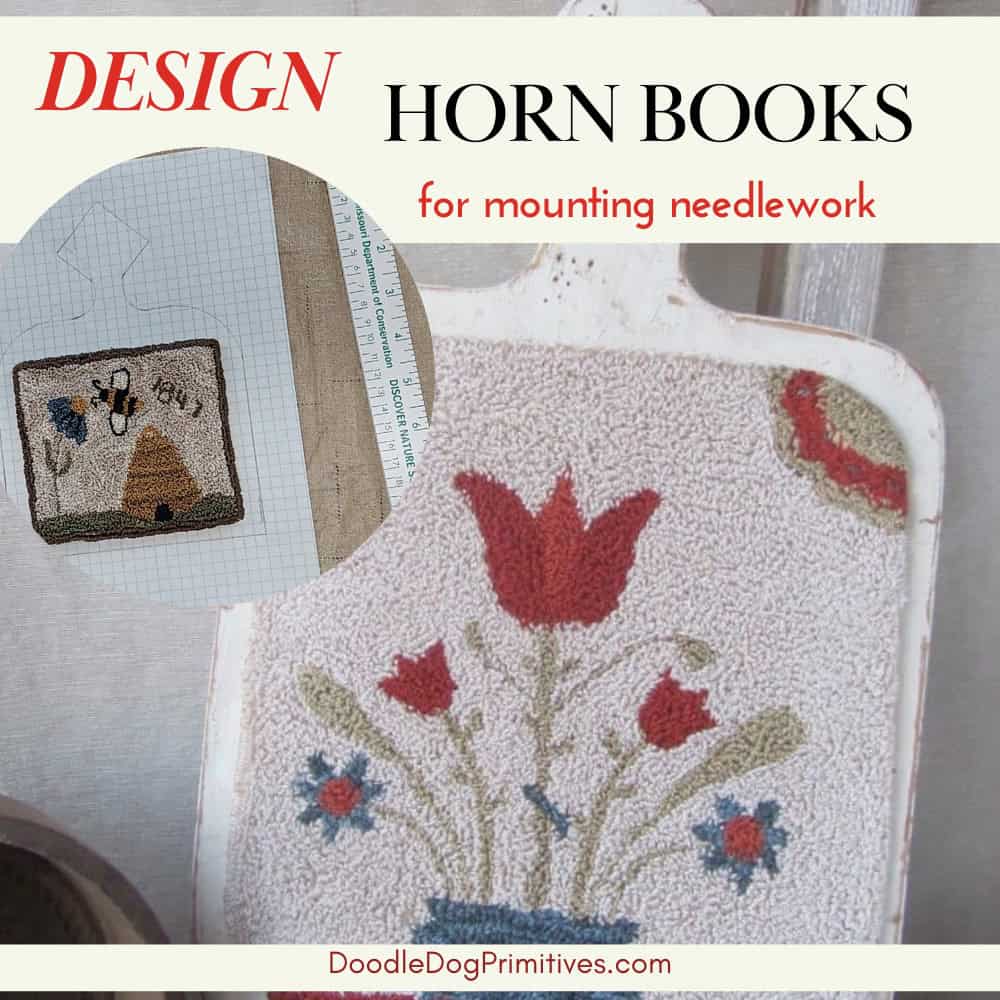
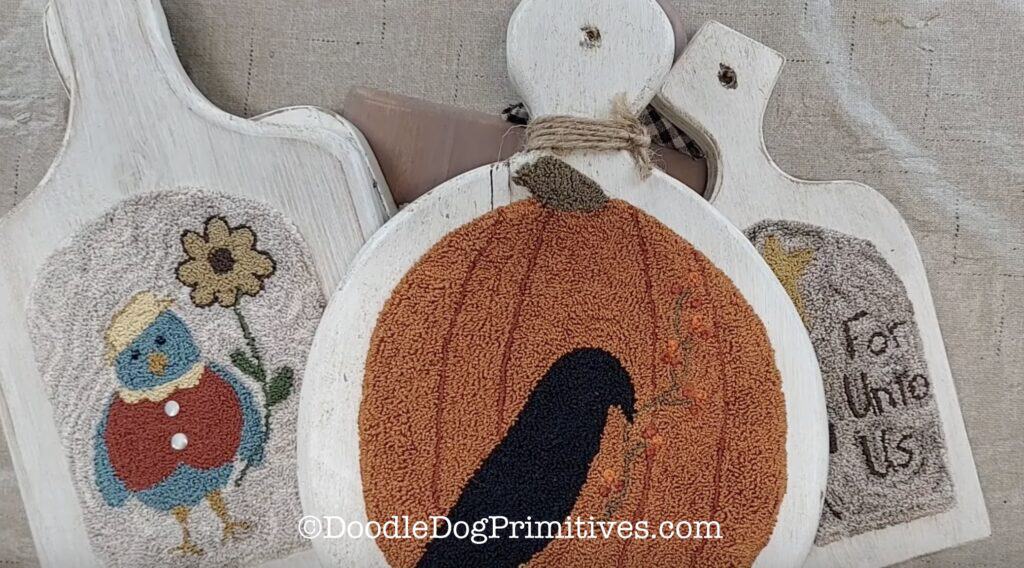
I sometimes mount my punch needle or other needlework on wooden boards that mimic antique wooden horn books. Horn books were used by school children in the Colonial period. They came in different shapes but usually have a handle of some kind. I like to design mine around my finished needle work project. In this tutorial, I will show you how I design patterns for custom wooden horn books.
Watch the Video Tutorial:
This post may contain affiliate links for your convenience, which means if you make a purchase after clicking a link I will earn a small commission but it won’t cost you a penny more. For more information, please visit our Privacy Policy.
Designing the Body of the Horn Book:
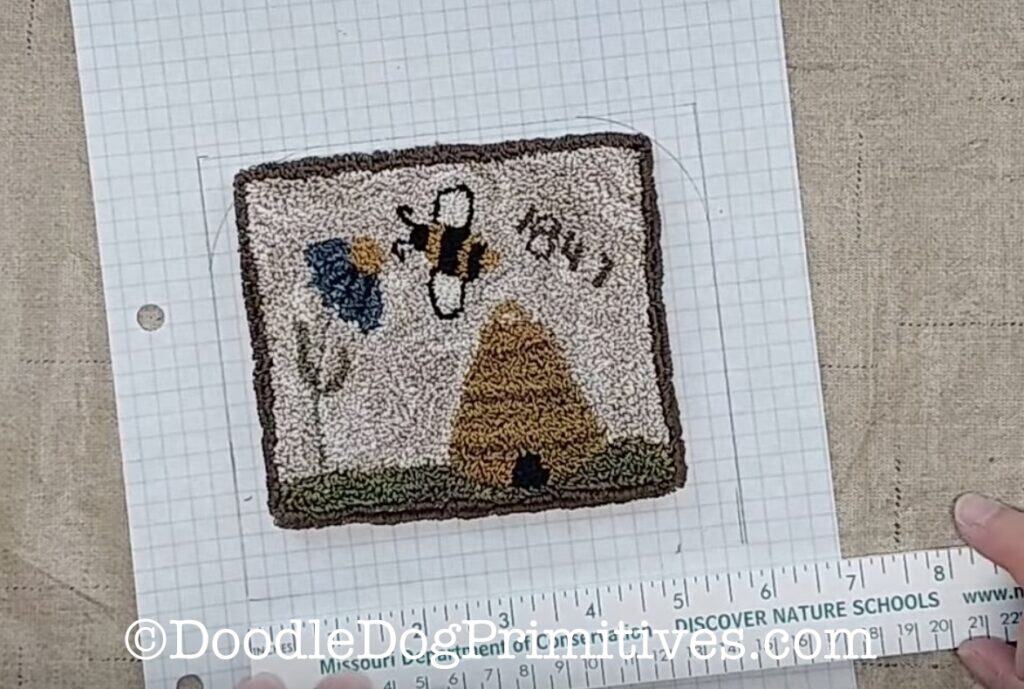
First, determine how large of a border you want to have around your finished project. I decided to use a half inch border on each side. You could choose a smaller or larger border based on the look you want.
Measure the width of your project and add 2 times the desired border width. My project is 4.5 inches wide. I want a half inch border, so I will add one inch (1/2 * 2). Do the same for the height of the project. My project is 4 inches tall, so I will make the height 5-ish inches. I decided to add a little more to the height.

Draw the rectangle onto some 4×4 graph paper.
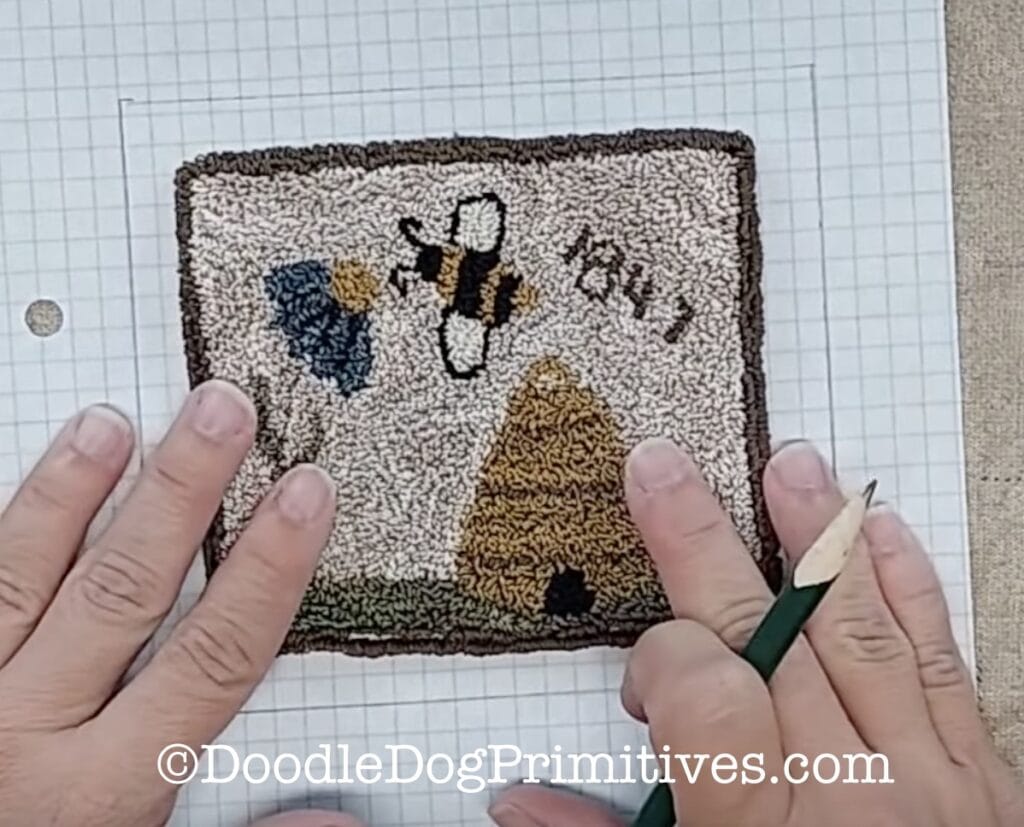
Now comes the fun part, deciding how it should look!
Sometimes I leave the bottom two corners straight and sometimes I add a curve. For this example, I decided to leave the bottom two corners at a 90 degree angle.
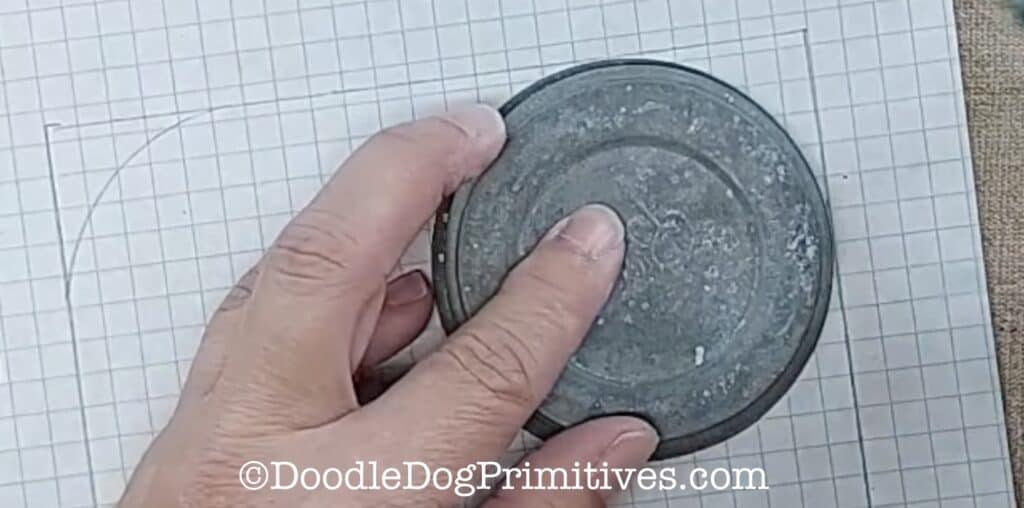
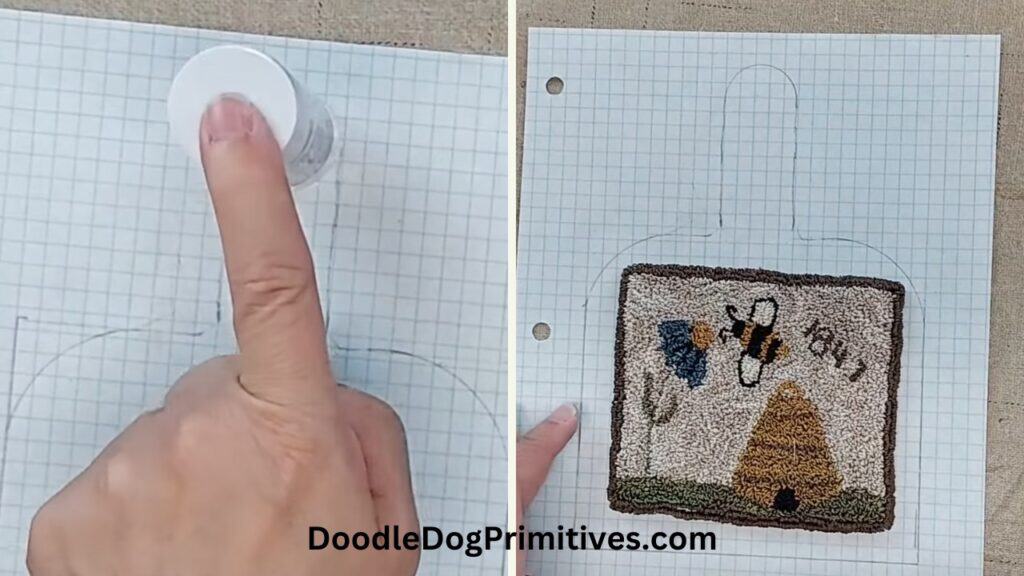
I do want to round out the top corners. I am going to use a zinc jar lid to draw the curve. The kitchen cabinets are usually a good place to find round objects you can use for drawing curves.
After I added the curves, I decided I needed to make the horn book just a little bit taller, so I added a quarter inch to the length at the bottom.
Design the Handle of the Horn Book:
The possibilities for handles are only limited by your imagination! I will show you a few ideas and how to easily draw them by tracing objects you might already have.
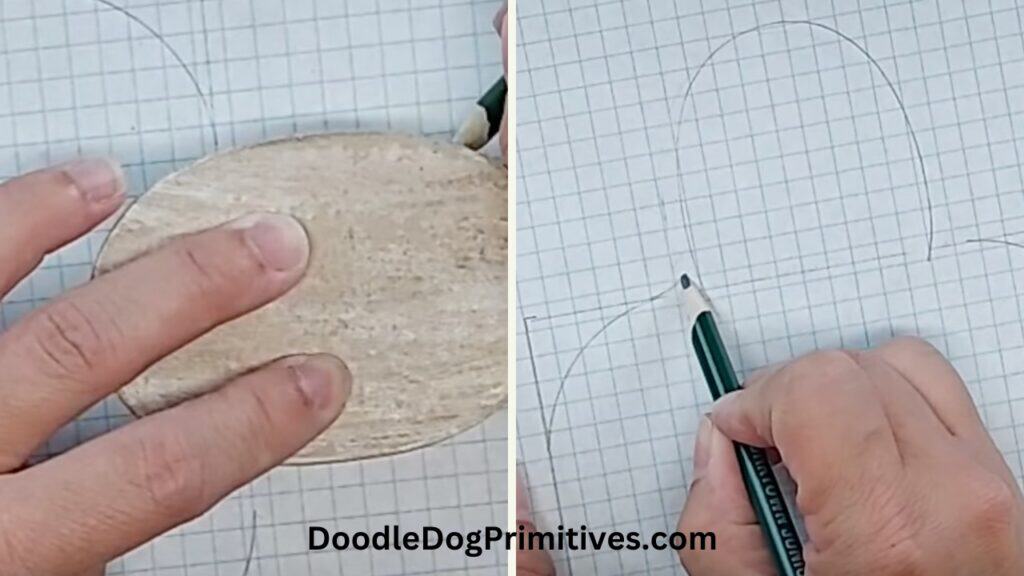
Let’s start with an oval handle. I have an oval paper mache box. I am going to place it right in the middle on the top with about 1/3 of the box below the top line, trace around it, and then round out where the top and the handle meet.
You could also put the oval box completely above the top line and then round out where the top and oval meet.
To make a long skinny handle, use a ruler to draw two lines up and then use a round object to draw an curve at the top.
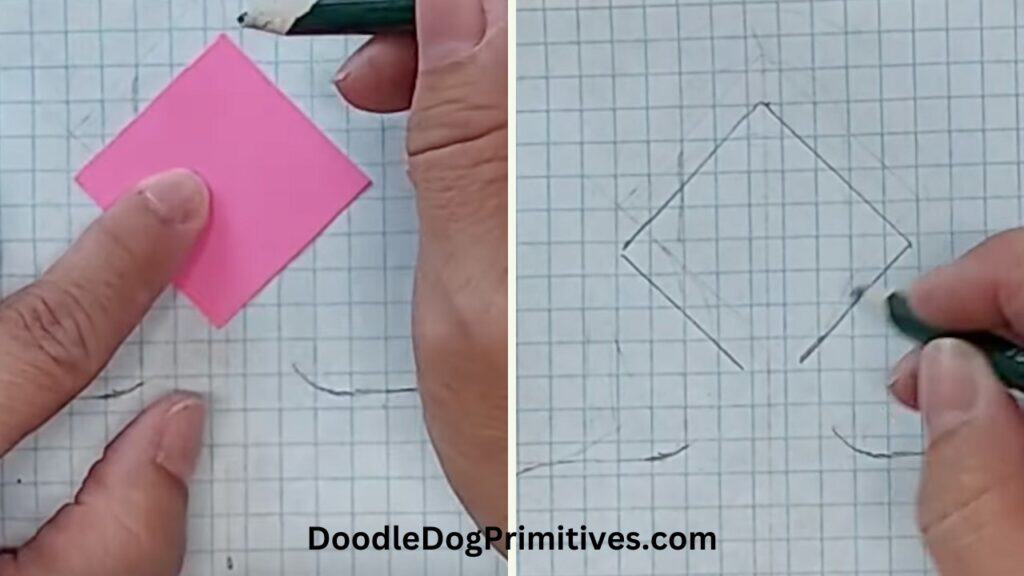
To make a handle with a diamond at the top, I cut a 1-1/2″ square from cardstock. I drew a light line right down the middle of the pattern and lined up two corners of the square with that line and traced the square.
Then I used a small round object to draw curves to connect the square to the rest of the pattern.
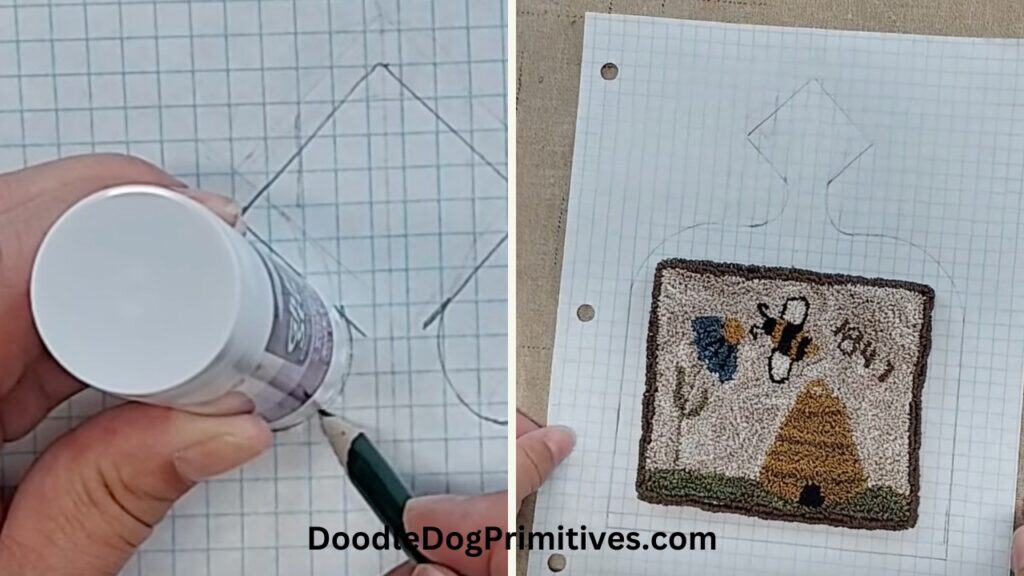
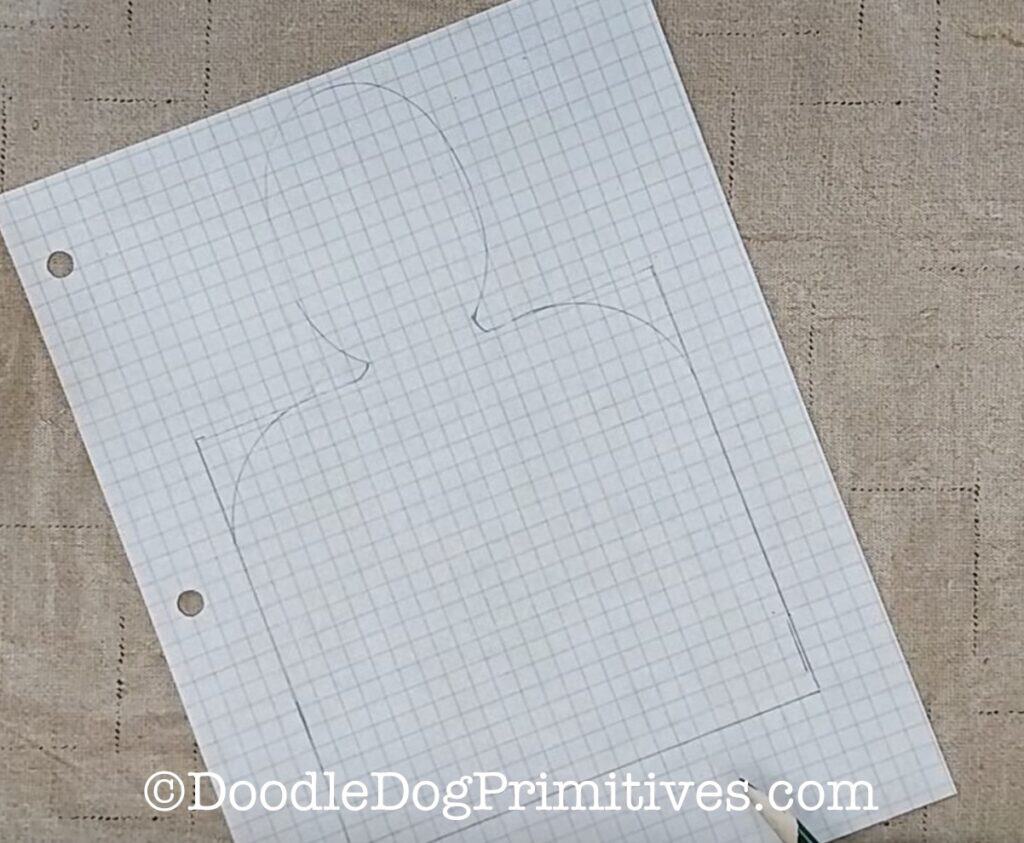
I am going to use this final design to cut out my wooden horn book.
Pin this Horn Book Tutorial: