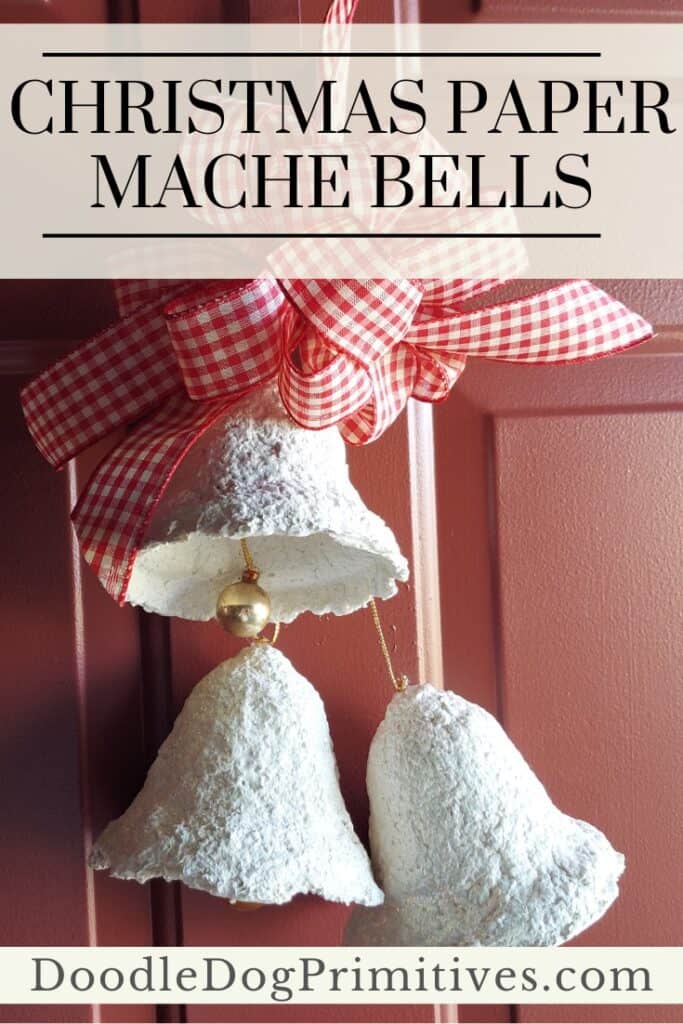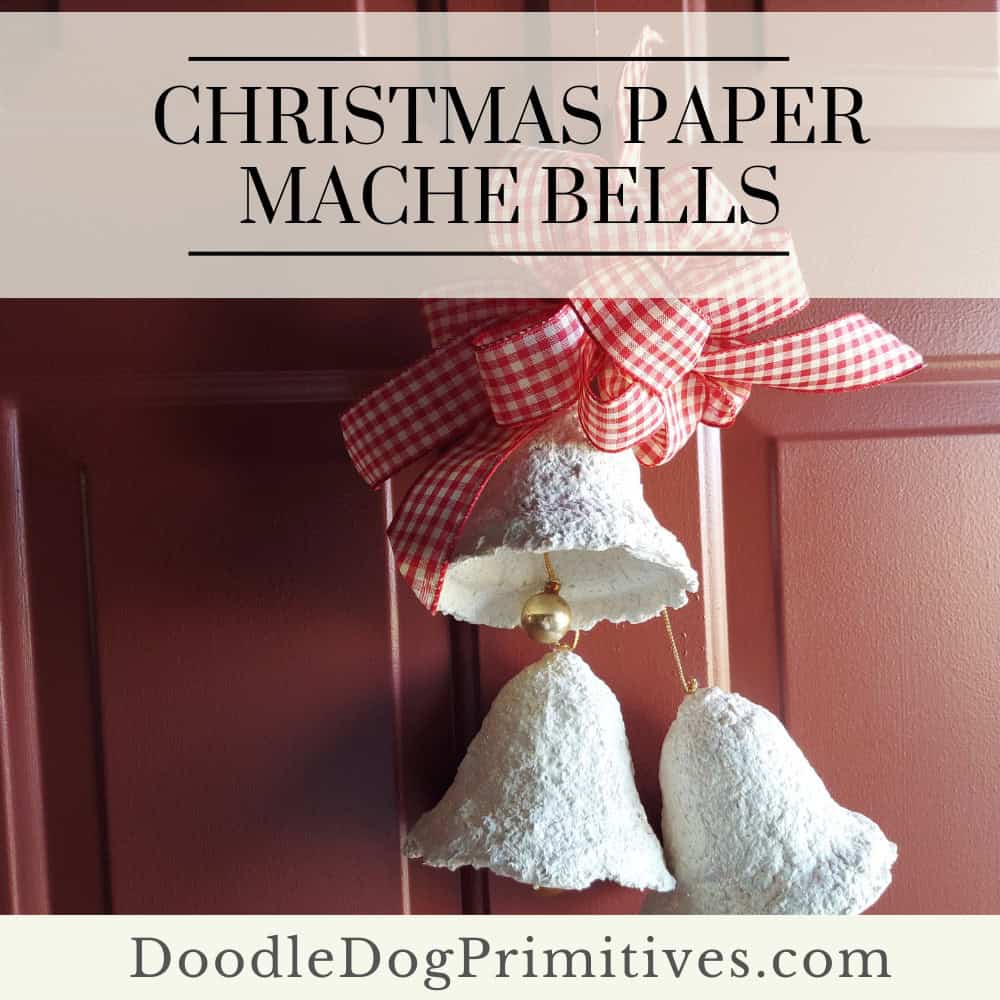
In this tutorial, I will show you how I made paper mache bells in the style of vintage paper mache bells using a Dollar Tree plastic bell for a mold.
Watch the Video Tutorial:
This post may contain affiliate links for your convenience, which means if you make a purchase after clicking a link I will earn a small commission but it won’t cost you a penny more. For more information, please visit our Privacy Policy.
Make the Paper Mache Bells:
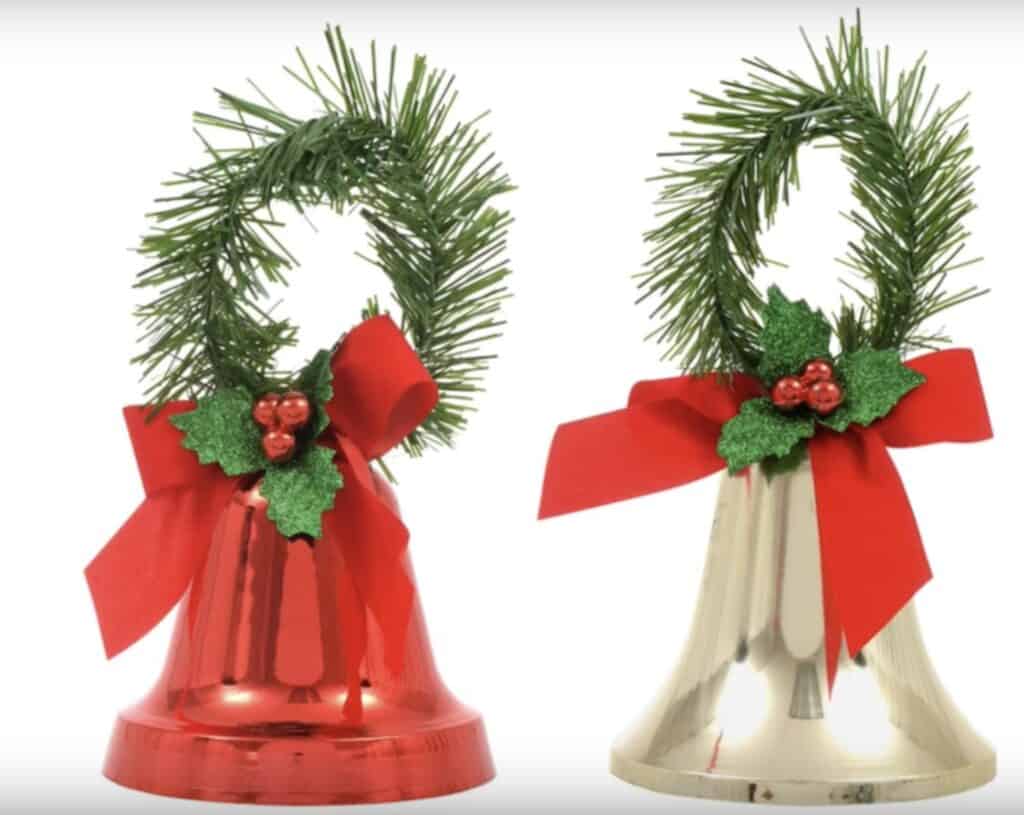
I bought a large plastic bell at Dollar Tree. They sell these single large bells that have a greenery and ribbon topper. Remove the greenery for this project. You can reuse the plastic bell to make as many paper mache bells as you want so you only need one. Unless you are in a hurry.
If you can’t find those bells or prefer a different size, keep in mind that your finished paper mache bell will be essentially the same size as the plastic bell.
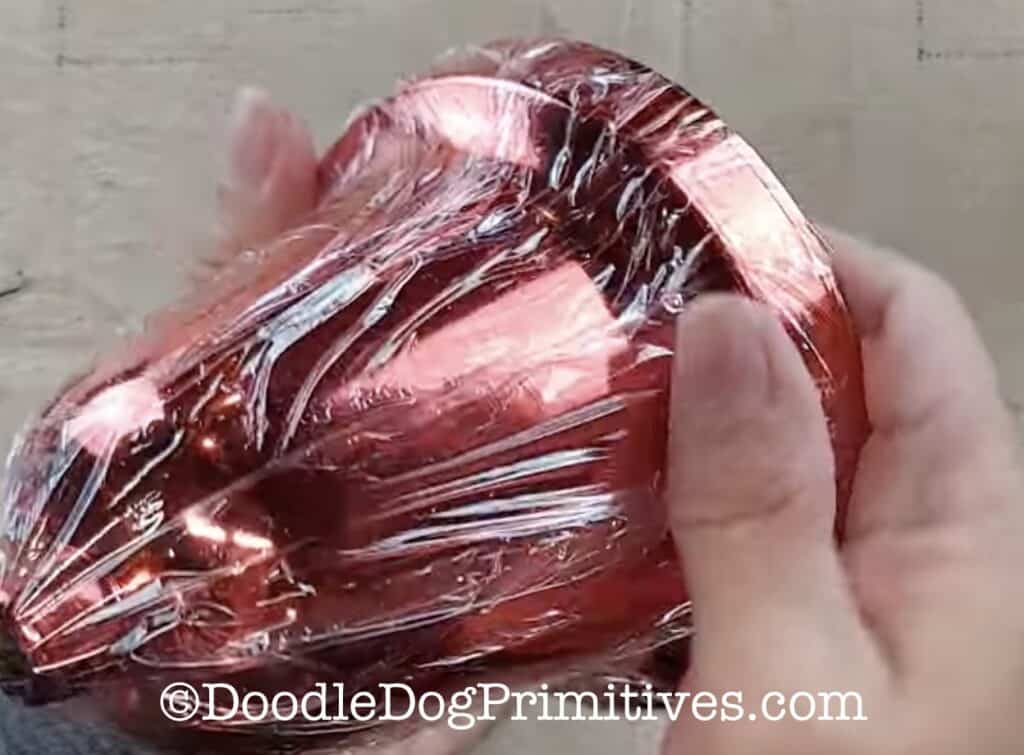
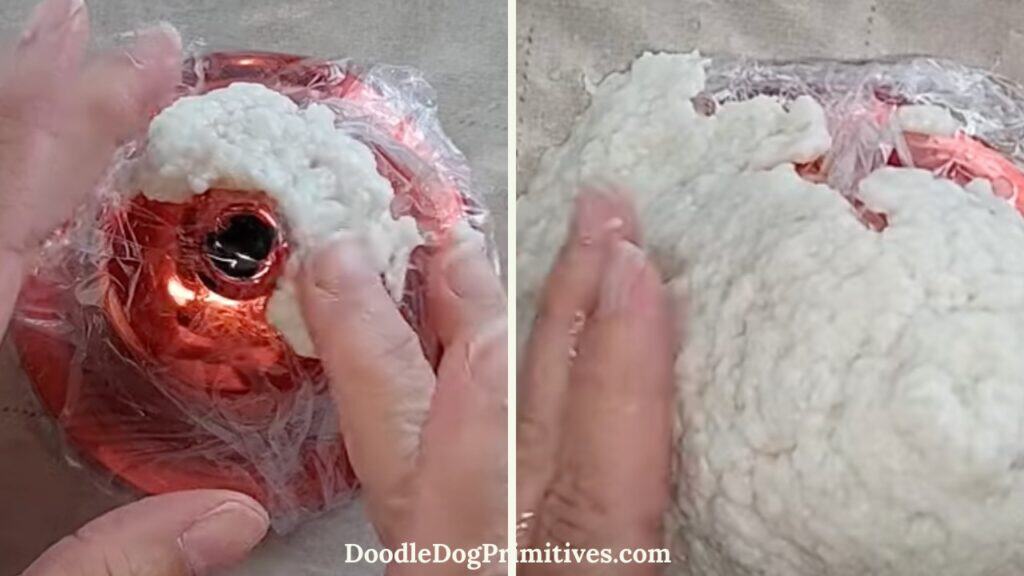
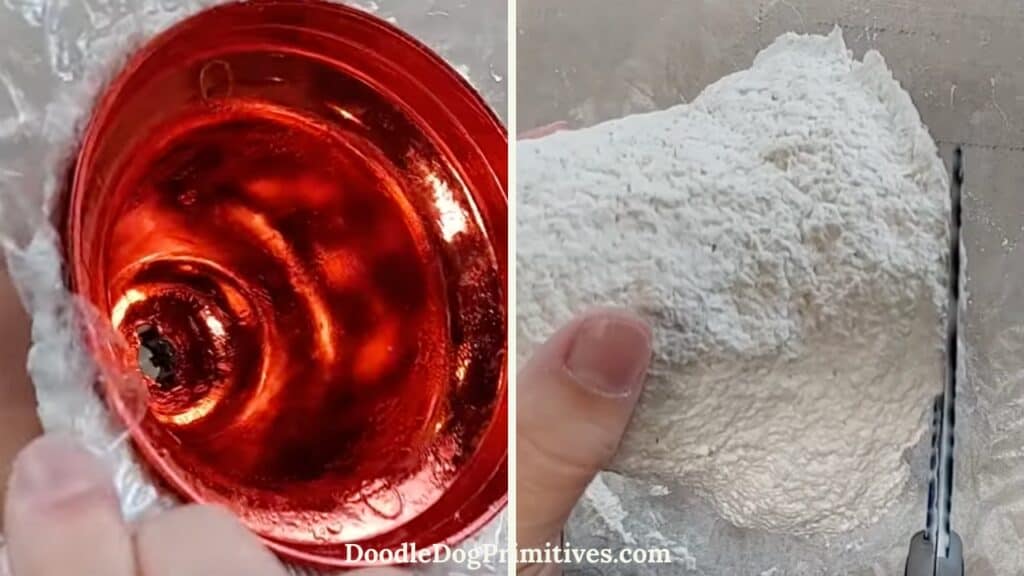
The first step is to cover the outside of the plastic bell with some Cling and Seal. This will allow you to remove the paper mache much easier after it is dry. Make sure the plastic wrap is pressed firmly around the entire bell with no gaps or air bubbles.
Following the package directions, mix some paper mache pulp. I like to use a paper, disposable bowl and plastic utensils for this so I can just throw the mess away when I am finished.
Put a plastic table cloth or a piece of wax paper down to protect your work surface. Start adding paper mache pulp to the outside of the bell, patting it down as you work. Try to keep the thickness of the paper mache even and cover the bell completely.
If the paper pulp is sliding off the bell, make the mixture thicker by adding more of the paper mache mix.
Set the bell aside to dry when it is completely covered. It did take mine 2-3 days to dry. Your drying time will depend on your humidity, temperature, etc.
After the paper mache is dry, remove the paper mache bell from the plastic bell. Gently pull on the plastic wrap to loosen the bell.
Trim the bottom of the bell if necessary.
If you get a crack or a hole in the paper mache, you can mix up some more paper mache mixture and press on a repair from both the front and back, making sure you don’t make a lump. Let the repair dry before continuing.
Decorate the Paper Mache Bells:
Once the bells are completely dry, you can paint them. I used Folk Art vintage white craft paint. After the paint is dry, paint on a coat of matte finish Mod Podge and then sprinkle with super fine white glitter.

Let this completely dry.
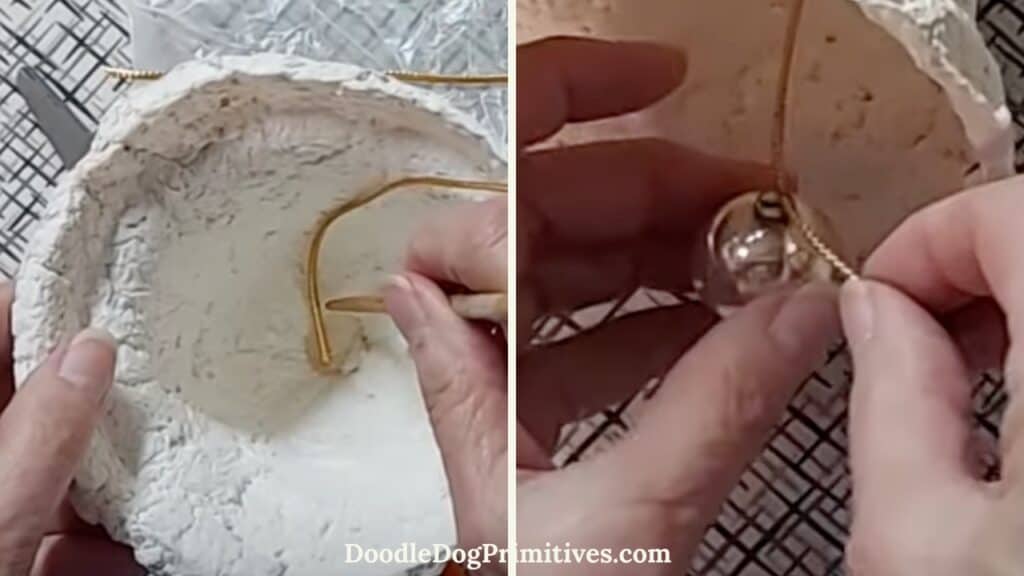
If you want, you can add some glass ball ornaments as ringers for the bells. Hot glue a piece of gold cording onto the top inside of the bell. Tie an ornament onto the cording.
Assemble the Vintage Bell Decoration:
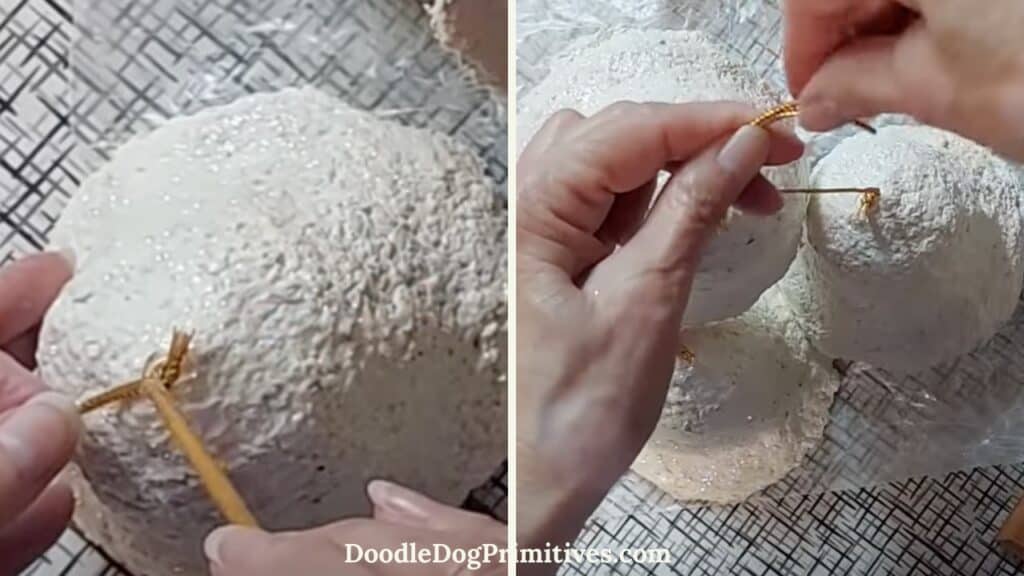
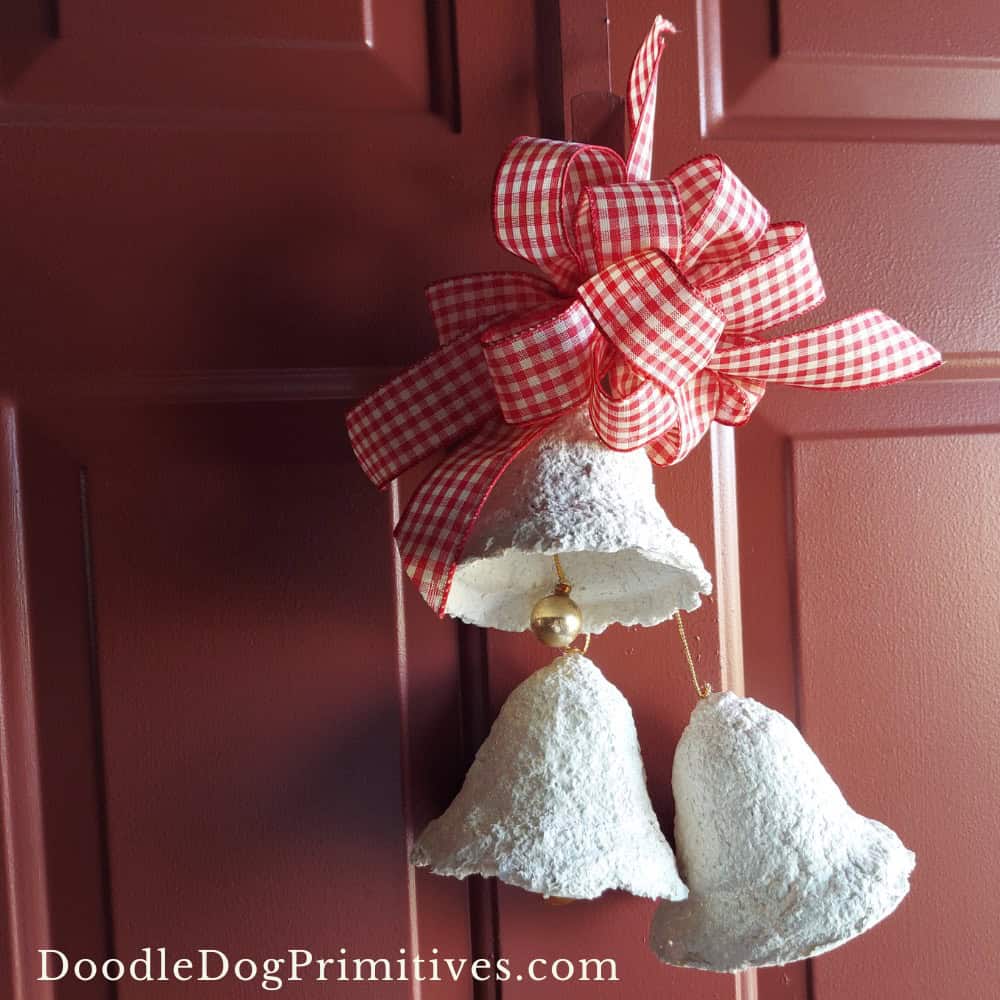
For the decoration pictured, I made three paper mache bells.
Using 1-1/2″ wired ribbon, make a bow for the topper.
Using a long piece – around 24″ – of the same gold cording, tie a knot in one end of the cording and hot glue the knot to the top of a bell. Repeat for the other two bells.
Gather the three strands of cording together and arrange the bells so they are at staggered heights and tie the three strings together in an overhand knot.
Attach the ribbon to the gold cording above the bells and make a loop for hanging the bells with a piece of wire.
Be sure to check out our other craft tutorials.
Pin this Christmas Craft Tutorial: