
In this post, I will show you how I made some primitive Santa bowl fillers. The Santas have been made with muslin fabric and painted. I used cotton batting for the trim on their coat and hat and finished them off with some jingle bells and fluffy beards.
Watch the Video Tutorial:
This post may contain affiliate links for your convenience, which means if you make a purchase after clicking a link I will earn a small commission but it won’t cost you a penny more. For more information, please visit our Privacy Policy.
Make the Primitive Santa Bowl Fillers:
You can draw your own pattern or use this free one I sketched here. Trace the Santa pattern onto a piece of muslin fabric. I used my light box to make tracing easier. This line is the sewing line.
Layer the fabric with the pattern onto another piece of muslin, right sides together and pin.
Sew along the traced line, leaving an opening for turning along the bottom. The curves on the Santa look better if you use a shorter than normal stitch length.

Trim all around the stitching line, leaving about 1/4″ seam allowance. Turn the Santa right side out and stuff. Hand sew the opening closed.

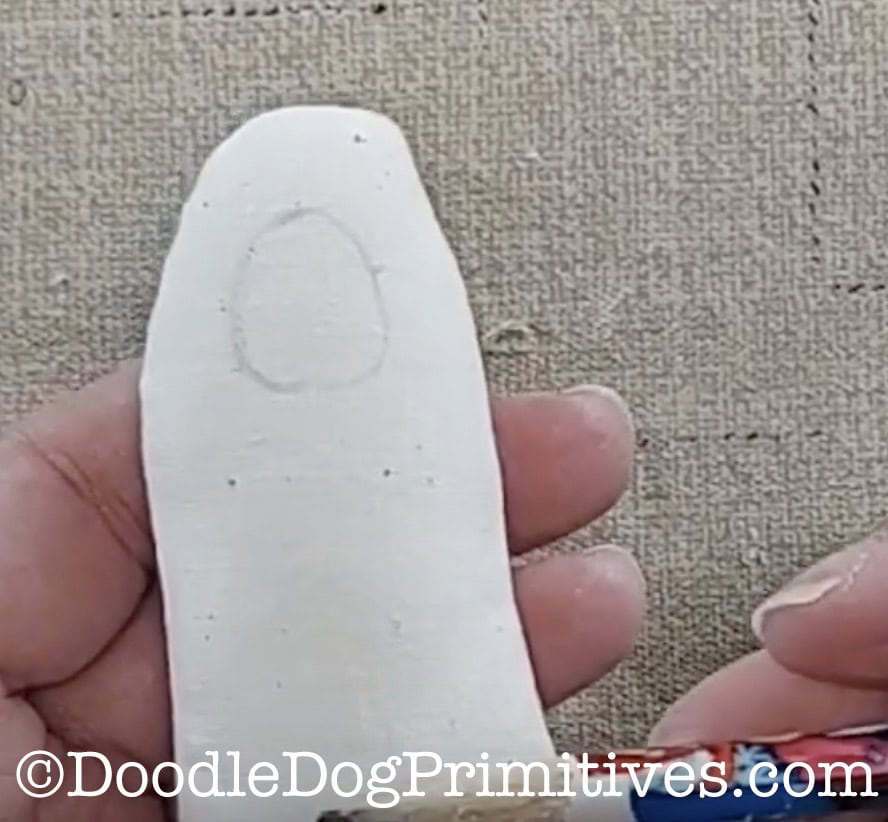
Use a pencil to draw an oval face shape on the Santa.
Use a needle and thread to sew a nose. Bring the needle and thread in through the back side of the Santa about 1/3 of the way down his face and slightly to one side of the center. Pop the knot through the back fabric so the knot is inside the Santa.
Put the needle back in close to where it came out and bring it back up at the same height but on the other side of the center of the face. Repeat that process, going back towards the other side of the face. Work your way down the face stitching back and forth and pulling tight to make the nose into a pucker. Tie off the thread.
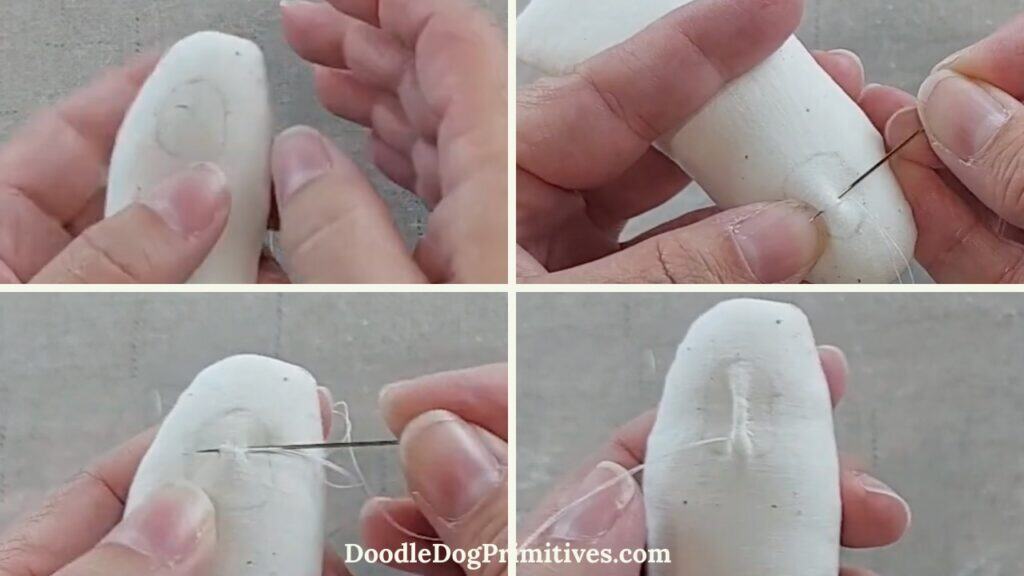
After I sewed the nose, I did decide to make the face a little bit bigger by enlarging the top of the face oval.
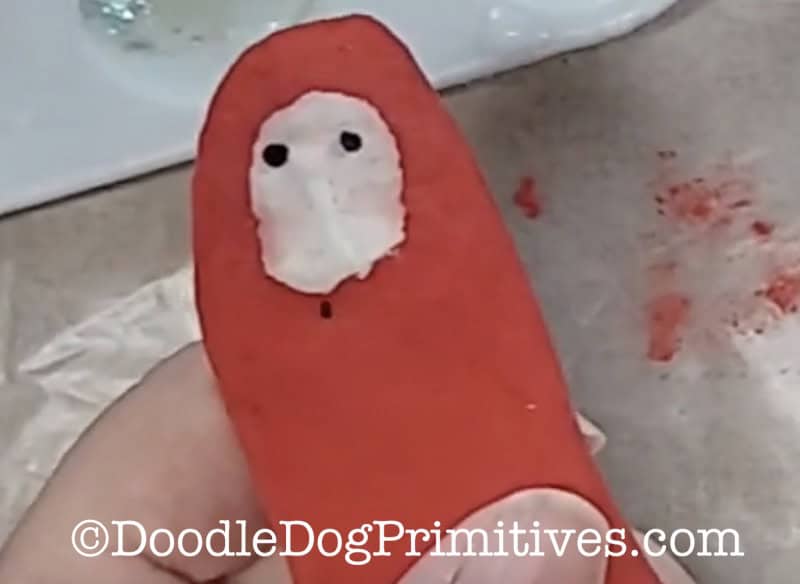
Next, paint the Santa everywhere except the face. I used Apple Barrel bright red craft paint for one, Anita’s mustard yellow for the second one, and a mix of some of my blue craft paints for the last one.
Paint the front of each Santa, let them dry, and then paint the backs.

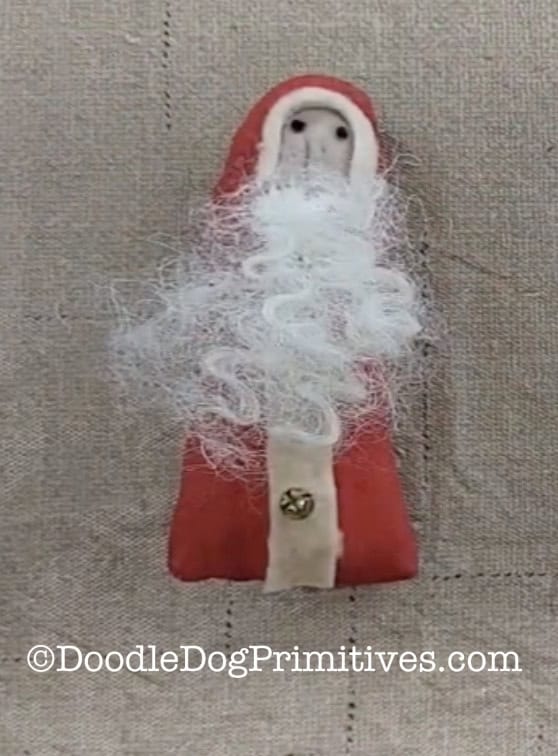
Using some black button thread, make french knots for the eyes. I tied my thread off right under the face because it will be hidden with a beard.
Water down some pink or red paint and paint some rosy cheeks.
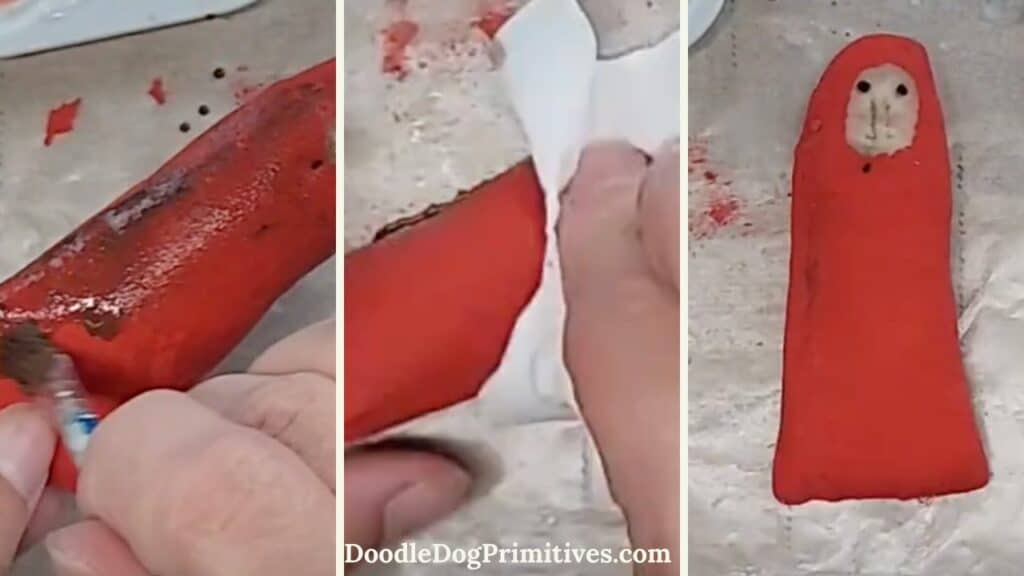
If you are happy with the color of your Santas, skip this step. If you want them to look more ‘aged’, you can apply an antiquing medium to them. I used Folk Art Antiquing Medium – Cocoa Bean. Be sure to test this on a painted piece of fabric first. I had to water mine down a little before applying it to the Santas. I think it has thickened from age. I brushed on the watered down antiquing medium and then dabbed it off with a cloth.
Cut a very thin piece of coffee dyed Warm & Natural quilt batting for a piece of trim around his hat and a wider strip for the front of his coat. Sew three small jingle bells onto the wider strip. Glue these onto the Santas.
Glue on some curly wool doll hair for a beard and a little piece for a mustache.
You might also like our other primitive craft tutorials.
Pin this Primitive Craft Tutorial:
