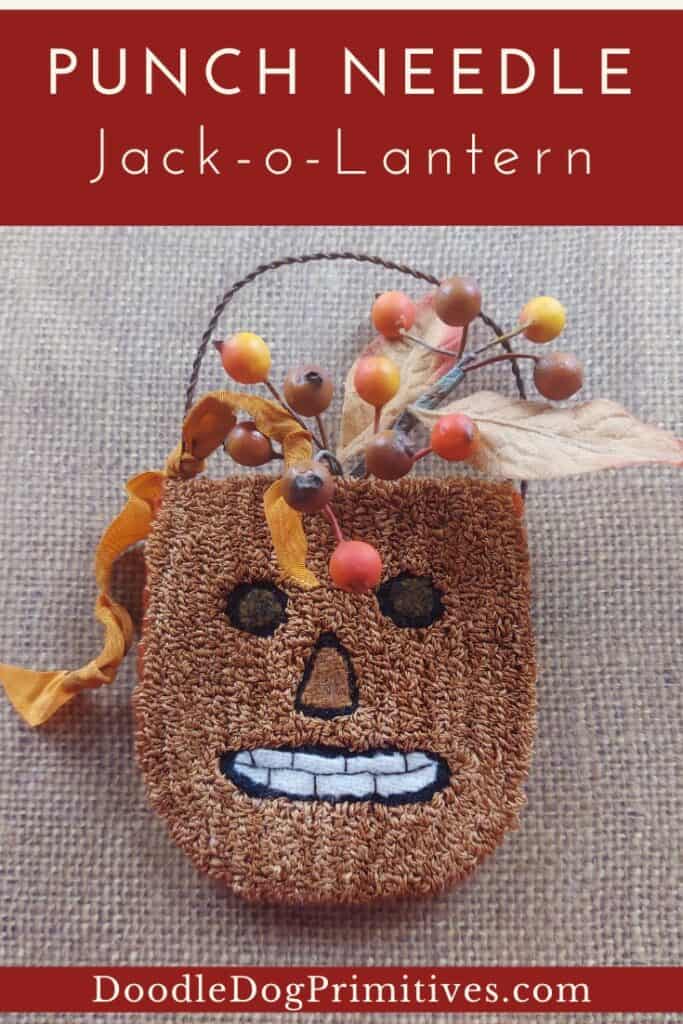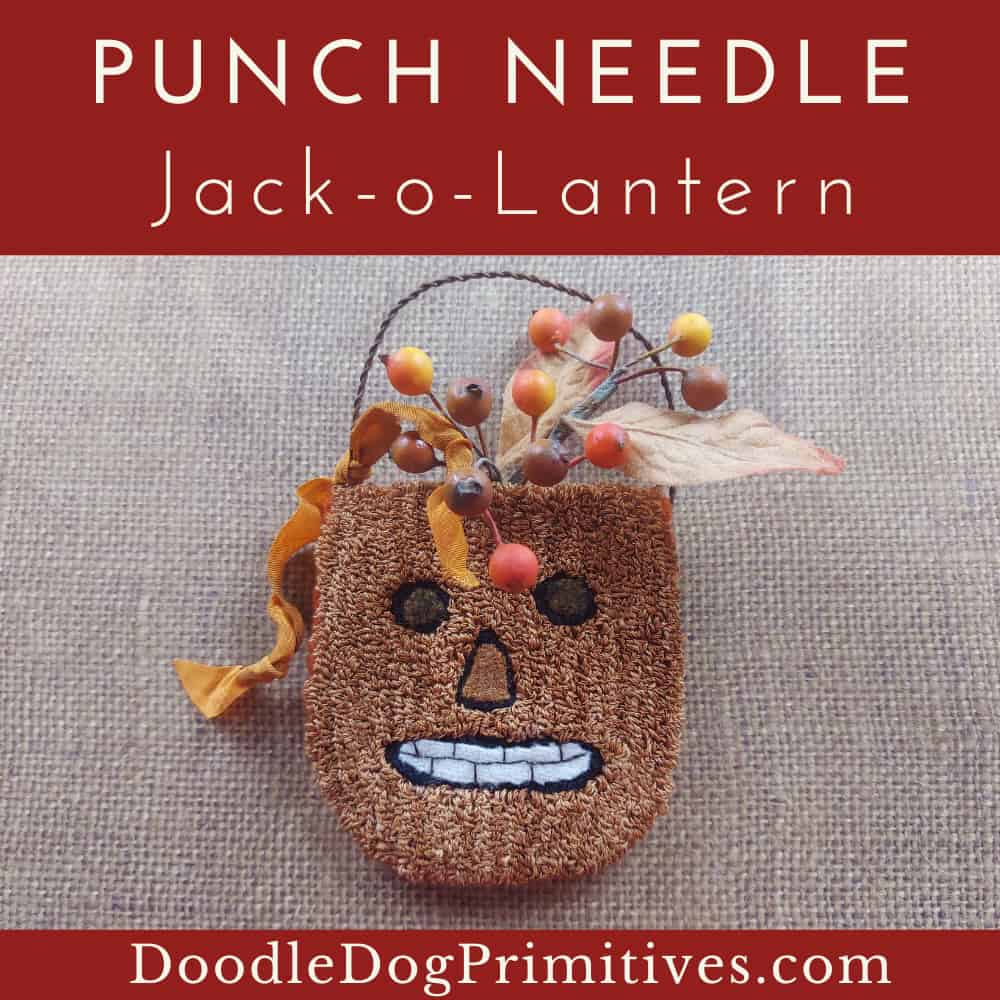
I loved how this fall punch needle project turned out so much that I decided to share it as a free pattern for you! This Jack-o-Lantern pumpkin bag is fun to make with its wool facial features.
Watch the Video Tutorial:
This post may contain affiliate links for your convenience, which means if you make a purchase after clicking a link I will earn a small commission but it won’t cost you a penny more. For more information, please visit our Privacy Policy.
Punching the Pumpkin:
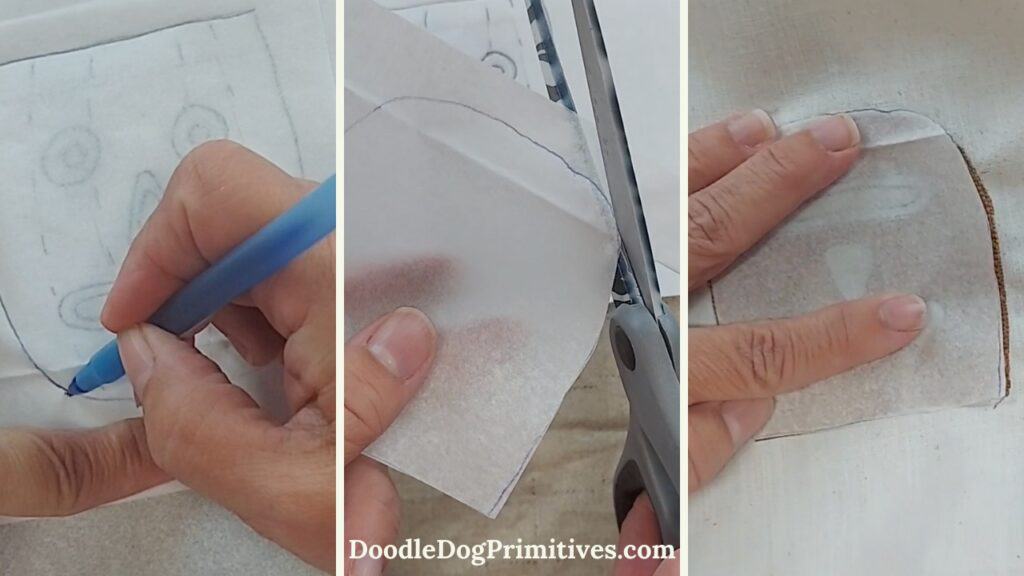
You can draw your own jack-o-lantern pattern or use this free pattern here. If you draw your own, be sure to make the top straight across so you can turn it into a bag later.
Trace the pattern onto weavers cloth. The dashed lines are lines to follow when punching if using a variegated thread. Punch the pumpkin with your desired color, but don’t punch the facial features. I used Valdani O217 (Yummy Pumpkin) 3 strand floss.
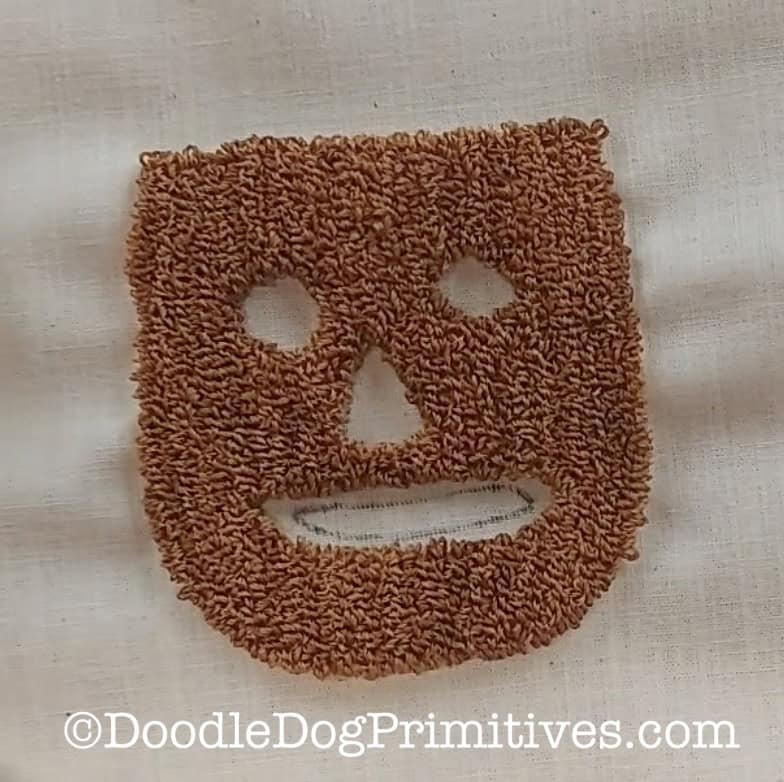
Adding the Jack-o-Lantern Facial Features:
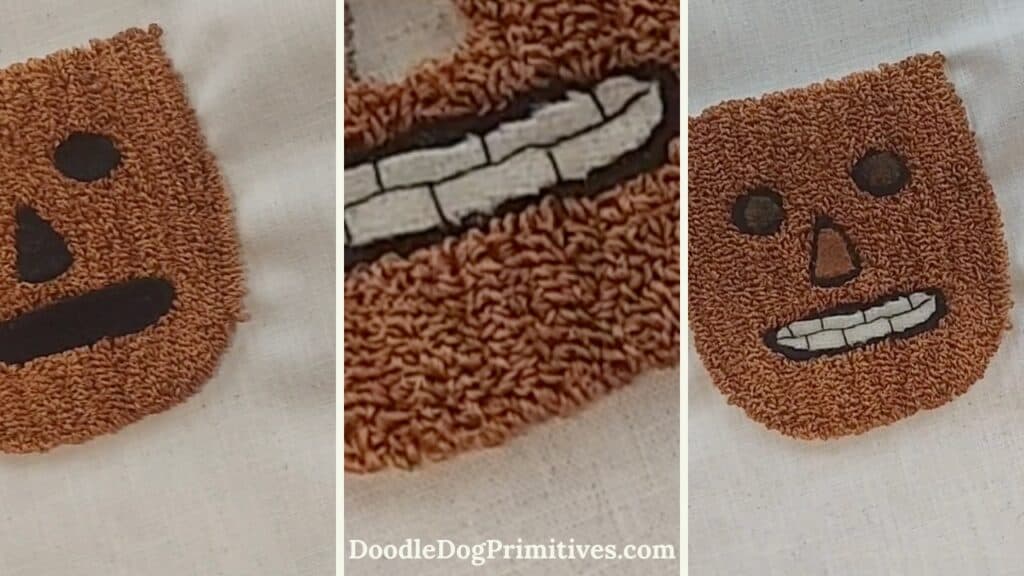
Using the original punching pattern as a template, cut pieces of black felted wool to match the outer facial feature shapes. If you don’t have felted wool, you could use felt. (Because the original pattern is backwards, you will have to cut the pieces and then flip them over to make them fit.)
Then cut the inner facial features from felted wool. I used cream wool for the mouth, a gold plaid for the eyes, and an orange wool for the nose.
Using embroidery floss, stitch through both mouth pieces and sew some ‘teeth’ by sewing a backstitch all the way across the middle of the mouth and then add some stitches perpendicular to that line to make it look like teeth. I used one strand of DMC 3371.
Glue the mouth piece into the mouth hole. Glue the two eye pieces together and the two nose pieces together and glue them into the appropriate holes on the jack-o-lantern.
Making the Pumpkin Ditty Bag:
If you want, you could add a lining to the bag. Instead of lining the bag, I am going to protect the punched inside of the bag by folding over the weavers cloth and fusing it down.
Trace the outline of the punching pattern onto some Wonder Under and cut out the Wonder Under.
Place the paper side up over the top of the back of the punched piece. Follow the Wonder Under directions to fuse it to the punched piece.
Peel the paper backing off the Wonder Under. Fold the empty weavers cloth over the top of the jack-o-lantern. You should be able to see the punched loops showing past the fold. Follow the wonder under instructions to fuse the weavers cloth to the back of the punched piece.
Use scissors to trim back the excess weavers cloth from the back half only.

Trim the front half of the weavers cloth to about 1/4″-3/8″ on the sides and bottom. I used pinking shears.
Use an iron to press the empty weavers cloth to the back.
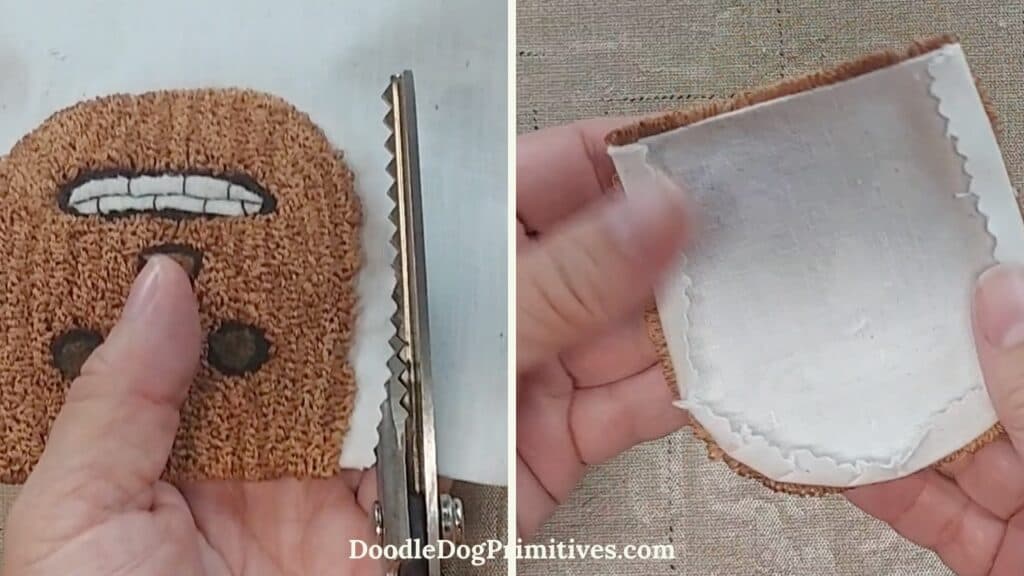
Use the outer punching pattern to cut a piece of felted wool just slightly larger than the punched piece. I chose to use an orange wool.
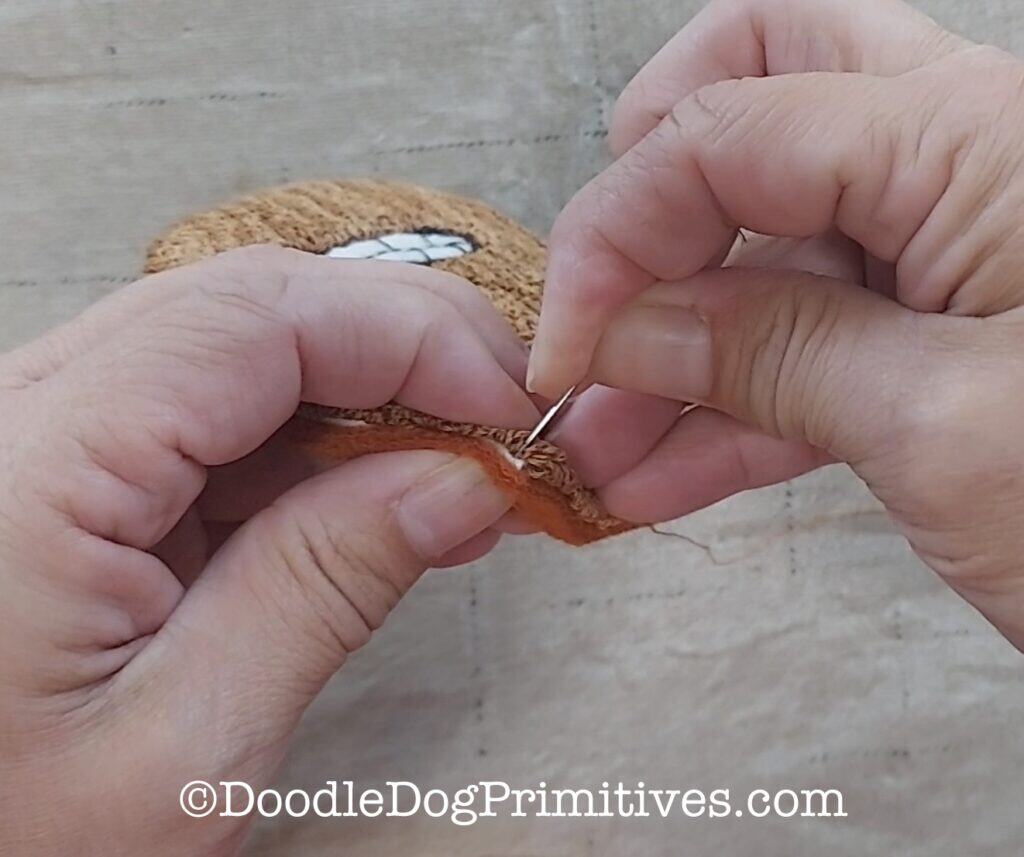
Use a thread that matches your backing. Whipstitch the sides and back of the wool to the punched pumpkin, catching the edge of the felted wool and the folded over edge of the weavers cloth.
Embellish the Pumpkin Bag:
I used 7″ of pre-twisted rusty wire to make a handle and added some orange crinkle ribbon to the handle. Finally, I slid some bittersweet berries into the bag.
Pin this Free Fall Punch Needle Pattern: