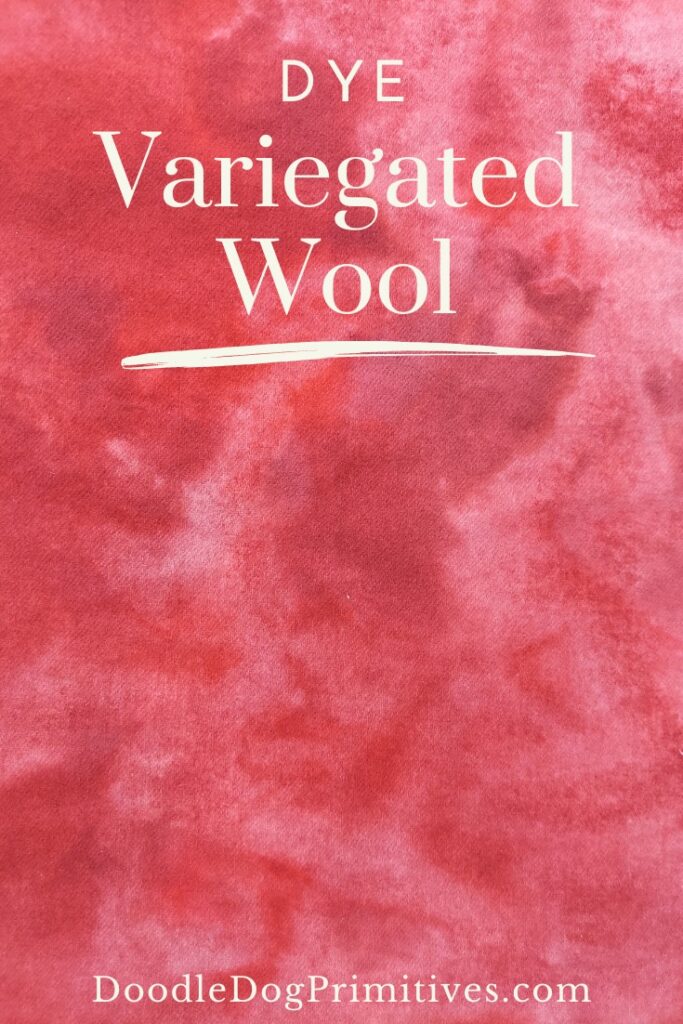
I am getting ready to hook a Santa coat and I want his coat to be hooked with a variegated red with multiple shades of red. I don’t have any wool like that and I have been dying to try dyeing in a restaurant buffet style pan I recently found at my local Amish store. Watch the video or keep reading below to see how I dye variegated wool.
Watch the Video Tutorial:
This post may contain affiliate links for your convenience, which means if you make a purchase after clicking a link I will earn a small commission but it won’t cost you a penny more. For more information, please visit our Privacy Policy.
Preparing to Dye:
Normally, when I dye wool, I use a big stainless steel stock pot and that can work well for creating a mottled looking wool. But for this project, I wanted to try using several different shades of red dyes all on the same wool to give an aged and faded look to Santa’s coat. So, I am going to dye the wool in my flat stainless steel pan.
It is important to keep the ‘cooking’ equipment you use for dyeing separate from your regular cooking tools and only use them for dyeing.
Previously, I felted the wool I will be using in my washing machine and pre-soaked it in water before beginning to dye.

The Dyes:
I chose three different shades of red Cushing’s dyes: Terra Cotta, Mulberry, and Scarlet. I also used a little bit of Black Walnut dye to tone it down a little bit.
Each dye packet is made to dye about one pound of wool. I am dyeing less than a pound and using three different shades of dye so I will not be using the entire packets of dye.
To prepare the dyes, I am going to measure out 1/4 teaspoon of one of the reds and dissolve it in some boiling water in one of my small dye pots. After the dye is dissolved, I am going to pour each dye into a separate glass jar I salvaged from our recycle bin.
Not wanting to mix the dyes, I washed the dye pot and utensils before repeating the process with the other two shades of red dye.
Dye the Variegated Wool:
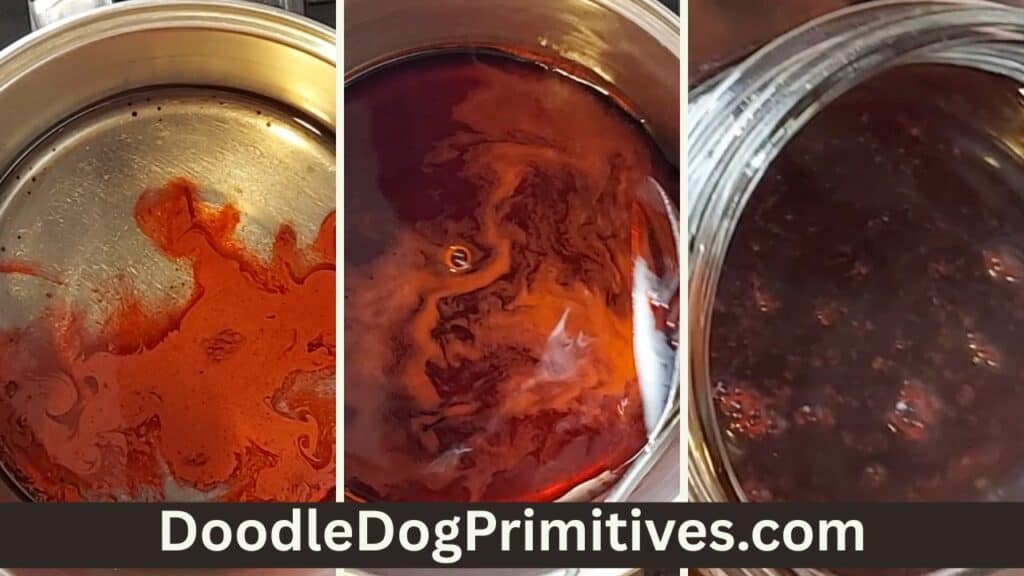
My stove has a middle oblong burner, so I will use that burner for this dye project. I could also have used both the front and back burners at the same time since the pan covers both burners.
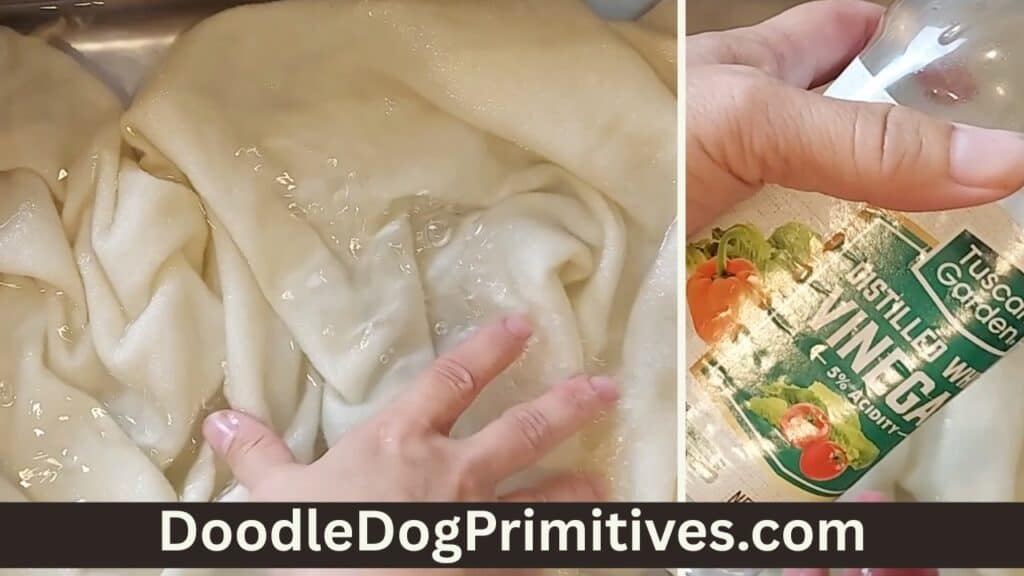
I put the pre-soaked wool in the pan and covered it with water. Then I poured some white vinegar into the pan (probably about 1/3 cup) and mixed it into the water. Adding the vinegar first will cause the dye to attach to the wool right where you pour it.
I turned on the heat and let it heat until there was a little bit of steam rising from the water.
The scarlet dye was then poured into the pan covering part of the wool but not all.

I then poured the terra cota dye in places onto the wool.
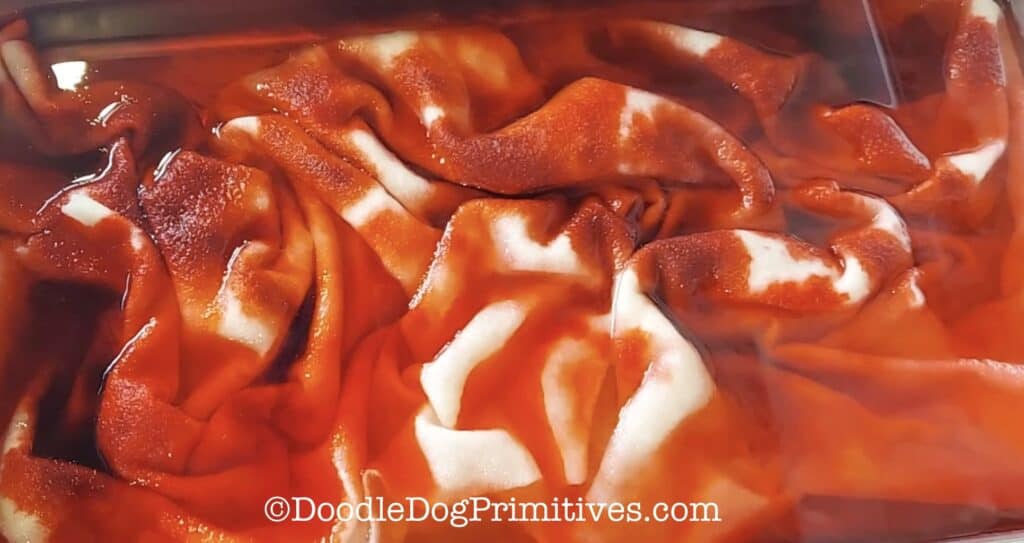
Finally, I poured the mulberry dye in random places onto the wool, trying to cover all of the remaining white spots. There were some places the wool was above the water so I used my dye spoon to push those places into the water without stirring.

The dye bath simmered for about 30 minutes. At the end of 30 minutes, the water was mostly clear so I turned off the heat and let it cool.
I removed the wool from the dye bath, rinsed the wool until the water ran clear, and hung the wool to dry.
Results and a Second Dye Bath:
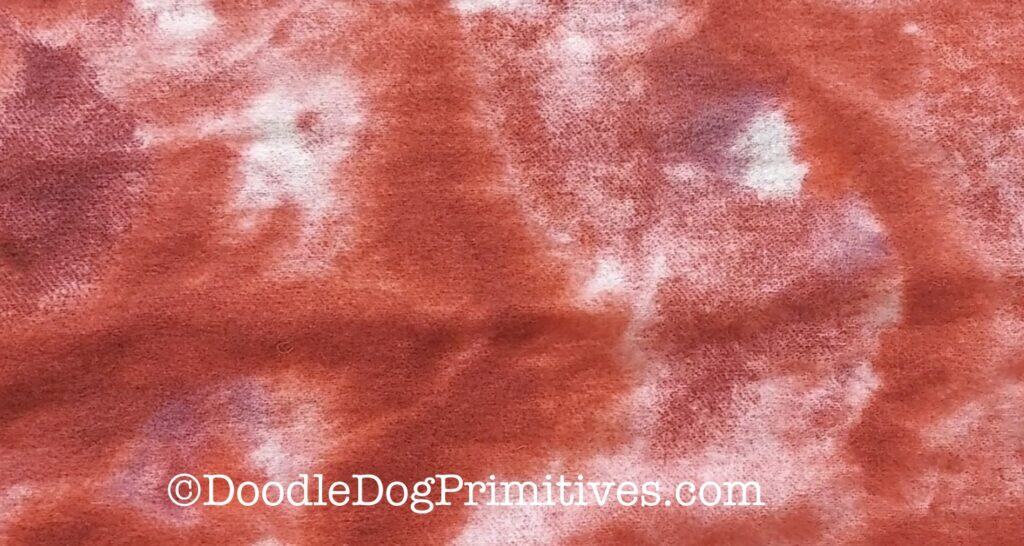
Here’s how it looked after drying. It definitely has a mottled look, but there is too much white still for my project. I am wondering if those were spots on the bottom where the dye didn’t reach.
I am not one to just give up, so I took it back to the dye pot. Not only is there too much white, it is a little bit too bright for my project so I am going to try adding some black walnut dye.
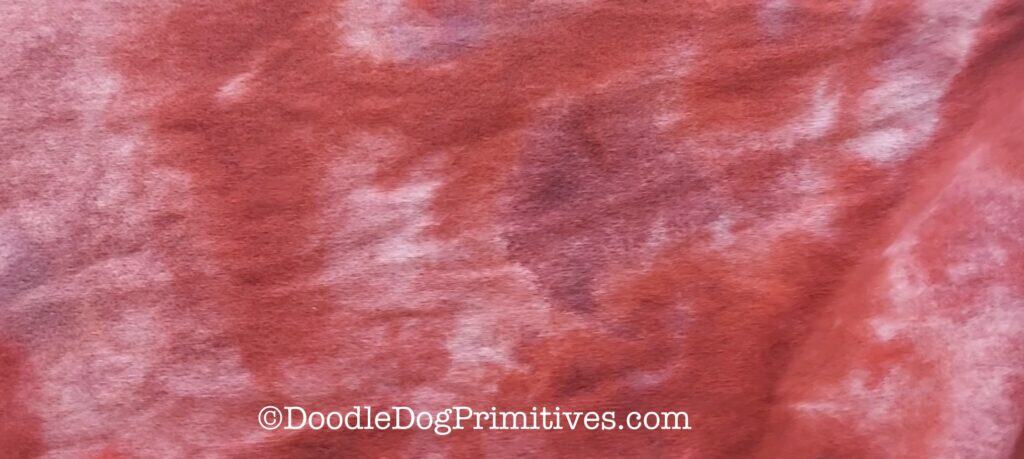
I measured 1/32 teaspoon of the black walnut dye, dissolved it, and added the variegated red wool (which I pre-soaked in water). This time, I dyed in my big stock pot as I normally dye fabric.
Here’s the variegated wool. I think it is going to work perfect for my Santa project!
Pin this Wool Dye Post: