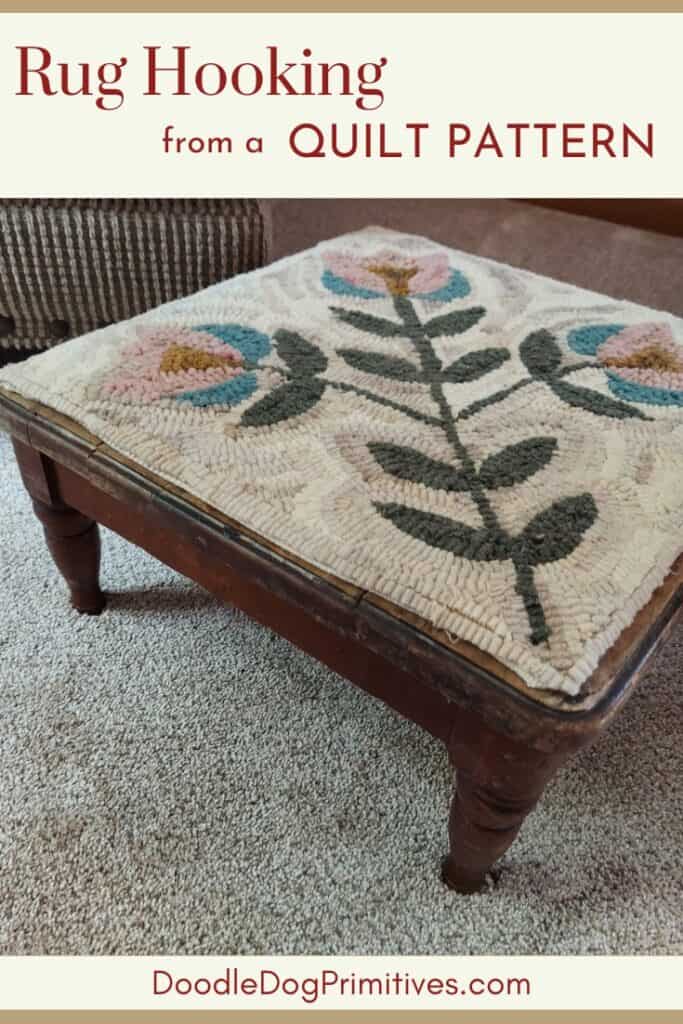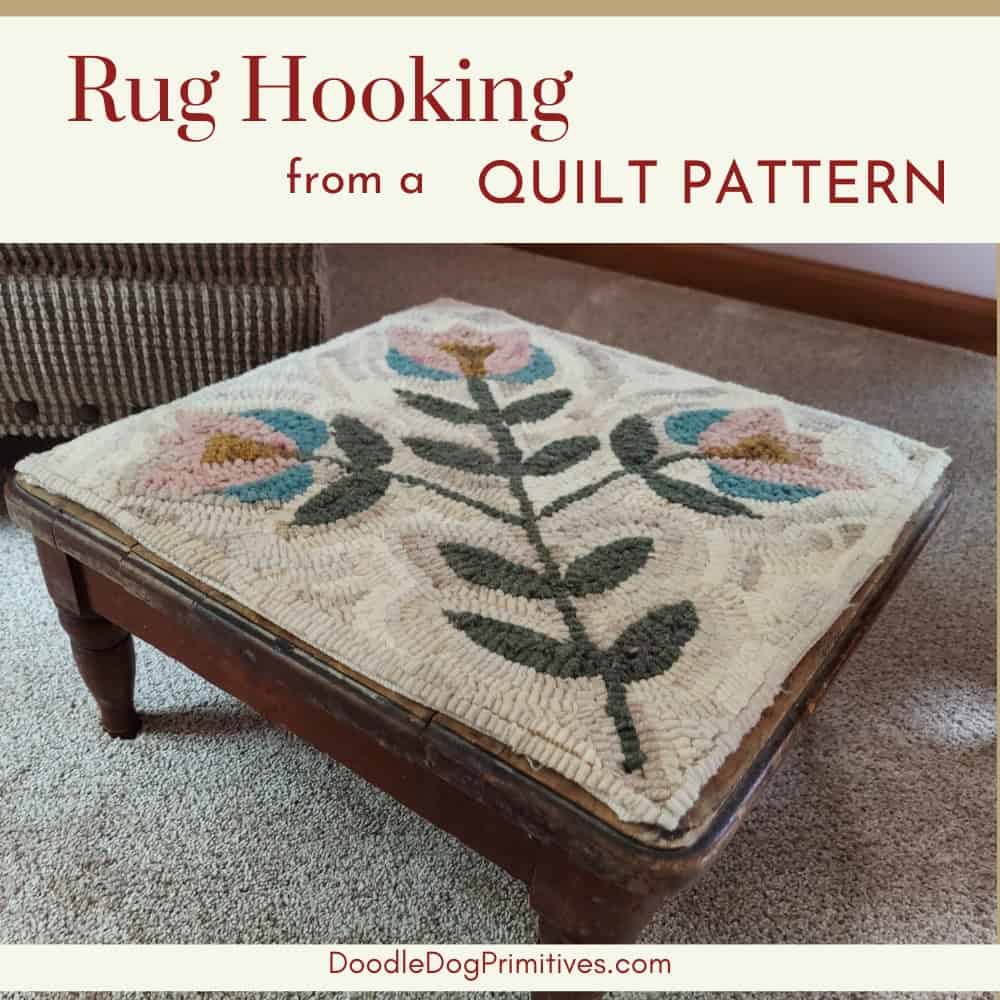
I was gifted a vintage footstool from a friend. It was in pretty rough condition, but I love the legs on it. In this post, I will show you how I fixed the stool and made a rug hooking top from a quilt pattern.
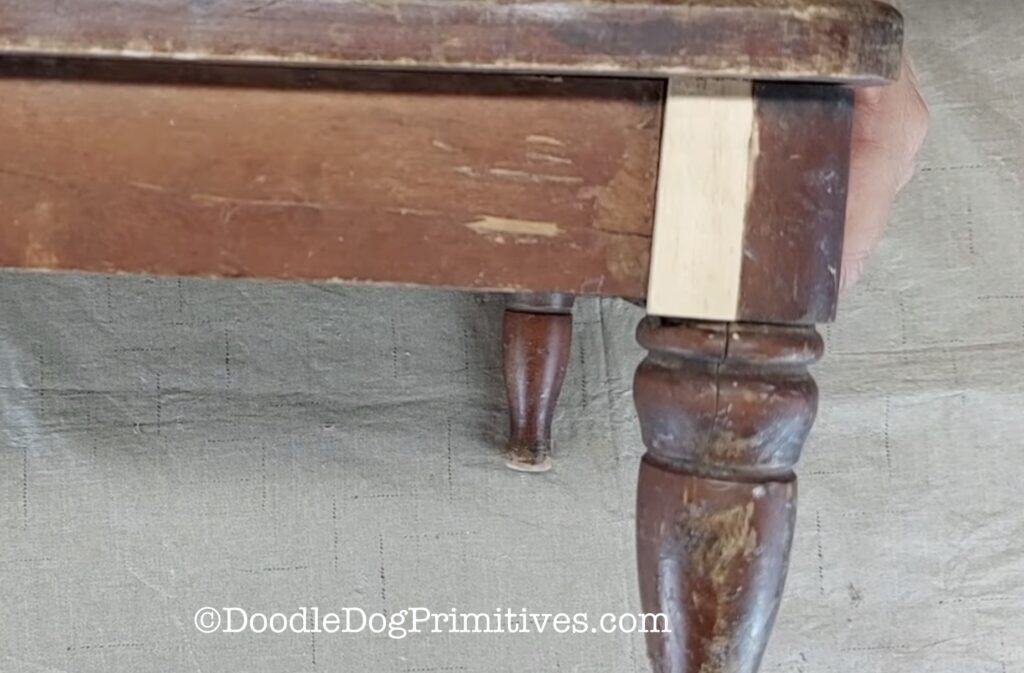
The stool had a small piece chipped off so we glued on a new piece of wood and stained it. The rest of the stool I left as is because I like a primitive look!
Watch the Tutorial Video:
This post may contain affiliate links for your convenience, which means if you make a purchase after clicking a link I will earn a small commission but it won’t cost you a penny more. For more information, please visit our Privacy Policy.
The Quilt Pattern:
I found a quilt pattern I liked in “Garden Club” by Blackbird Designs and I am going to use that to make a hooked rug top for the stool.
The top of the stool measures a little more than 14″ square so I am going to make my hooked rug pattern 14″ square.

The book has a finished diagram of the quilt. I took that image and resized it to be 14″ square.
The Hooked Rug:
Instead of using red dot to transfer the pattern to my foundation fabric, I used my light box to transfer the pattern.
After hooking the design in colors to match my guest bedroom, I steam pressed the rug, pressed the edges to the back, and basted the edges to the back side of the hooked rug project.
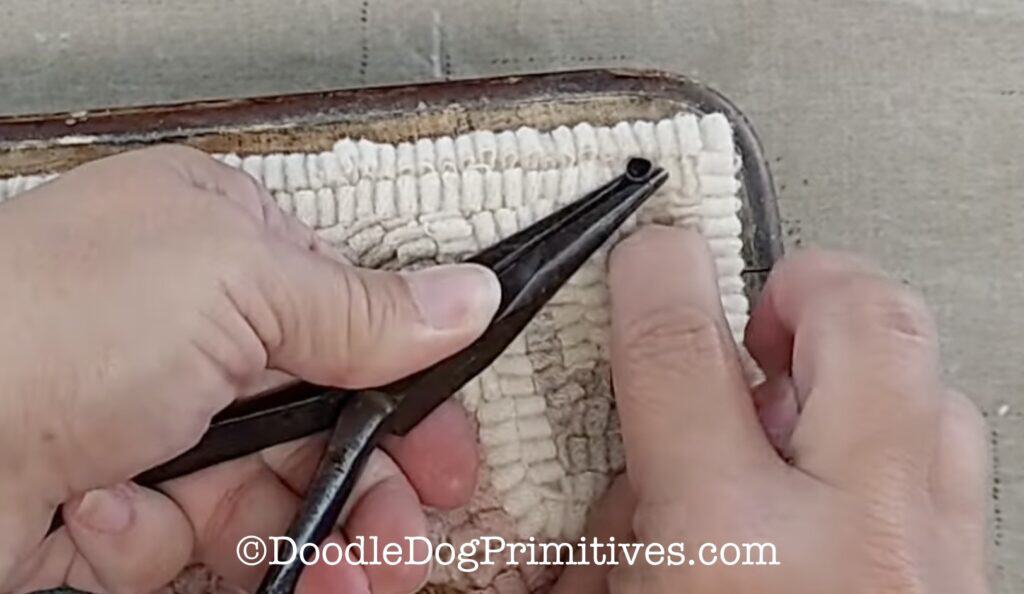
I used carpet tacks to tack the hooked rug onto the stool, being careful to keep the tacks between the loops of wool. I used four tacks – one on each corner. After hammering down the tacks, I rearranged the wool to cover the tacks.

You might also enjoy our other rug hooking tutorials.
Be sure to Pin this Rug Hooking Inspiration: