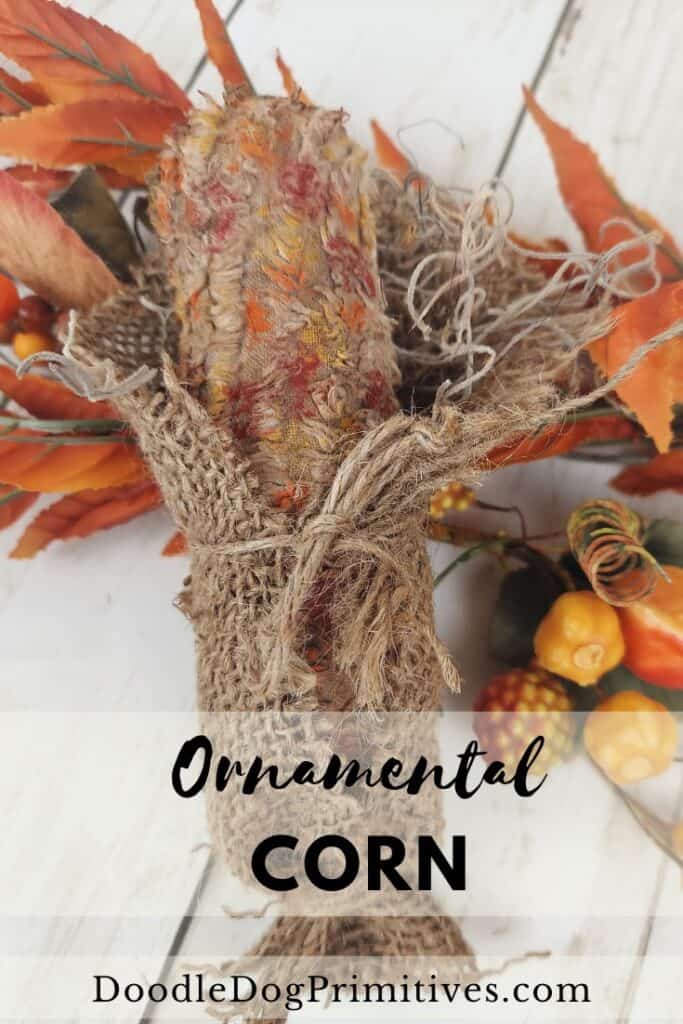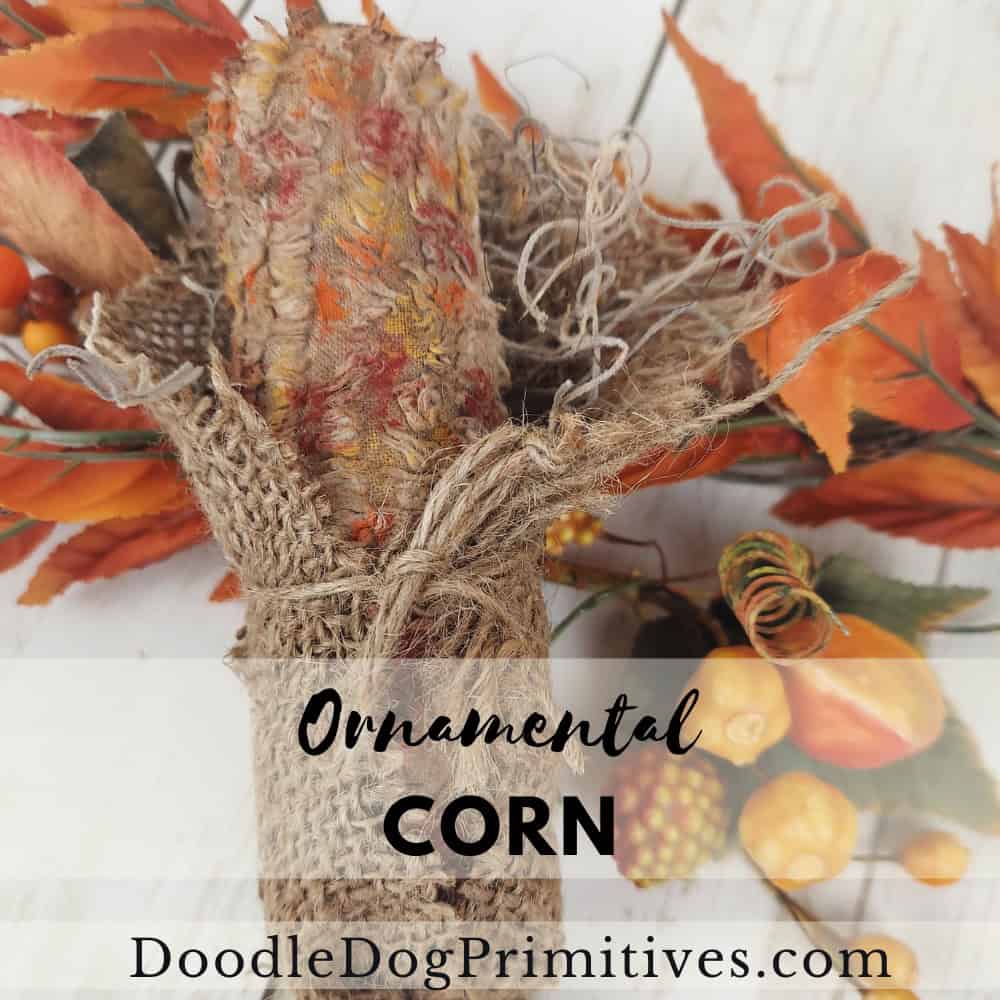
In previous years, I have made some hooked rug and punch needle ornamental corn. This year, I thought it would be fun to make some ornamental corn out of a vintage chenille cutter quilt. It didn’t quite turn out like I wanted initially, but I kept modifying it until it looked nice and primitive.
Watch the Craft Video:
This post may contain affiliate links for your convenience, which means if you make a purchase after clicking a link I will earn a small commission but it won’t cost you a penny more. For more information, please visit our Privacy Policy.
Make the Ornamental Corn:
For this project, I used part of an old chenille bedspread. If you don’t have access to an old bedspread, they do make new chenille fabric that would probably work in a similar fashion, but I haven’t tried it.
Before I started, I coffee dyed a piece to use for the ornamental corn. For a pattern, I used this free rug hooking ornamental corn pattern but I shrunk it to 60% of its original size when I printed it. If you prefer to make your own pattern, it is just a rectangle with the corners on one side curved.
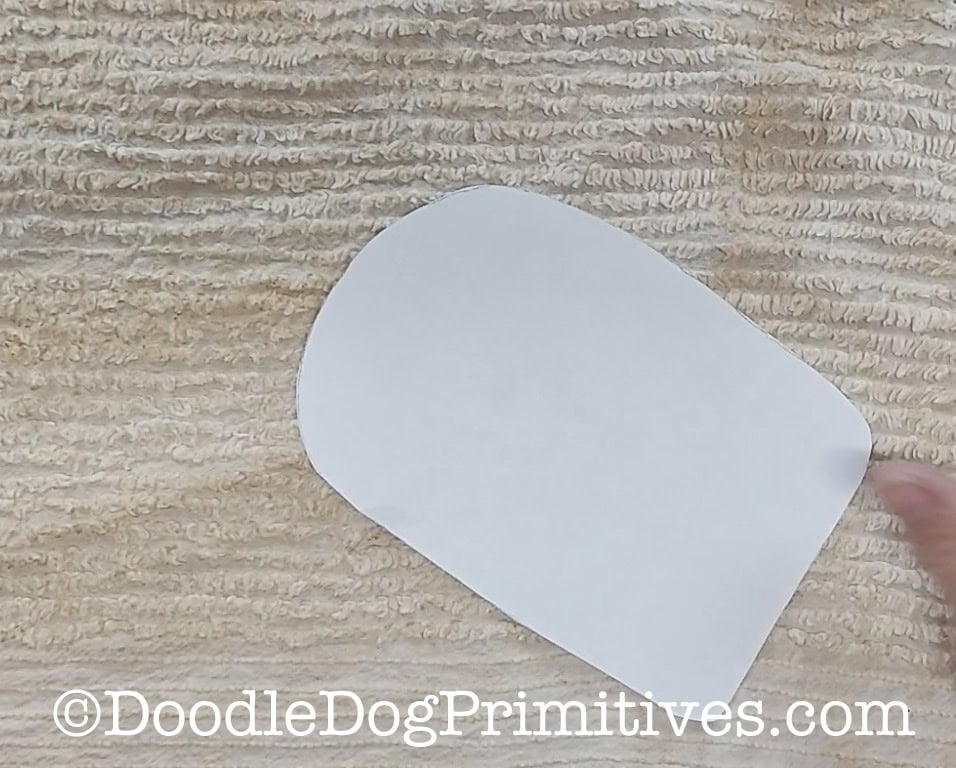
Place the pattern on the fabric with the long side going the same way as the lines of bumps and cut out one piece for each ear of corn you want to make.
Fold it in half lengthwise with the right sides together and cut a curve on the folded side to match the other side.

Fold again in half lengthwise, pin, and sew with a quarter inch seam allowance along the long side and the curved end, leaving the other end open for turning. Turn right side out.
Stuff the ear of corn. Use a needle and thread to run a gathering stitch about 1/2″ from the open end of the ear of corn. Tuck the ends in as you gather the thread to close the end. Tie off the thread.
Make the Corn Husk:
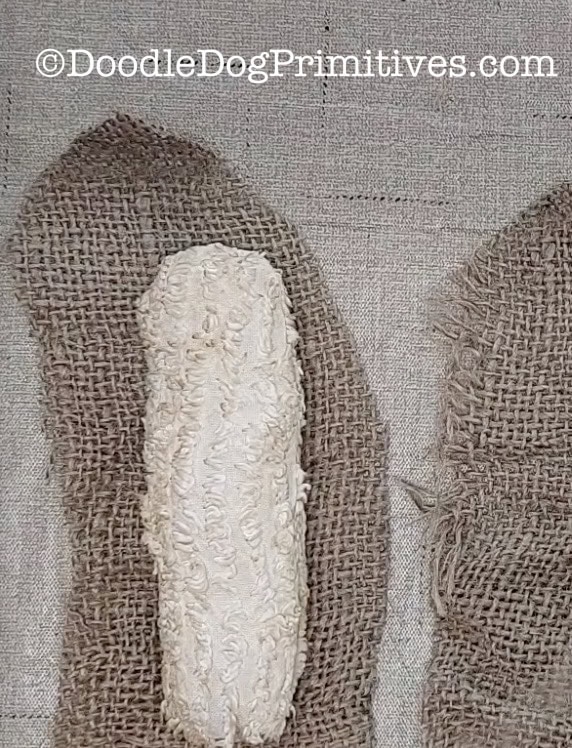
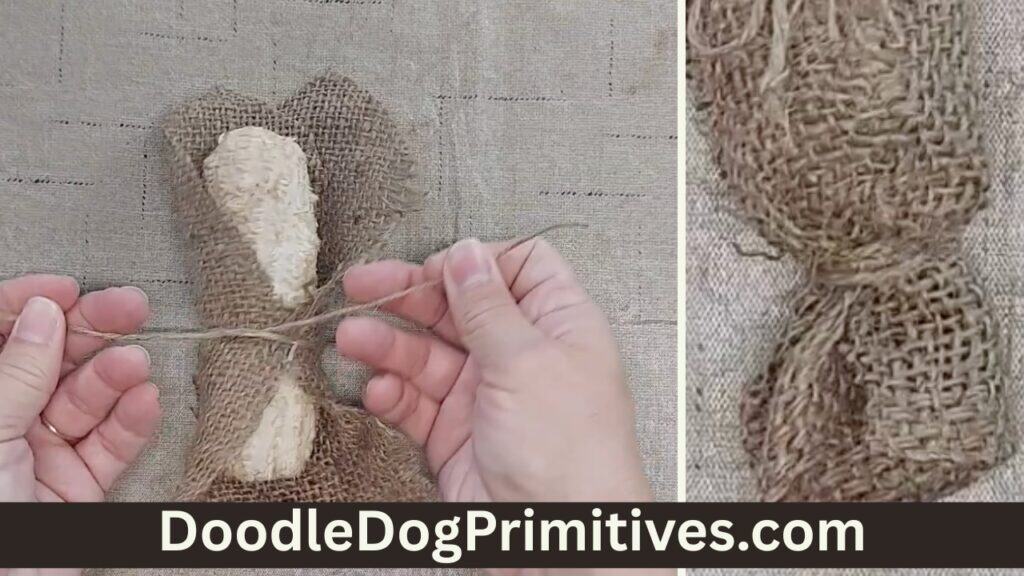
I chose to use burlap for the corn husks on this ornamental corn. Cut two pieces of burlap a little bit wider than the corn and a couple of inches taller. Cut angles on one end of each corn husk.
Overlap the two pieces of burlap on a long side. Place the corn in the middle and wrap the burlap around the corn. Tie it in place in the middle using a piece of jute.
Use a piece of jute to wrap around the bottom several times right beneath the ear of corn. Tie off the jute.
You can add some spanish moss around the top to resemble the corn silk.
Add Some Color to the Corn:
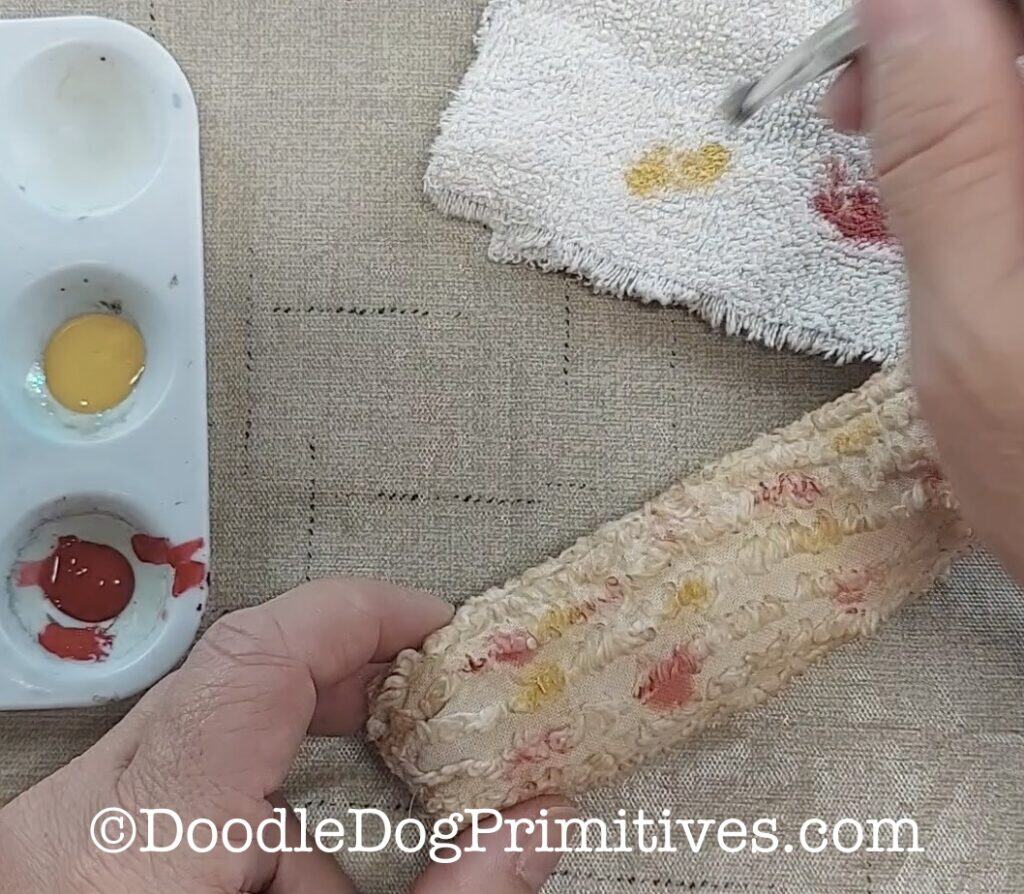
At this point, it could have been finished, but I thought it looked very blah so I took the corn back out of the husk and got out my craft paints.
I chose red, orange, and gold paints and a stiff bristle brush. I dipped the brush into the paint, then dabbed it onto a rag and then painted spots on the corn with each color.
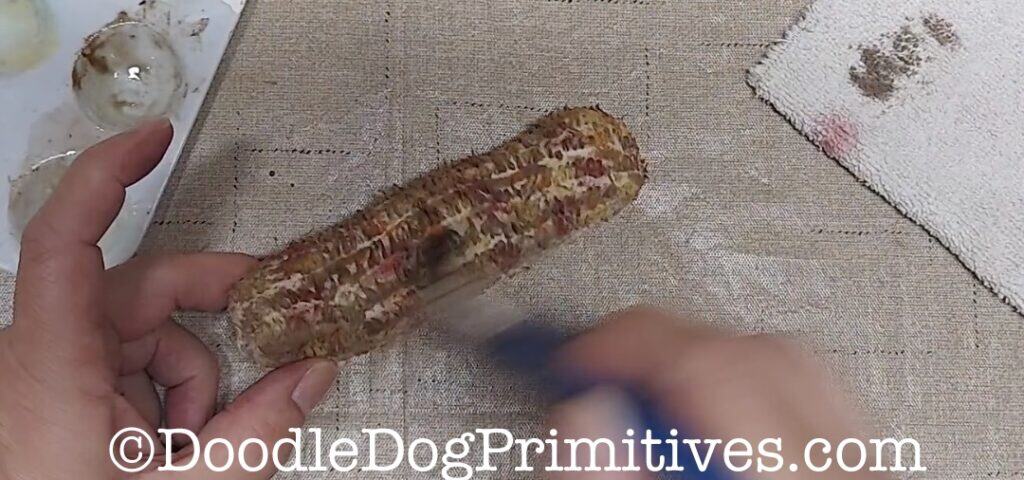
I then took some folk art home decor wax (which is a water based product) and watered it down. Any antiquing medium would probably work here.
I used a big fluffy brush (that I dabbed onto the rag first) to brush this mixture over the top of the corn.
After it was dry, I reassembled the corn with the husk and silk.
Pin this Fall Craft Tutorial: