I found these foam clip pumpkins in the fall decor at my local Dollar Tree store. I loved the size and shape of the pumpkins, I just didn’t love the plastic stem and color. I knew they would be perfect for a primitive fall bowl filler after a little pumpkin makeover!
Watch the Pumpkin Makeover Video:
This post may contain affiliate links for your convenience, which means if you make a purchase after clicking a link I will earn a small commission but it won’t cost you a penny more. For more information, please visit our Privacy Policy.
Prepping the Foam Pumpkins:
The pumpkin clips came with three in one package. They each have a metal clip on the bottom, perhaps to clip onto a Halloween tree or other decor. There was a little bit of a hot glue like substance holding them down as well as a piece of metal to hold them into place. I was able to slip the clips right off the pumpkins.
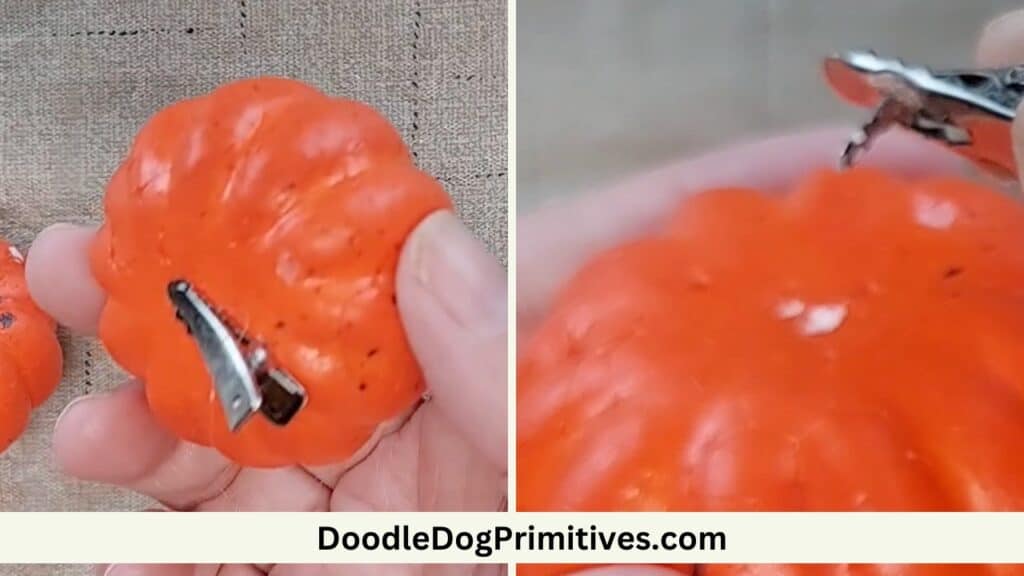
The pumpkin stems are plastic and they also pulled out of the foam pumpkin easily.
Painting the Pumpkins:
I am going to use crackle medium to give the pumpkins a rustic, aged look. I want one of the finished pumpkins to be cream and the other two to be orange.
With the crackle medium, you put a base coat of the color you want to show through the cracks, then the crackle medium, and finally the top color.
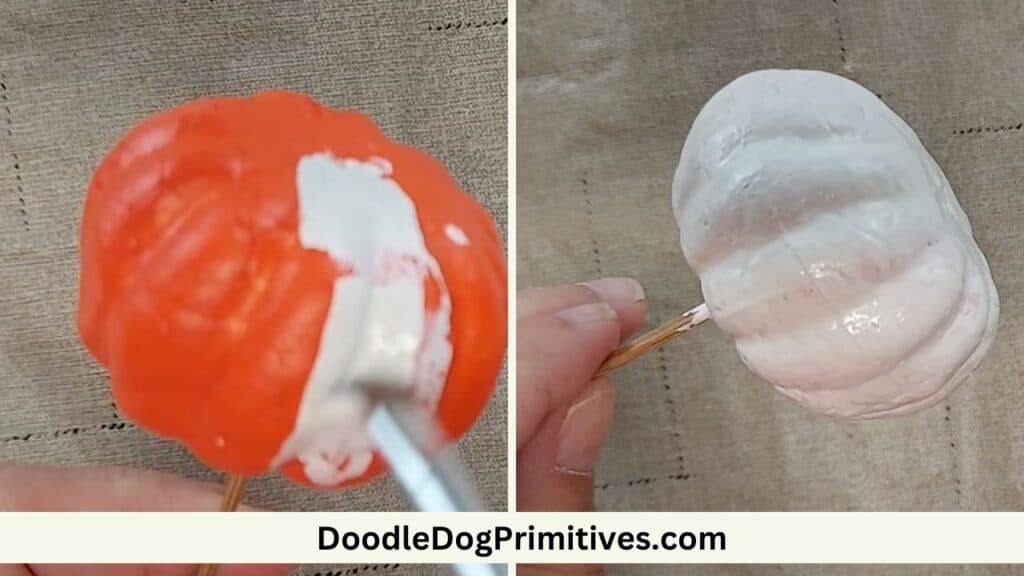
Paint the Base Coat:
So, my base coats of two need to be cream and one orange. I will just leave one pumpkin as is for the base coat since it is already orange and paint the other two with a base coat of cream. I used Folk Art Vintage White craft paint.
To make painting easier, I poked a wooden skewer into the stem hole. This allows me to hold onto the skewer while painting.
Allow the base coat of paint to dry.
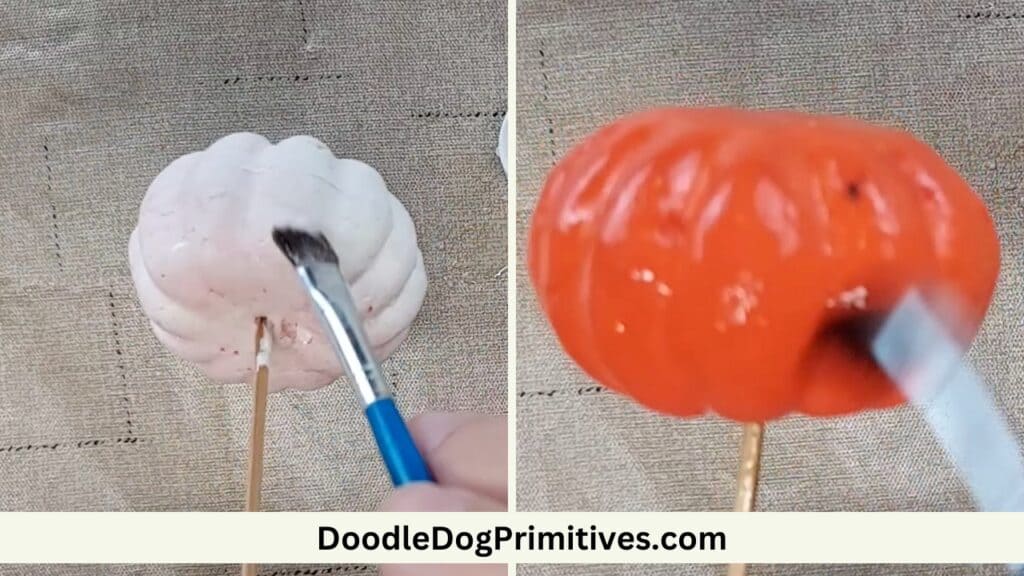
Paint the Crackle Medium:
The crackle medium is a clear liquid that you paint onto the surface where you want the cracks to appear. I painted the crackle medium all over all three pumpkins.
Allow the crackle medium to dry.
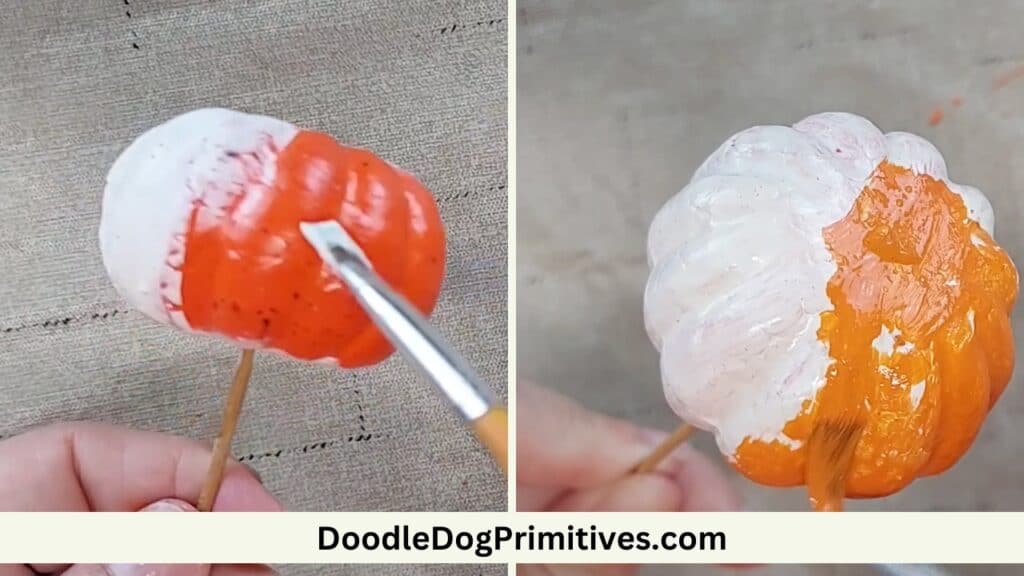
Paint the Top Coat:
Next, paint the top coat. For the top coat on the orange pumpkin I used Folk Art pure orange. For the top coat on the cream pumpkin, I used Folk Art vintage white.
The paint starts to crackle right away as soon as it starts to dry.
Let top coat of paint completely dry.
Grunge the Pumpkins:
If you are happy with the way they look, you can stop here. If you want to give them an extra dose of primitive grunge, you can give them a coat of antiquing wax.
I watered down some Folk Art antique wax with about half water and half wax. Then I brushed the mixture onto the pumpkins and immediately rubbed it back off gently with a soft rag.
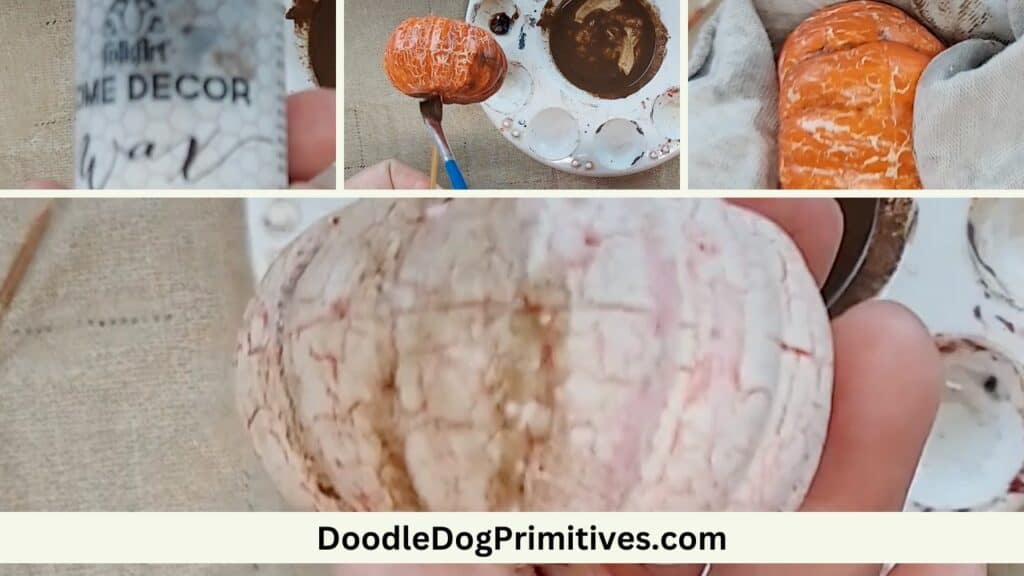
Let the wax completely dry.
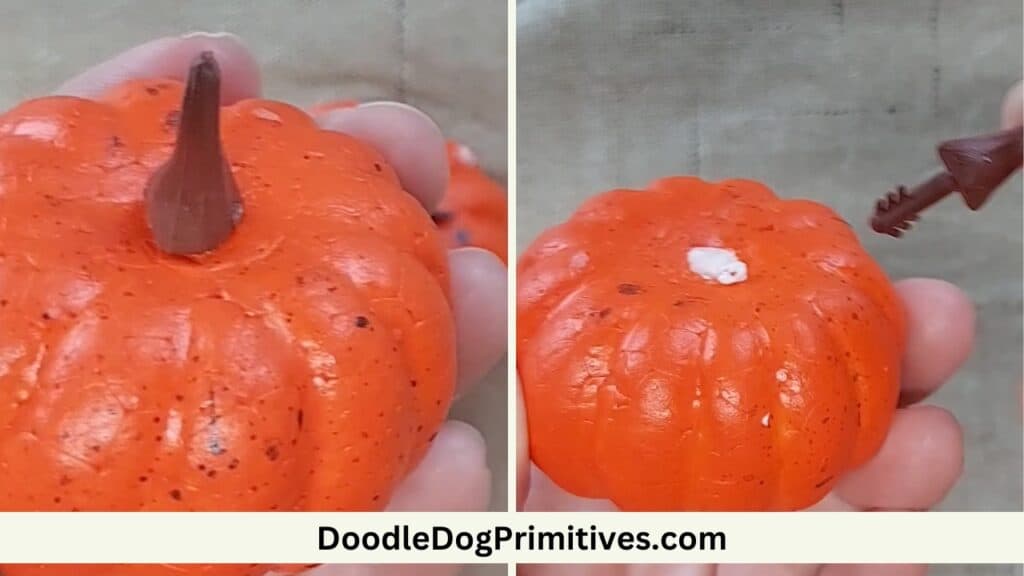
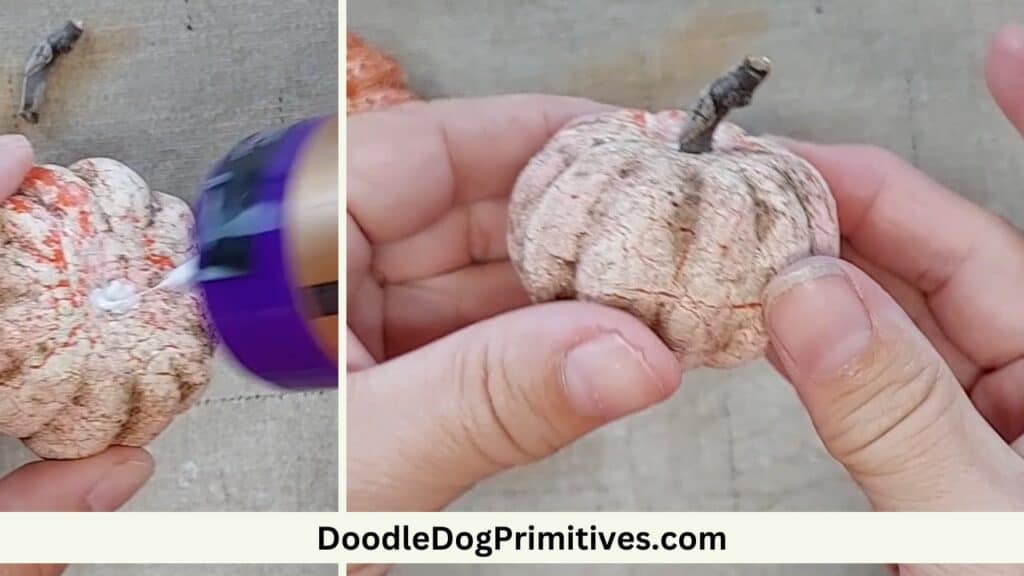
Pumpkin Stems:
I looked around in the yard for some fallen twigs to use for the pumpkin stems. I tried to find some that have some interest to them – not just straight.
I cut these and glued them into the stem hole with craft glue.
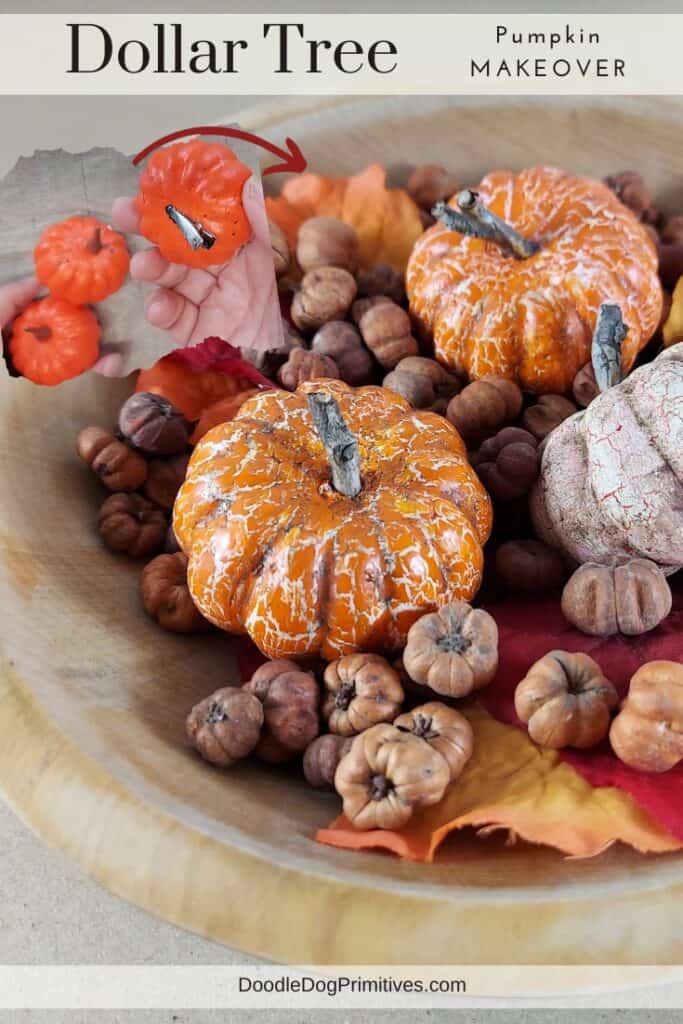
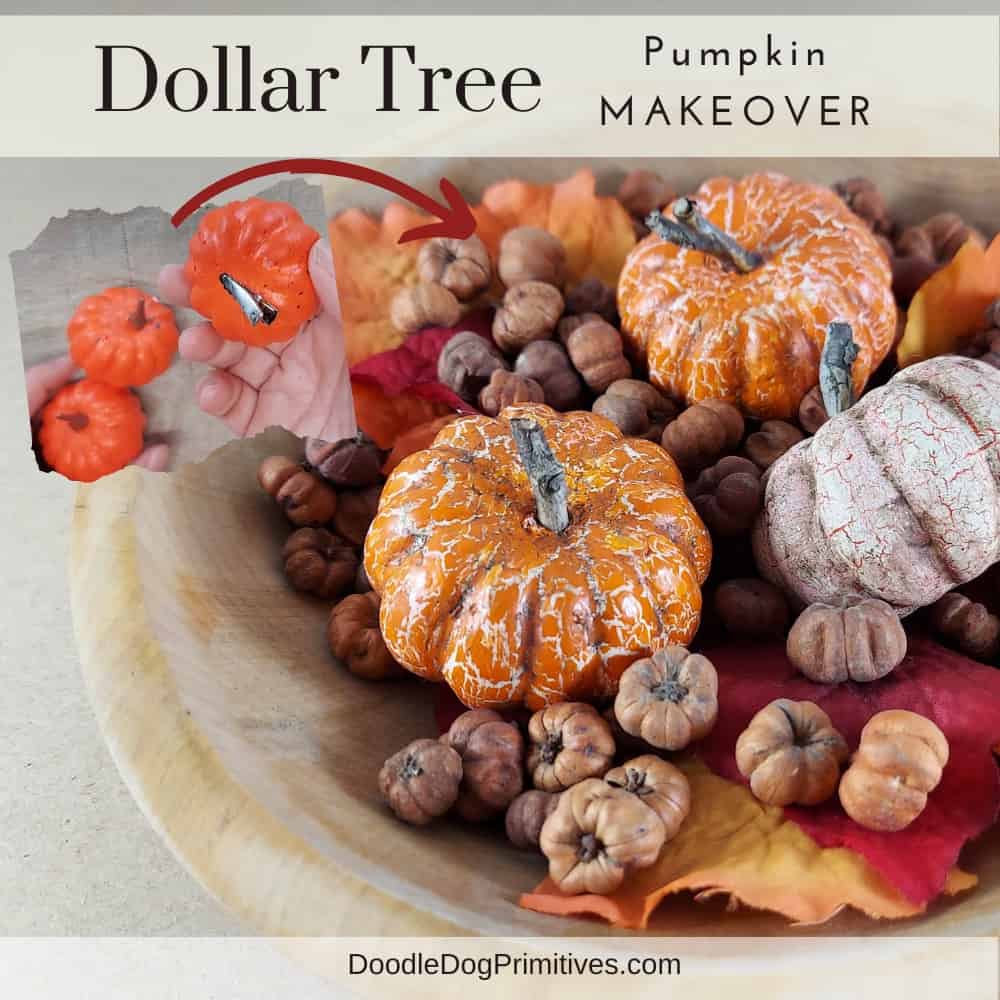
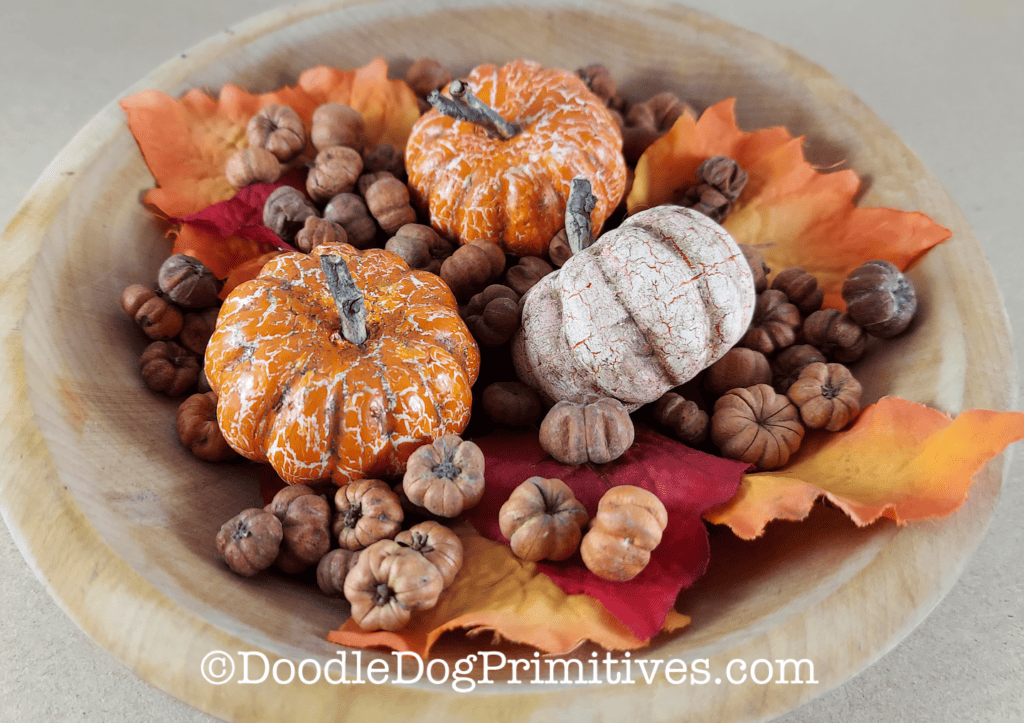
Results of Dollar Tree Pumpkin Makeover:
I added the primitive pumpkin to a small treenware bowl along with some fall leaves and putka pods.
I hope you enjoyed this Dollar Tree pumpkin makeover. Be sure to check out our other primitive craft tutorials.
Pin this Primitive Pumpkin Makeover: