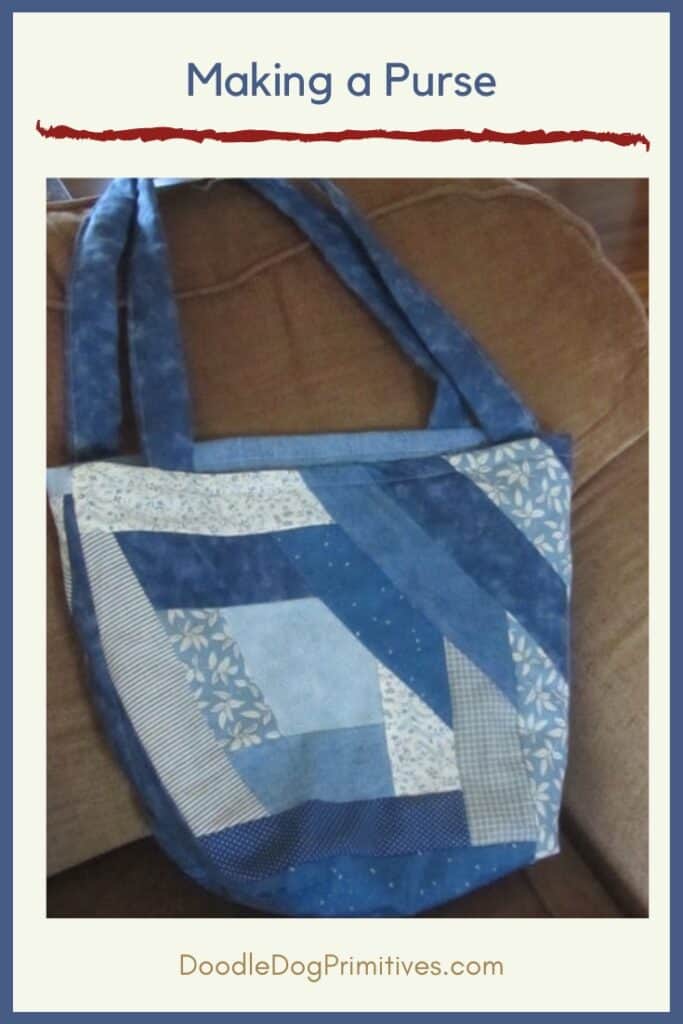
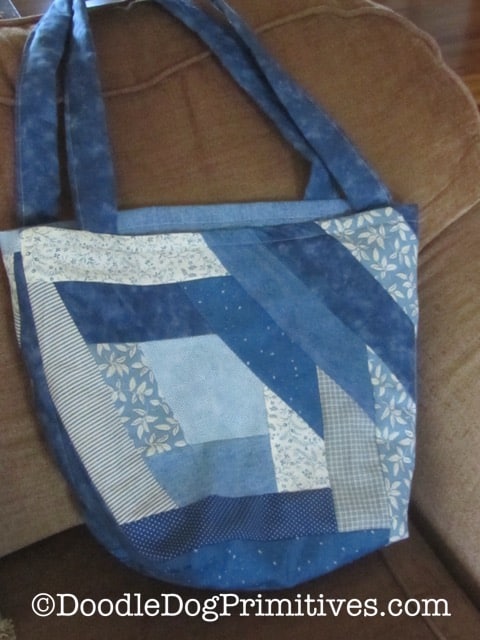
Over the weekend, I worked on making myself a new purse.
I started with this purse pattern

intending to make the top left bag, but without the ruffle.
I chose to make it in blues and some denim scraps I had.
I ended up (sort of) following the directions
to sew the crazy quilt front and back
and then doing my own thing after that.
Here’s how I made the bag.
This post may contain affiliate links for your convenience, which means if you make a purchase after clicking a link I will earn a small commission but it won’t cost you a penny more. For more information, please visit our Privacy Policy.
Making the Crazy Quilt front and back:
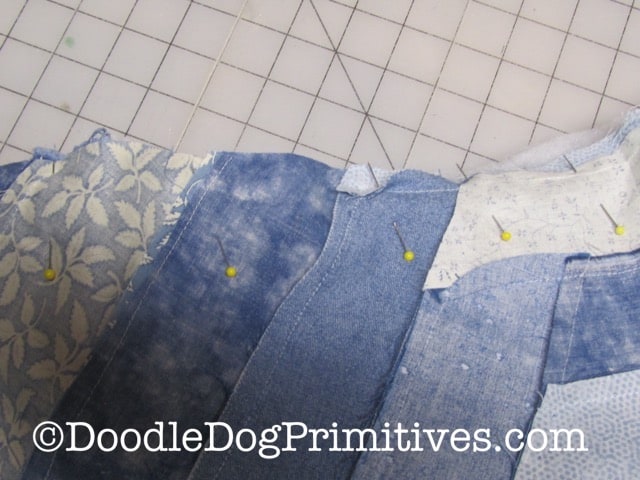
After the crazy quilt pieces got big enough
I was able to cut them down to the right size
for the front and back pieces
and cut out notches in the bottom for the bottom of the bag.
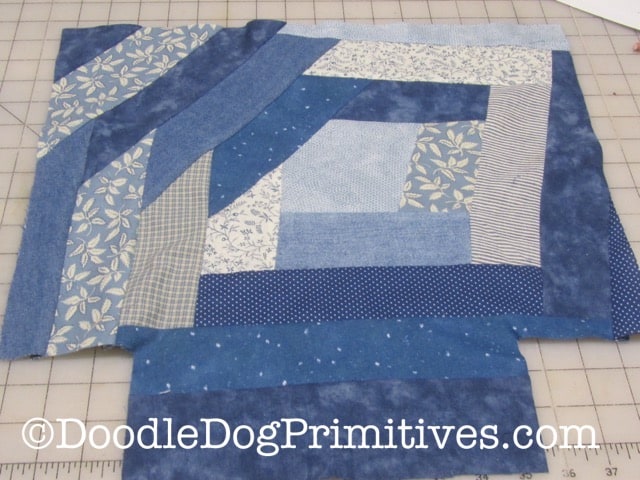
Cutting the notches makes an easy way
to have a definite “bottom” to the bag.
Making the lining:
I cut two lining pieces out of denim the same sized and shape
as the front and back.
I also cut two pieces of batting the same size and shape.
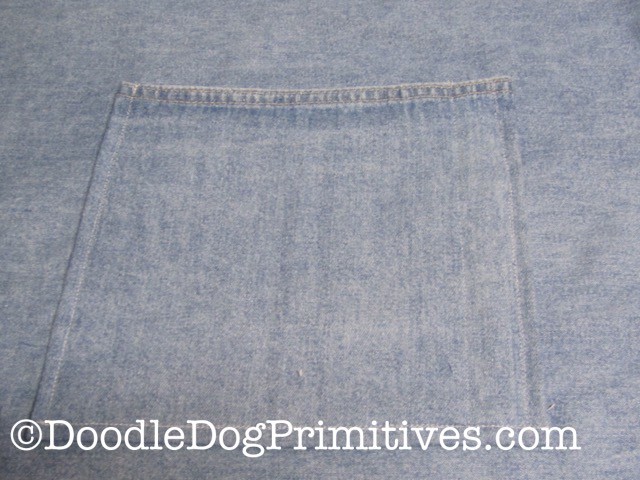
Then, I added some pockets to the lining.
I was using an old soft denim skirt for the lining
and I had enough for one pocket that still had the original hem.
I cut a rectangle piece of the denim and hemmed the other three sides
that didn’t have the original hem.
Then, I sewed it onto the right side of one of the lining pieces
sewing along the bottom and side edges.
I made the pocket big enough for my phone
and sewed an additional line to make another pocket big enough for a pen.
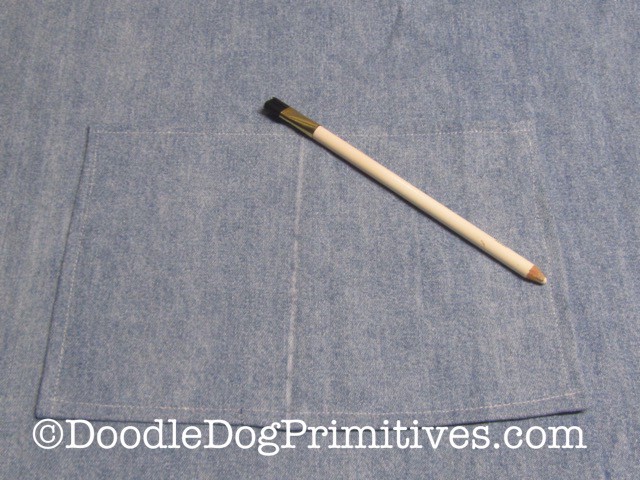
I decided to add two equal sized pockets on the other side of the bag.
I cut another rectangle out of denim and sewed a hem on all four sides.
Then, I drew a line down the middle
so I would know where to sew to make it into two pockets.
I also added velcro on the lining and pocket
to help keep stuff inside these pockets.
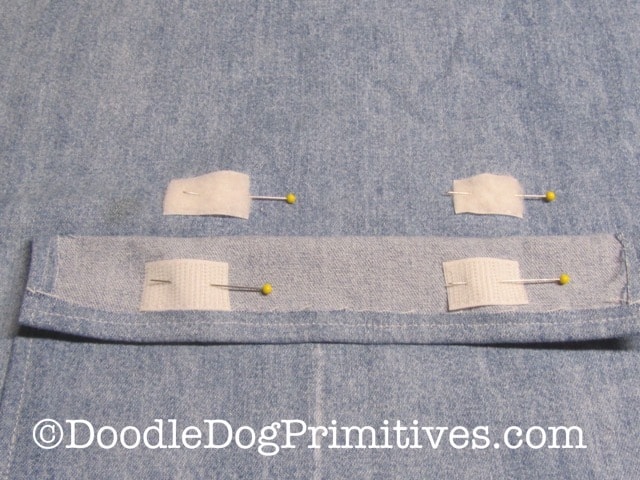
Then, I sewed along the sides and bottom of the pocket
and along the line I drew.
Sewing a purse handle:
For me, there is a fine line between purse handles that are too long
and ones that are too short.
So, I measured the handles of a purse
I have that I like the length of the handles.
I added one inch to that length so I would have enough length
to place the handles in the seam.
I cut two handles in that length (30 inches) with a width of 4 inches.
I pressed under 3/8 inch on both of the long sides
and then pressed the handles in half lengthwise.
I then cut batting to fit inside the pocket this created.
I pinned the handle wrong sides together,
with the pressed under edges even
and sewed up along that side.
I just realized it would probably look more professional
if I had sewn along both edges.
But, I am done now…and not taking it apart!
I made two of these handles.
Sewing a Purse:
I layered the two outer purse pieces right sides together.
I sewed along the bottom and two sides,
leaving a hole for turning on one of the sides.
I didn’t sew along the notched areas!
I pressed the seams.
Then, I took the open, notched areas and lined up the seam from the side
with the seam from the bottom.
I pinned the two edges, right sides together, and sewed a seam.
This creates the “bottom” of the bag.

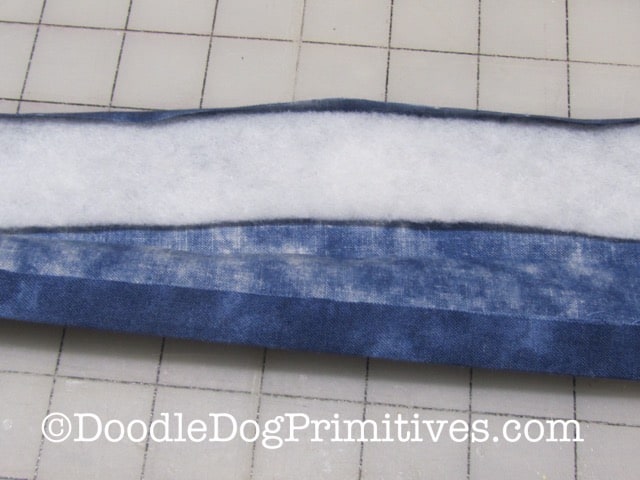
Then, I layered a batting piece,
a lining piece – right side up,
then a lining piece – right side down,
and then another batting piece.
So, the two lining pieces were right sides together,
sandwiched between the two batting pieces.
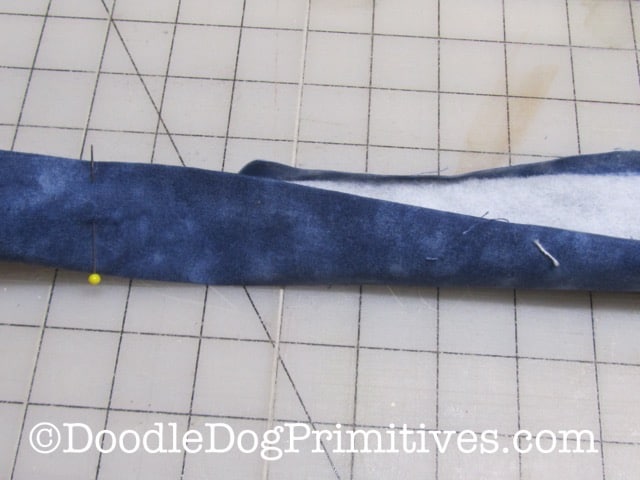
I sewed along the bottom and two sides,
leaving a hole for turning on one of the sides.
I didn’t sew along the notched areas!
I pressed the seams.
Then, I took the open, notched areas and lined up the seam from the side
with the seam from the bottom.
I pinned the two edges, right sides together, and sewed a seam.
Finishing the Purse:
To finish it all up, I put the bag inside the lining, right sides together
pinning the top of the bag to the top of the lining.
I inserted the handles in between the lining and the bag,
also lining up the raw edge of the handles with the raw edge of the bag.
I put one handle on each side of the bag.
I made sure the handle wasn’t twisted inside there
and was evenly placed on both sides.
I placed my handles two inches from the seam on each side.
Then, I sewed the top seam of the bag.
I turned the bag through the hole I had left in the side of the lining.
I pressed the top seam and sewed up the hole in the lining.
I also stitched all the way around along the top of the bag.
It took me quite a while to get the crazy quilting done,
but once that was done, it didn’t take very long at all to sew up the purse.
Be sure to check our how I made a ruffled tea towel.
Blessings~
Amy
Pin this Purse for later: