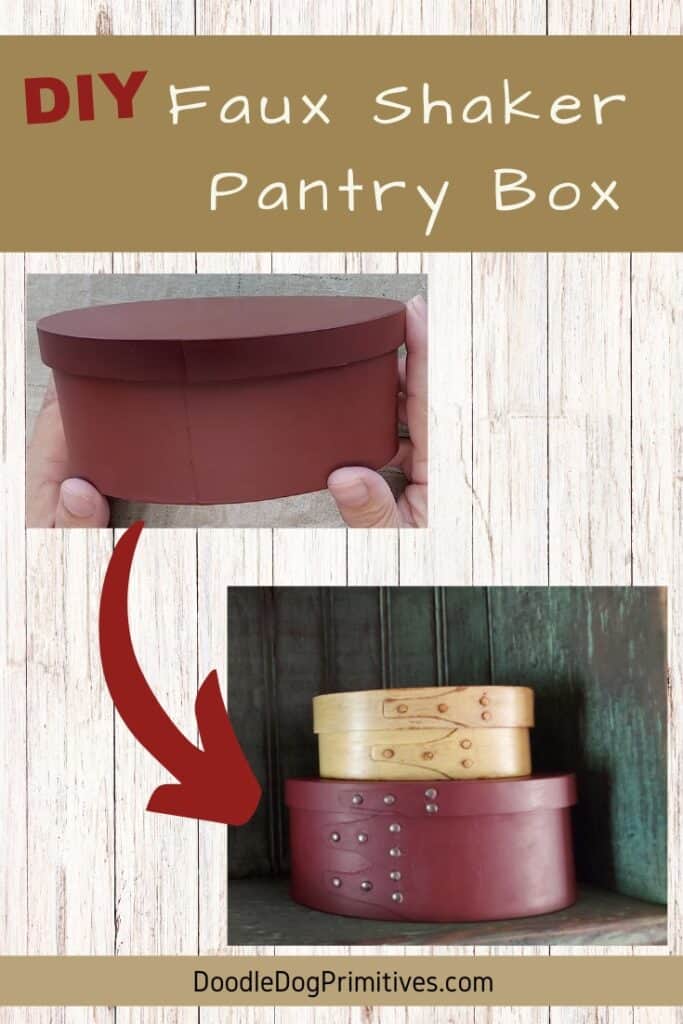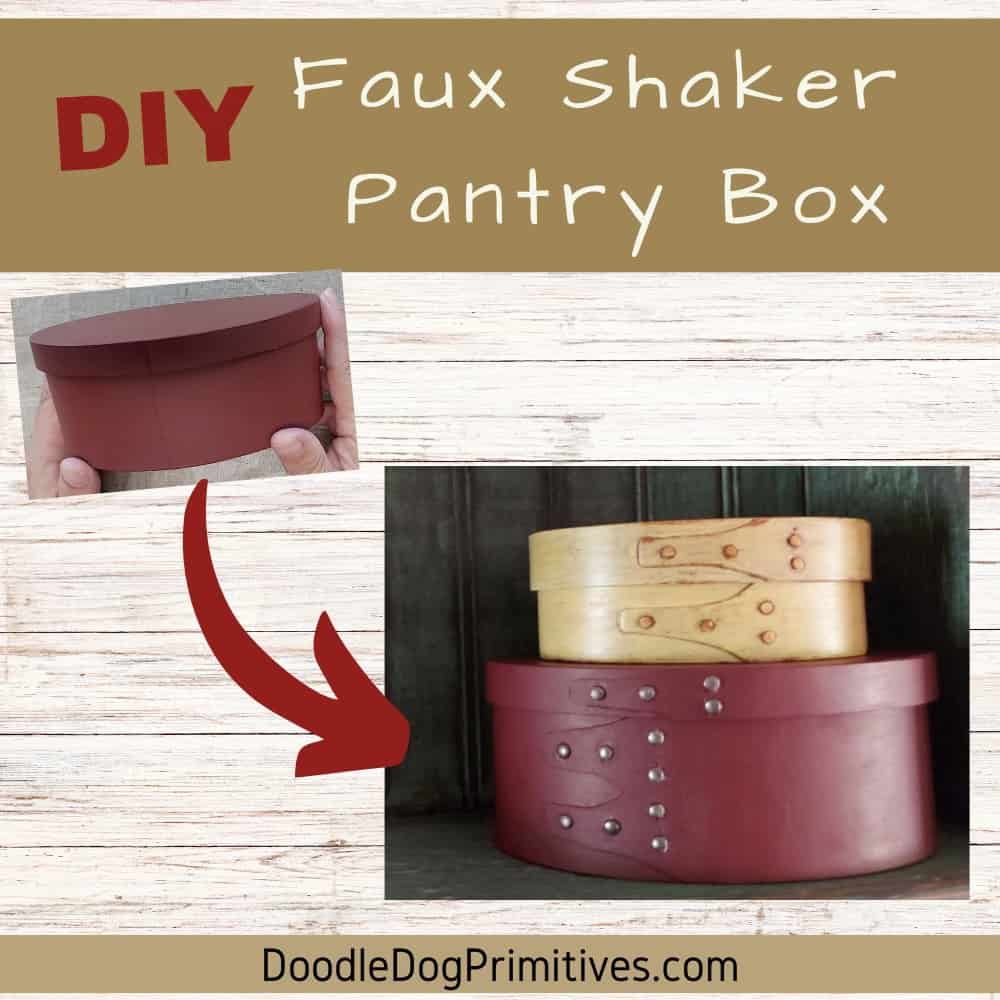
I love to decorate with primitive and colonial style items. Unfortunately, these items are not very plentiful in my area and what I do find tends to be quite pricey. So I like to find ways to get the same look as the antiques without having to break the bank. In this post, I will show you how I took a plain wooden box and made it look like a shaker style pantry box. This is an easy DIY project that is fun to make!
Watch the Video:
Choosing a Pantry Box:
This project requires a thin wooden box. It could be either round or oval shaped. The box needs to be made out of thin wood – about the thickness of cereal box cardboard. I have found some that are made of thicker wood but I will need to come up with a different project for those!
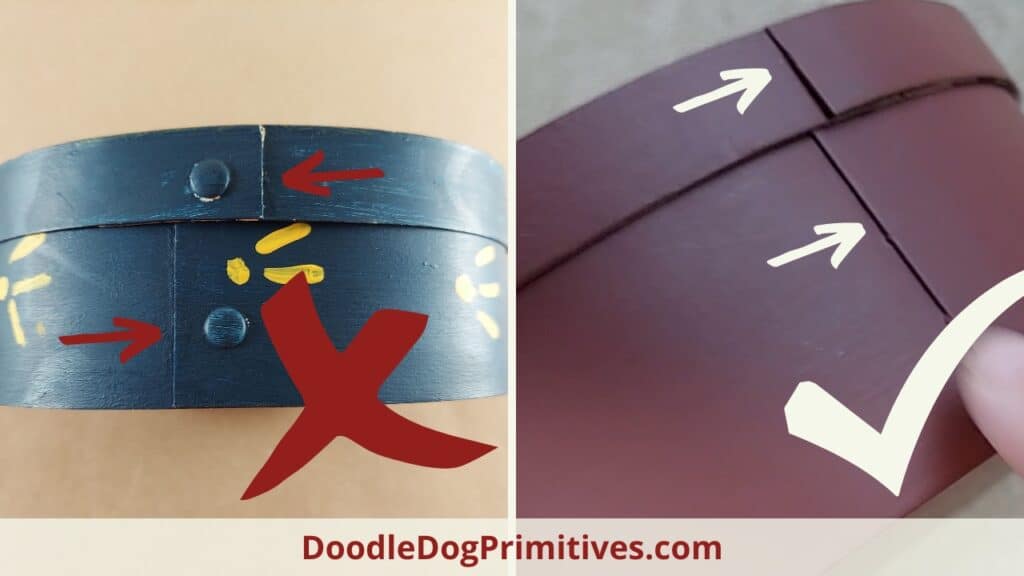
The box also needs to have a lip on both the box and the lid.
They don’t have to line up directly, but it is important for the lips on both the base of the box and the lid to be facing the same direction for this project. Otherwise you would end up with fingers going in both directions because the fingers will come off of the lips on the lid and box.
These boxes are usually inexpensive and can frequently be found in thrift stores or antique shops. Sometimes they are painted in awful colors, but that’s ok. They are easy to repaint.
This post may contain affiliate links for your convenience, which means if you make a purchase after clicking a link I will earn a small commission but it won’t cost you a penny more. For more information, please visit our Privacy Policy.
Make the Fingers:
Measure the width of the box lid and draw a finger pattern. I had a couple of reproduction shaker pantry boxes that I borrowed to look at for inspiration. If you don’t have any to look at, you can find lots of inspiration by googling shaker pantry box.
Cut out the pattern and make sure it fits and you like the way it looks.
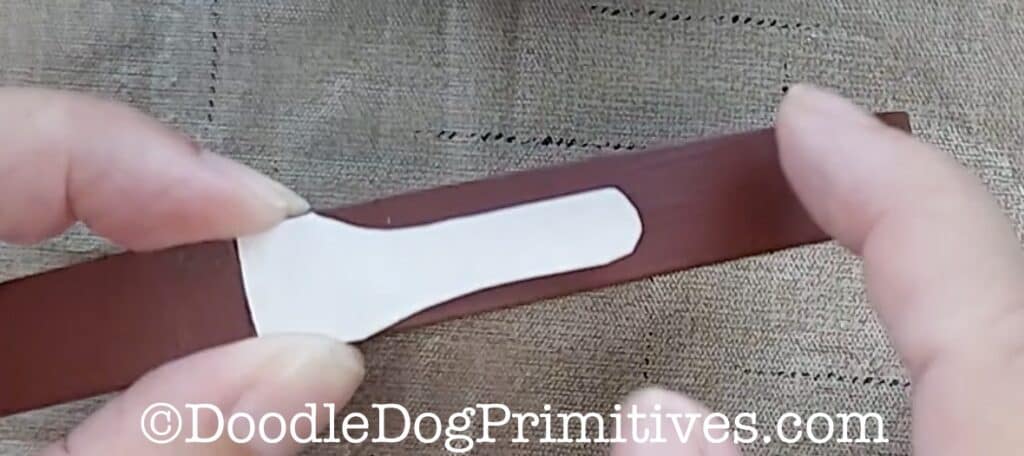
Choose a thin cardboard that is the same thickness as the lip on the box. I used a cereal box.

Cut the finger out of cardboard.
Repeat this process for the base of the box. When drawing the pattern for the fingers on the base, keep in mind that the lid will cover the top part of the box so don’t make any fingers that will be hidden by the lid.
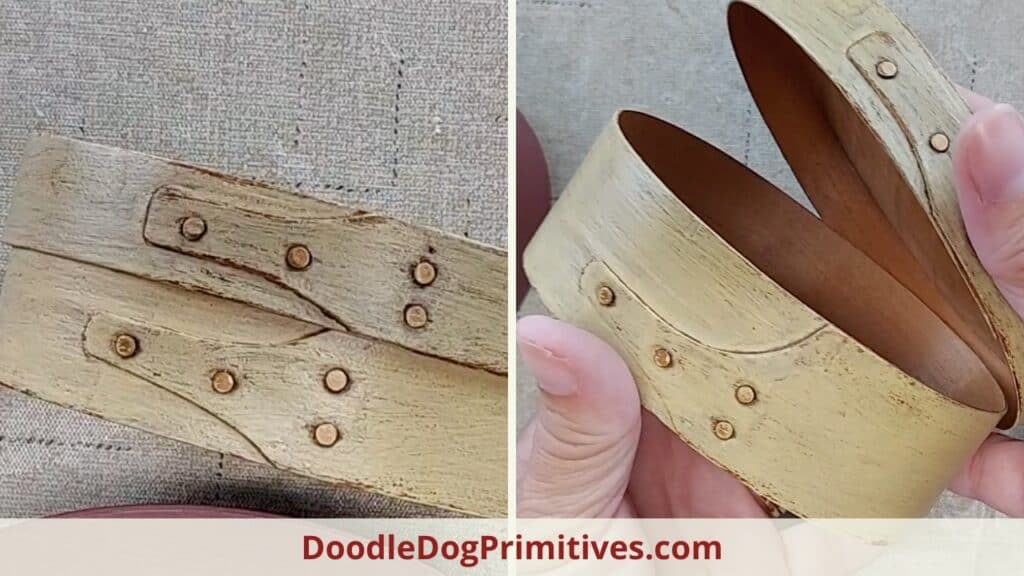
A taller box will have more fingers than a short box. I am going to make my box have two fingers on the base.
Attach the Fingers to the Pantry Box:
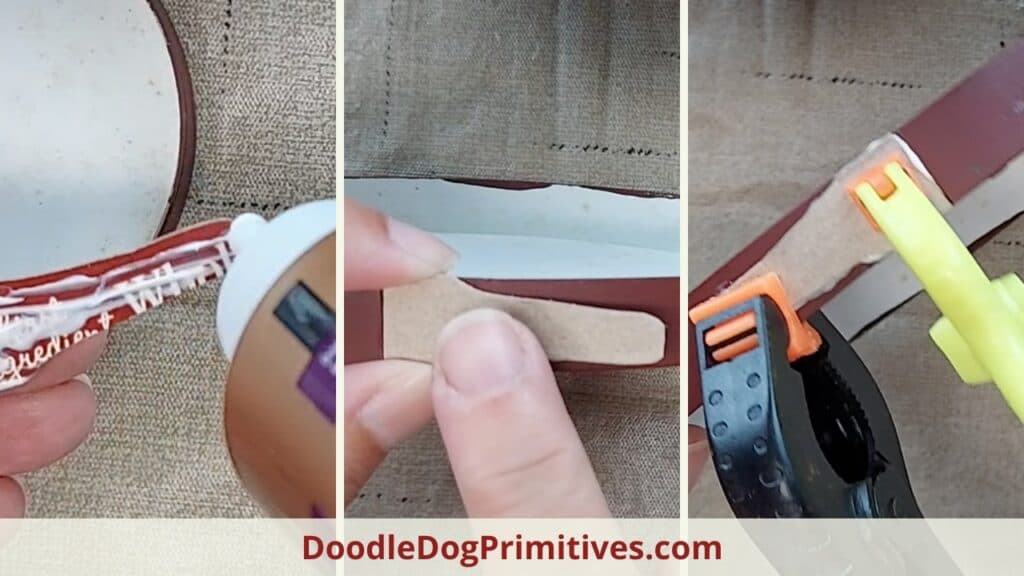
Use some craft glue to attach the cardboard fingers to the box. Be sure to put the glue on the colorful side of the cardboard. You want to have the edge of the cardboard fingers right up next to the lip on the box. Use small clamps to hold the cardboard in place while the glue dries. Wipe off excess glue.
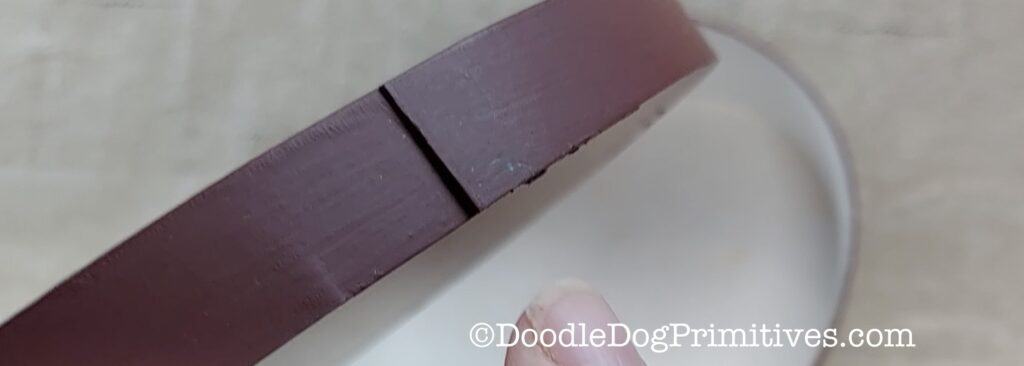
Spackle the Seam:
After the glue is completely dry, the next step is to apply spackle to the seam between the lip on the box and the cardboard finger.
You can use your finger or a putty knife to smooth the spackle over the seam. The goal is to smooth out any gaps and level out the two parts to make them appear to be one.
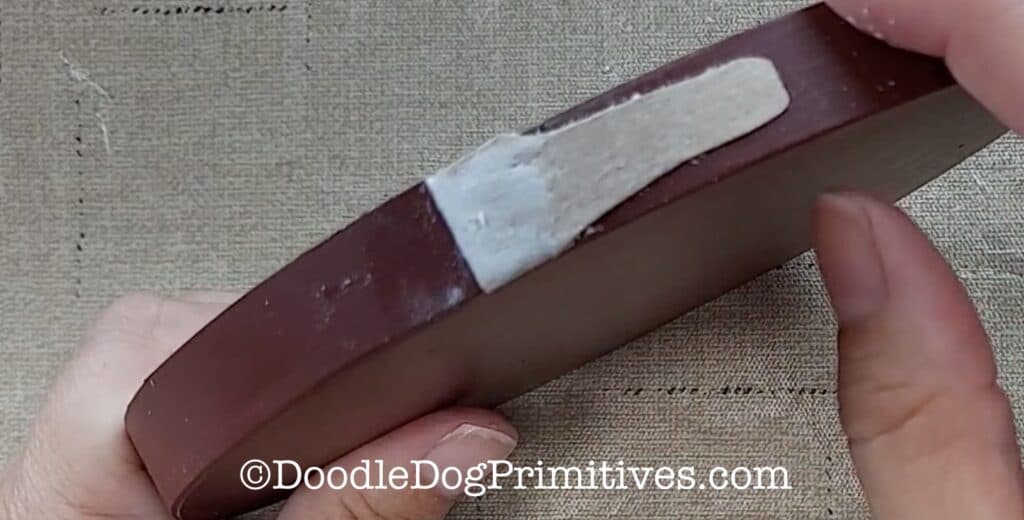
After the spackle is dry, lightly sand the area. Reapply the spackle if needed. I had to re-spackle a couple of times to get things really smooth. I even re-spackled the box a final time AFTER I had painted because it just didn’t look smooth enough in certain lighting.
Paint the Shaker Box:
I was lucky enough to have the original paint that this box had been painted with so I was able to just paint the altered areas.
If you don’t have the same paint or the box just needs a complete overhaul, you can paint the box now. You could paint it solid like my box or give it a distressed antique look.
Add “Nails” to the Box:
Instead of nails, I added small paper fasteners that are made for card making or scrapbooking. These are much like the brass fasteners you would find in office supply stores.
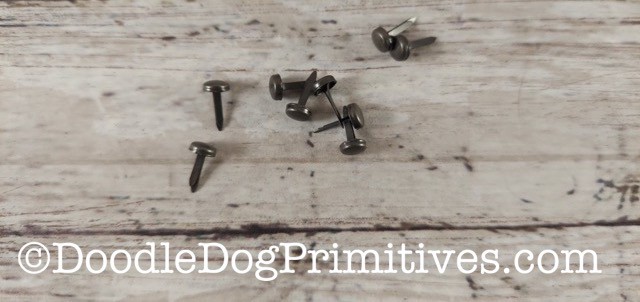
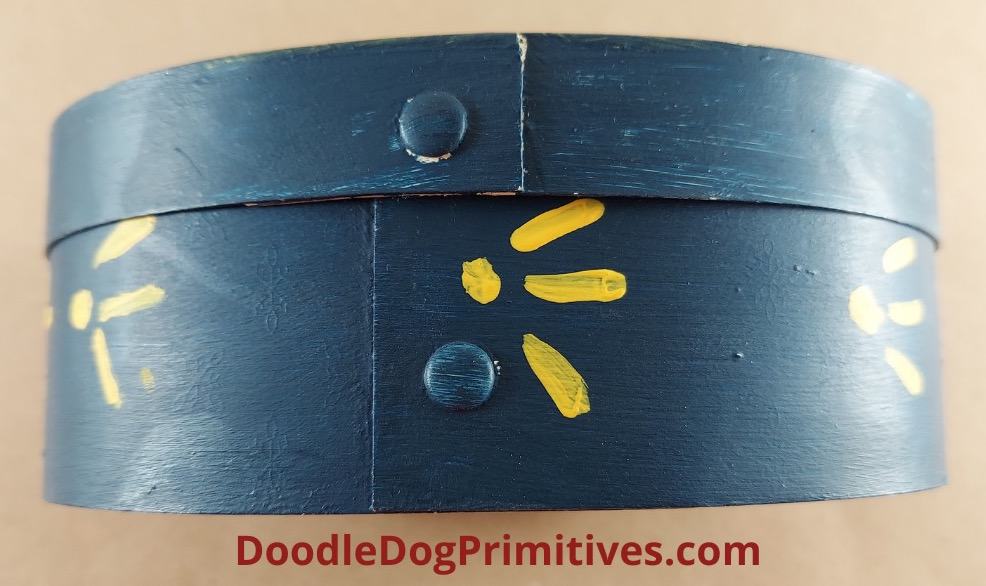
These paper fasteners come in lots of different sizes and colors. If your box already has some fasteners like this blue one does, it would look nice to choose fasteners about the same size.
Since my box didn’t have any, I chose some small ones to mimic the look of the nails on the reproduction shaker pantry boxes.
I used a wire cutter to cut the backs off the paper fasteners. I did this for two reasons. I didn’t want to try to drill through the cardboard and I didn’t want the backs of the paper fasteners to keep the lid from going onto the box properly.

After cutting the backs off the paper fasteners, push any metal remaining from the backing to the inside of the fastener.
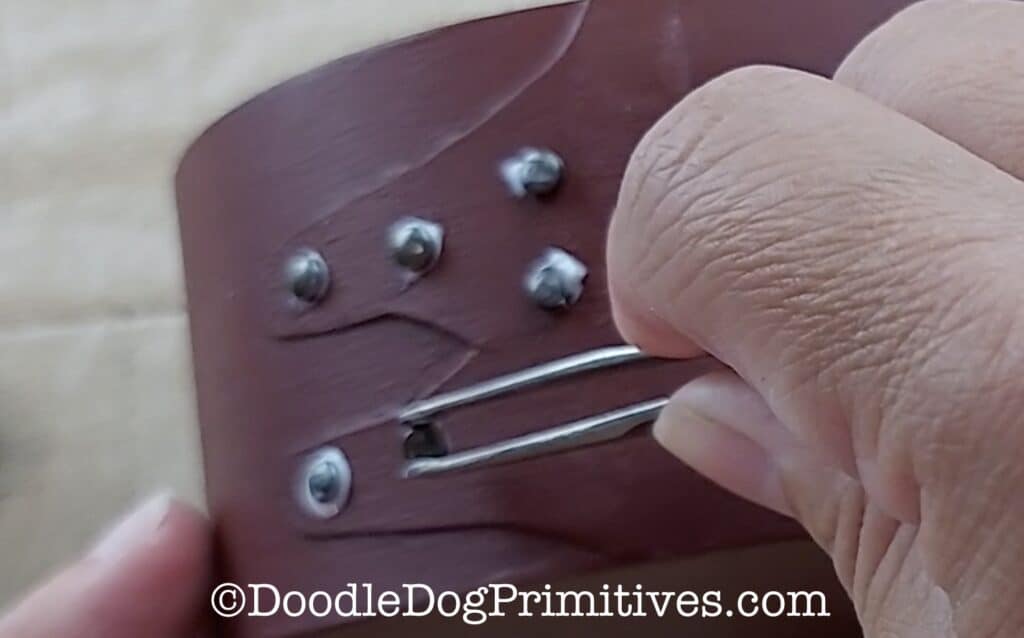
Glue the tops of the paper fasteners to the box, using pictures of antique or reproduction shaker pantry boxes as a guide.
To make it easier, I used tweezers and applied the glue with a toothpick.
Be sure to wipe off the excess glue. This is easier to do if you let the glue set up a few minutes first. Hold the paper fastener down with one finger while wiping the extra glue away.
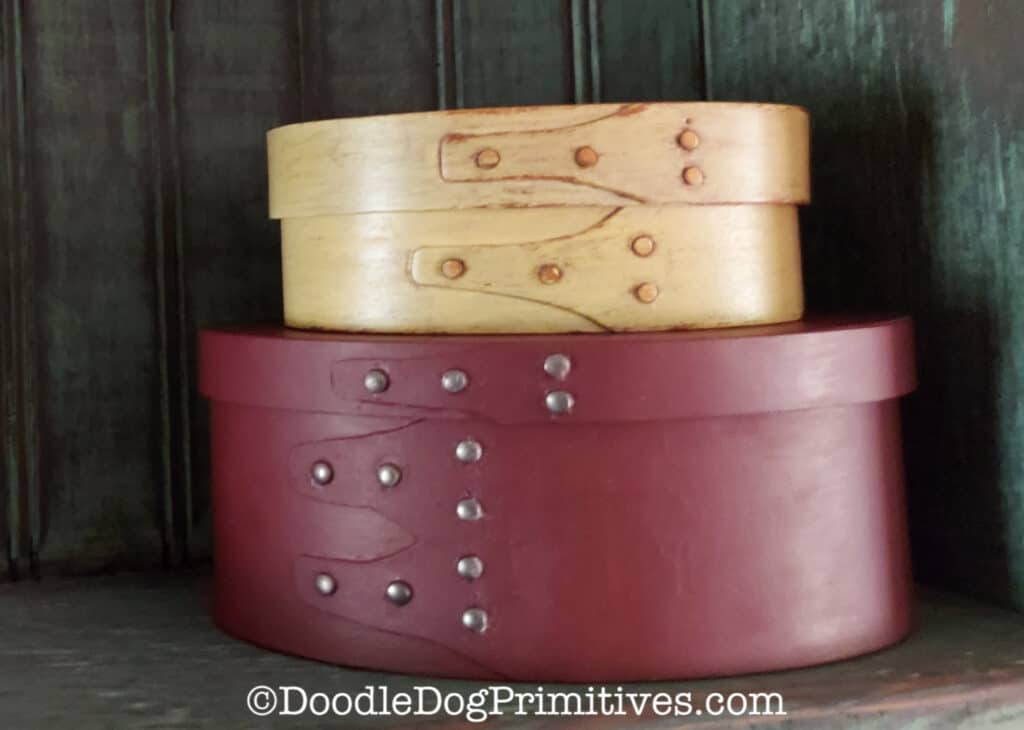
I think it turned out really good. The top box is the real reproduction and the bottom box is the faux shaker pantry box.
Be sure to check out our other craft tutorials.
Be sure to Pin this Colonial Craft Tutorial: