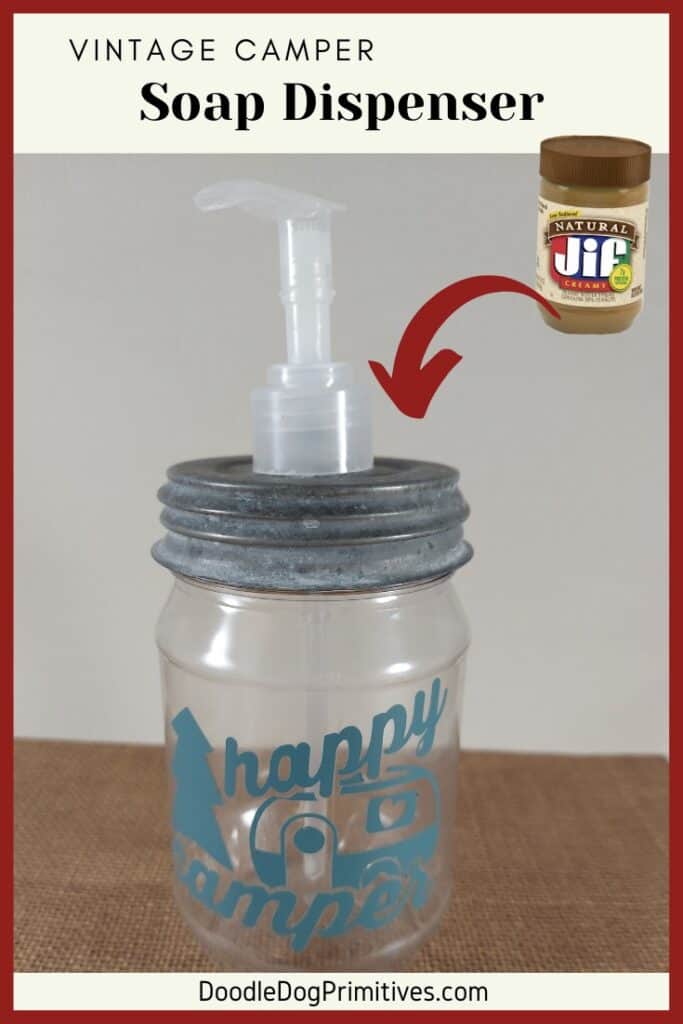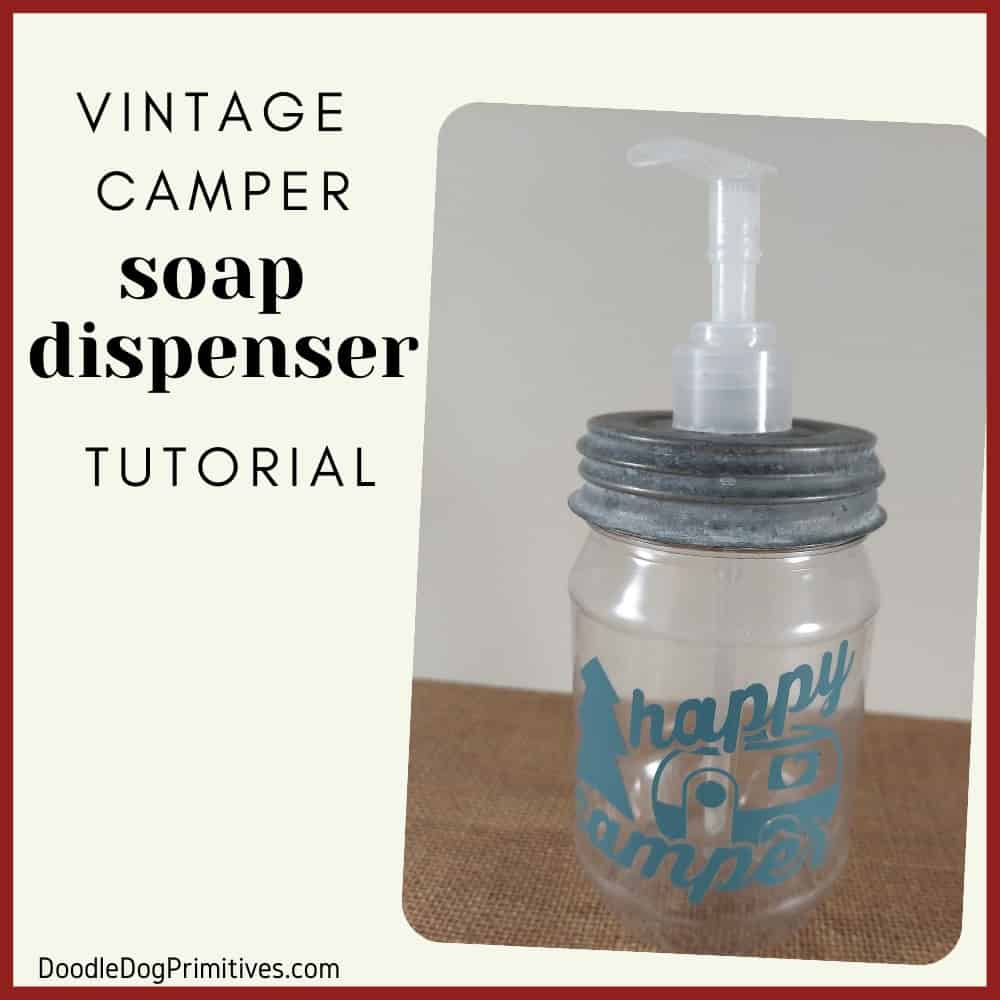
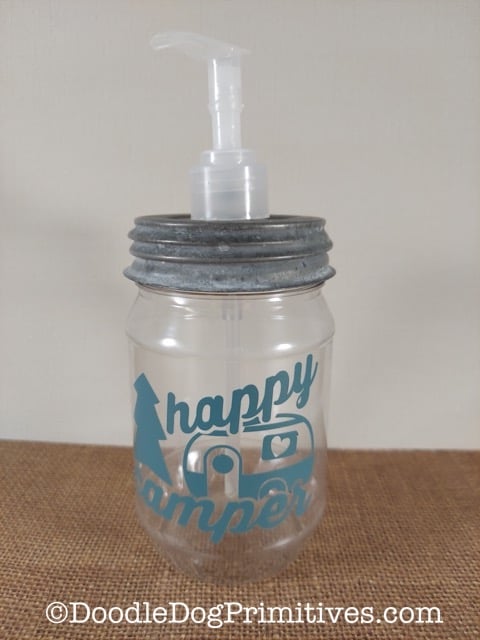
We have been working on updating our vintage camper for several years. One of the things I really enjoy doing is making accessories to use in the camper. In the kitchen, we just had a plain Softsoap dispenser and I decided I should make a vintage camper themed soap dispenser with a zinc lid. It was fun to make and much more fun to use. And who doesn’t want to make washing their hands fun!
This post may contain affiliate links for your convenience, which means if you make a purchase after clicking a link I will earn a small commission but it won’t cost you a penny more. For more information, please visit our Privacy Policy.
Supplies for Vintage Camper Soap Dispenser:
- Plastic jar with same size lid as a regular mason jar
- Zinc lid
- Soap dispenser pump
- Camper decal
- Safety glasses
- Drill
- Step bit
- Sandpaper
- Rubbing alcohol
- Adhesive glue
- Rubber disposable gloves
Choosing a Jar:
I wanted my soap dispenser to be plastic so I wouldn’t have to worry about it breaking during travel. I found a Jif peanut butter container that my zinc lid would fit on. We ate all of the peanut butter, cleaned the jar, and removed the label.
If your zinc lid fits the plastic container, I would avoid putting the container in the dishwasher to clean it as they will sometimes “shrink” in the dishwasher. Ask me how I know 🙂
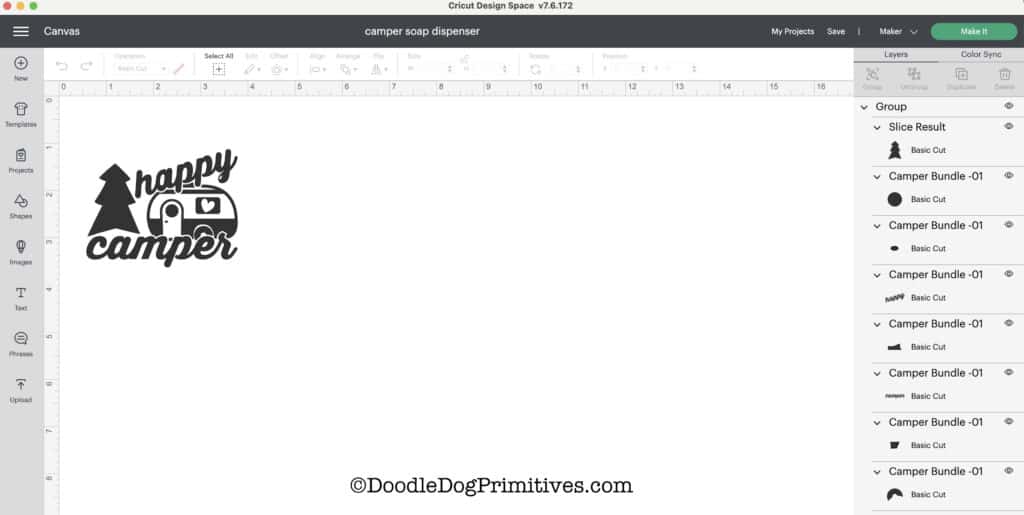
The Vinyl Camper Decal:
I have a Cricut Maker, so I chose some permanent vinyl that matches the decor in my vintage camper. I purchased a graphics bundle that has a lot of vintage camper designs.
I did end up changing the tree in the design I chose just to make my weeding easier. I used one of the free trees in Design Space.
If you don’t have a Cricut Maker, don’t worry, there are lots of cute pre-cut stickers available. Just make sure the size is good for your jar!
Clean the outside of the jar and apply the sticker to the plastic jar. I like to clean things with rubbing alcohol and let it dry before I apply vinyl stickers.
Prepare the Zinc Lid:
Vintage zinc lids usually have a glass liner in them. The first step is to remove the glass.
Be careful and wear safety glasses and other safety protection. The broken glass will be sharp.
Place a center punch right in the center of the lid on the glass side. Use a hammer to solidly strike the center punch. This should break the glass AND make an indentation on the lid directly in the center.
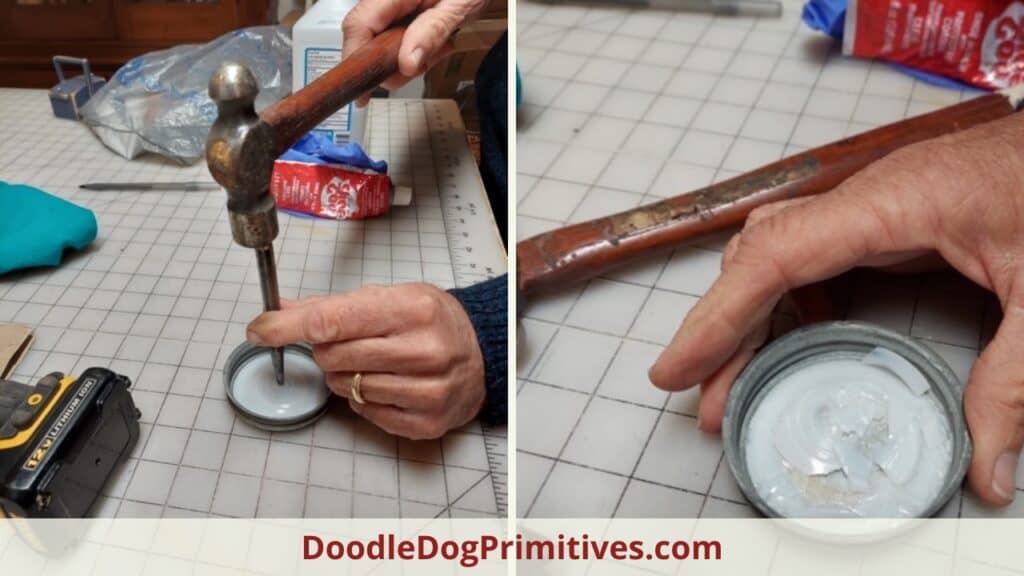
Carefully remove all glass.
Drill the hole in the Zinc Lid:
Use a step bit in a drill to make a hole in the middle of the zinc lid just large enough for the soap dispenser pump to fit. Be sure to use your safety glasses here too.
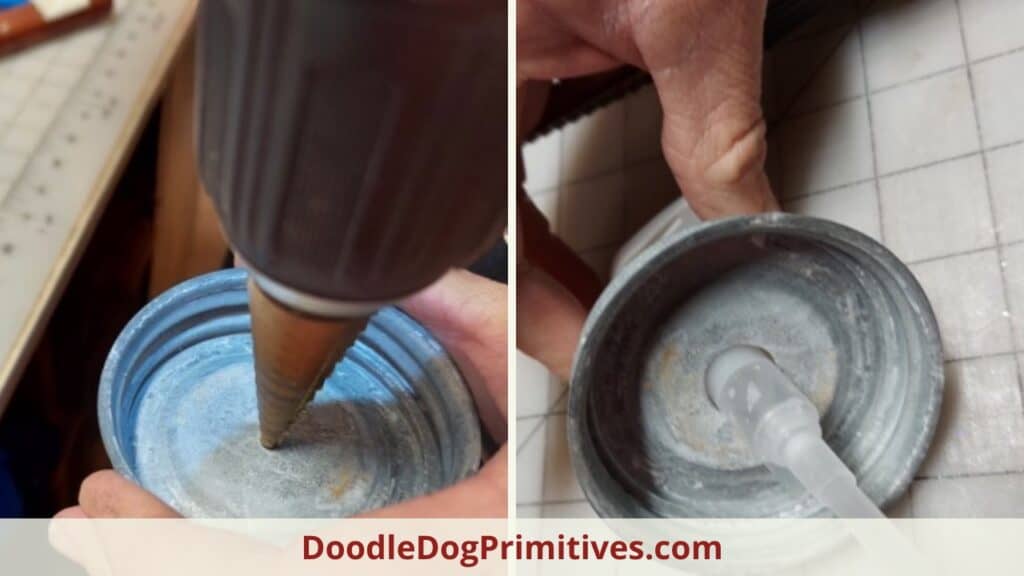
The step bit drills progressively larger holes, allowing you to get just the size you need.
Clean & Glue the Soap Dispenser Lid Together:
Use some 120 grit sandpaper to lightly sand the inside of the lid before gluing. This will remove oxidation and creates an anchor pattern to help the glue adhere.
Clean the inside of the lid with rubbing alcohol. Also clean the dispenser pump with rubbing alcohol.
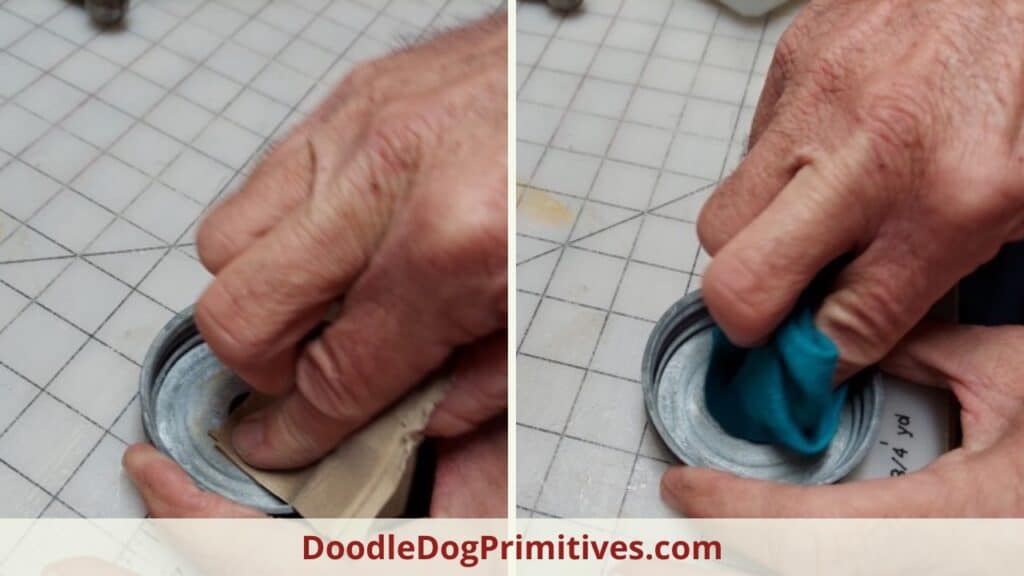
Allow the rubbing alcohol to dry.
Use a vise or clamp to hold the pump dispenser upside down. Slide the lid upside down onto the pump dispenser. Make sure the zinc lid is sitting flat on top of the pump.
Apply an appropriate glue all the way around the dispenser. Spread around using a rubber, disposable glove. Allow to dry. We used shoe goo – just because that is what we had on hand and it seems to be my husband’s favorite adhesive.
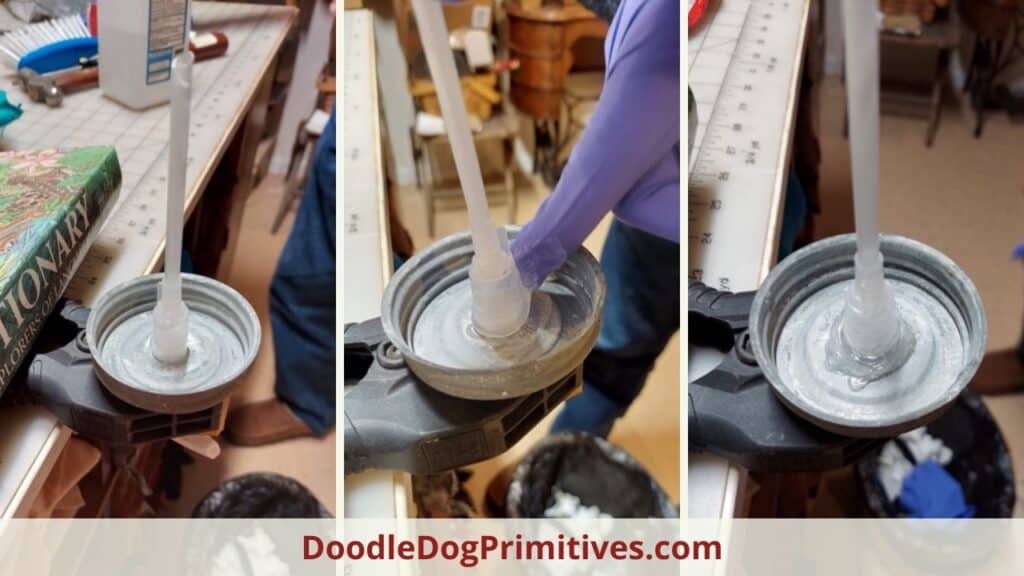
Keep this in the clamp while allowing it to dry. Once it is dry, check to make sure the dispenser is not too long for your jar. You can just cut off the end if it is too long.
Fill your jar with soap and screw on the new lid!
Be sure to check out our other vintage camper tutorials.
Be sure to Pin this Vintage Camper Tutorial: