Today, I am going to show you how to create a hooked rug wall hanging that isn’t droopy.
This technique adds a wooden dowel rod to the back of the hooked rug
so the rug doesn’t sag in the middle when you hang it.
This post may contain affiliate links for your convenience, which means if you make a purchase after clicking a link I will earn a small commission but it won’t cost you a penny more. For more information, please visit our Privacy Policy.
Supplies Needed for Wall Hanging:
- Finished hooked rug
- Wooden dowel rod
- Yardstick
- Pencil
- Scrap fabric – 2 @ 4″ x 5″
- Basic Sewing Supplies
- Serger
Watch the Video:
Cut the Rug Backing:
Cut the rug backing fabric to about an inch all the way around.
An easy way to do this is to place a yardstick
up against each hooked edge of the rug and draw lines
along the edge of the yardstick.
Then cut along the drawn lines.
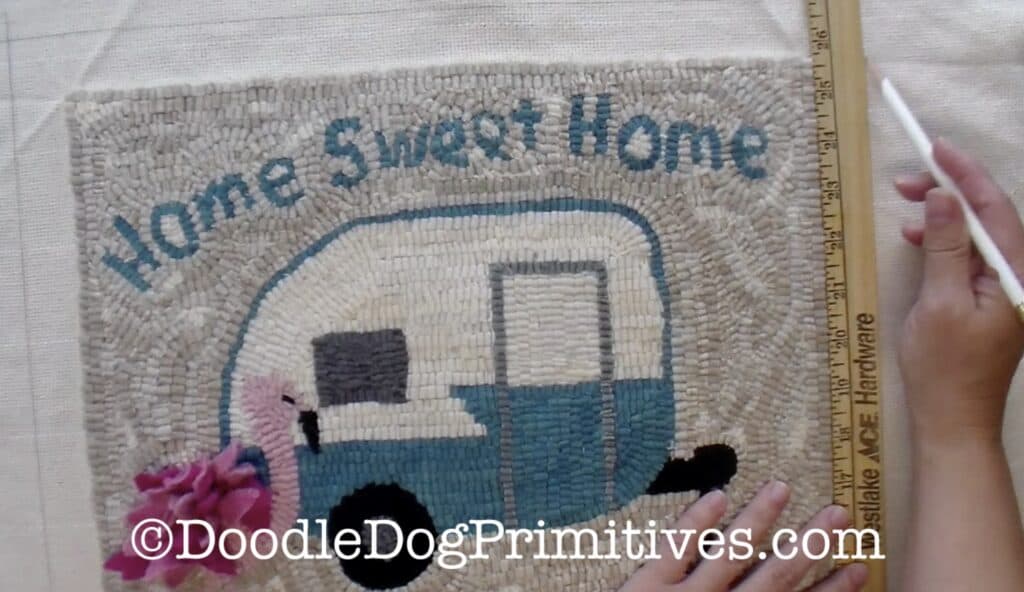
After cutting, serge around the entire hooked rug.
If you don’t have a serger,
finish the edges as you normally do.
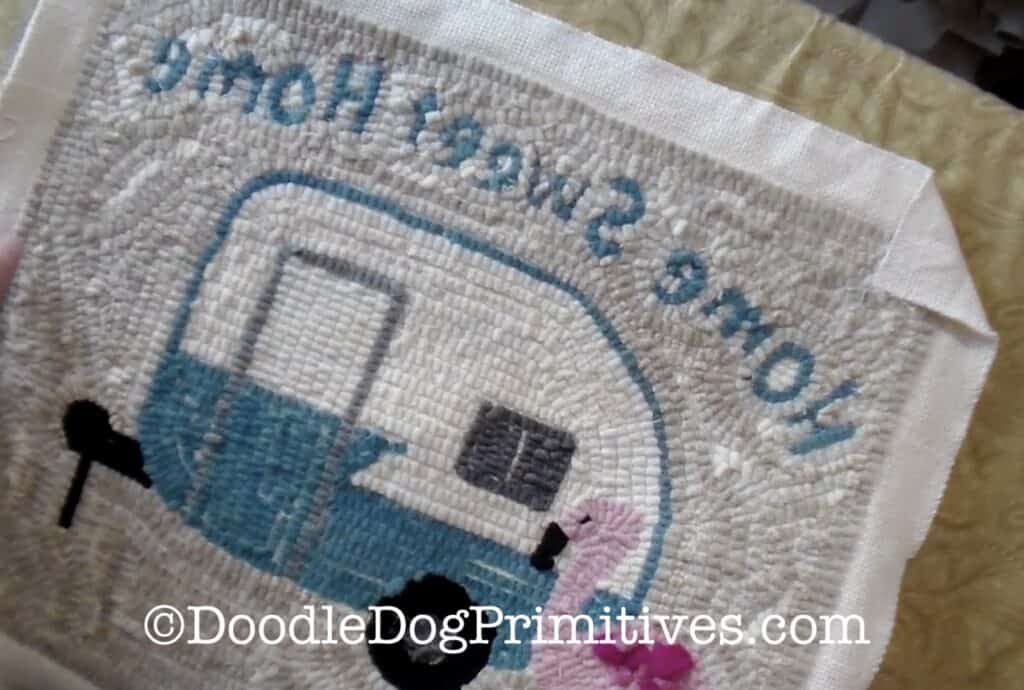
I used monks cloth as the backing fabric in this project,
but you could also complete this project with other rug backings.

Press the Foundation Fabric to the Back:
Press each of the four corners to the back of the project.
And then press each of the sides to the back.
Finally, press the top and bottom to the back.
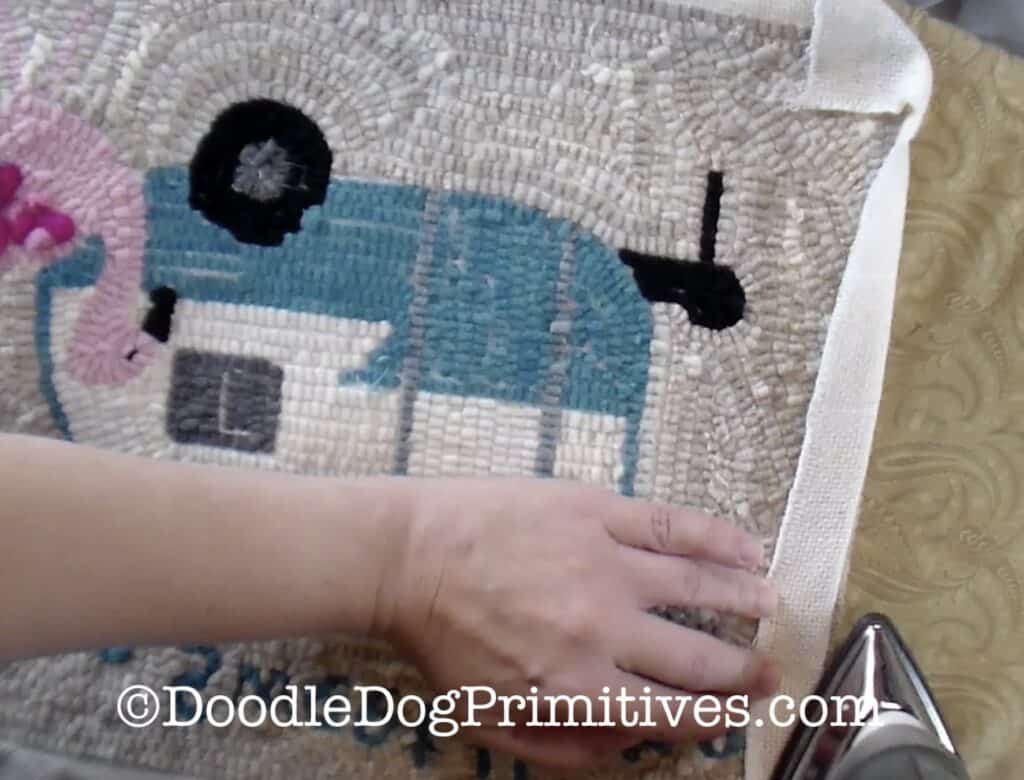
After all the edges are folded under,
press edges back again with a damp pressing cloth.
This will help hold the edges to the back.
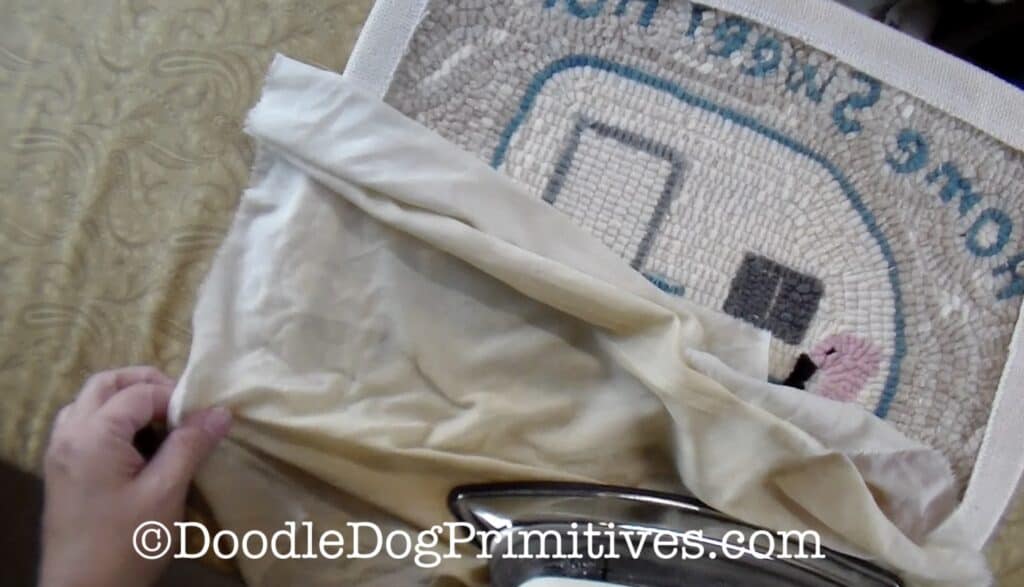
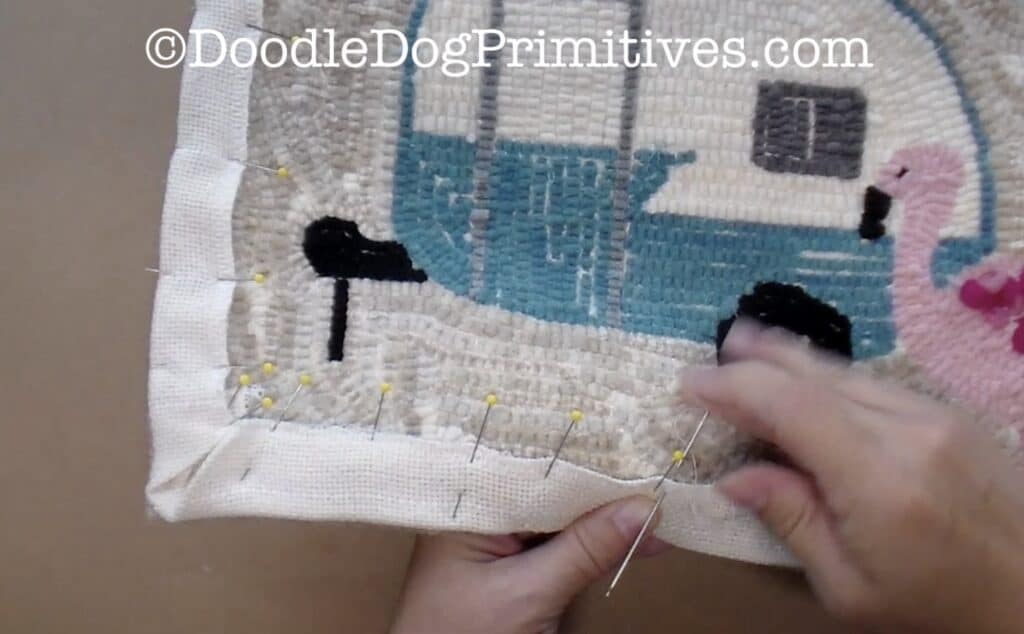
Sew the Foundation Fabric to the Back:
Pin the foundation fabric to the back of the hooked rug.
As you pin, be sure to pull the background fabric tight
so you can’t see it from the front.
Stitch the backing fabric to the back of the rug.
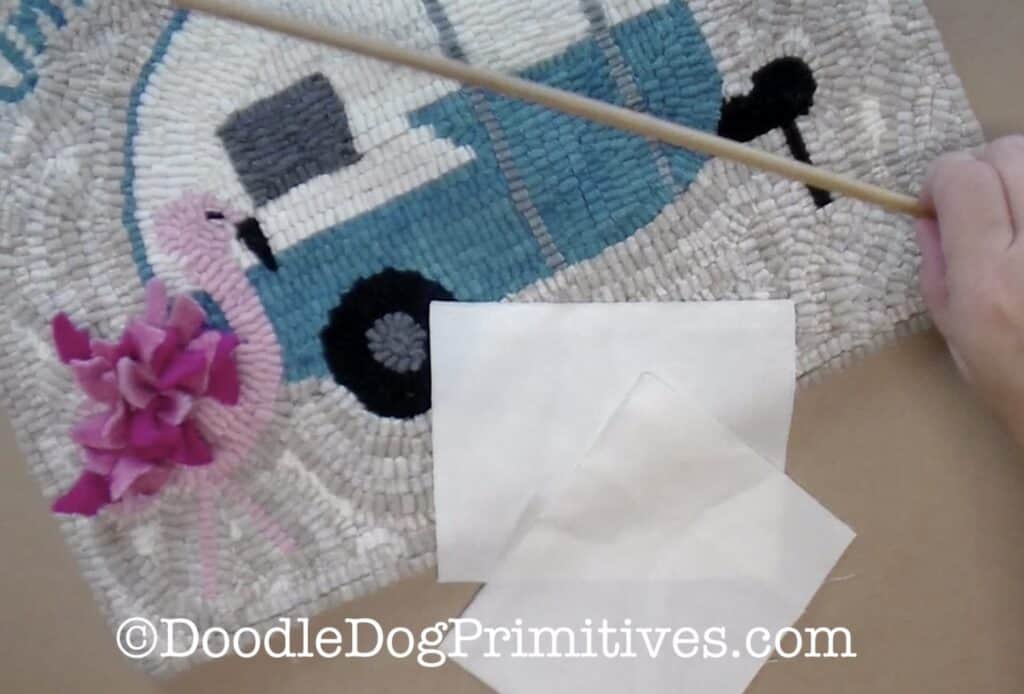
Make the Pockets:
Cut scrap fabric into two rectangles –
each measuring four inches by five inches.
Fold one fabric rectangle in half, right sides together,
so it now measures four inches by two and a half inches.
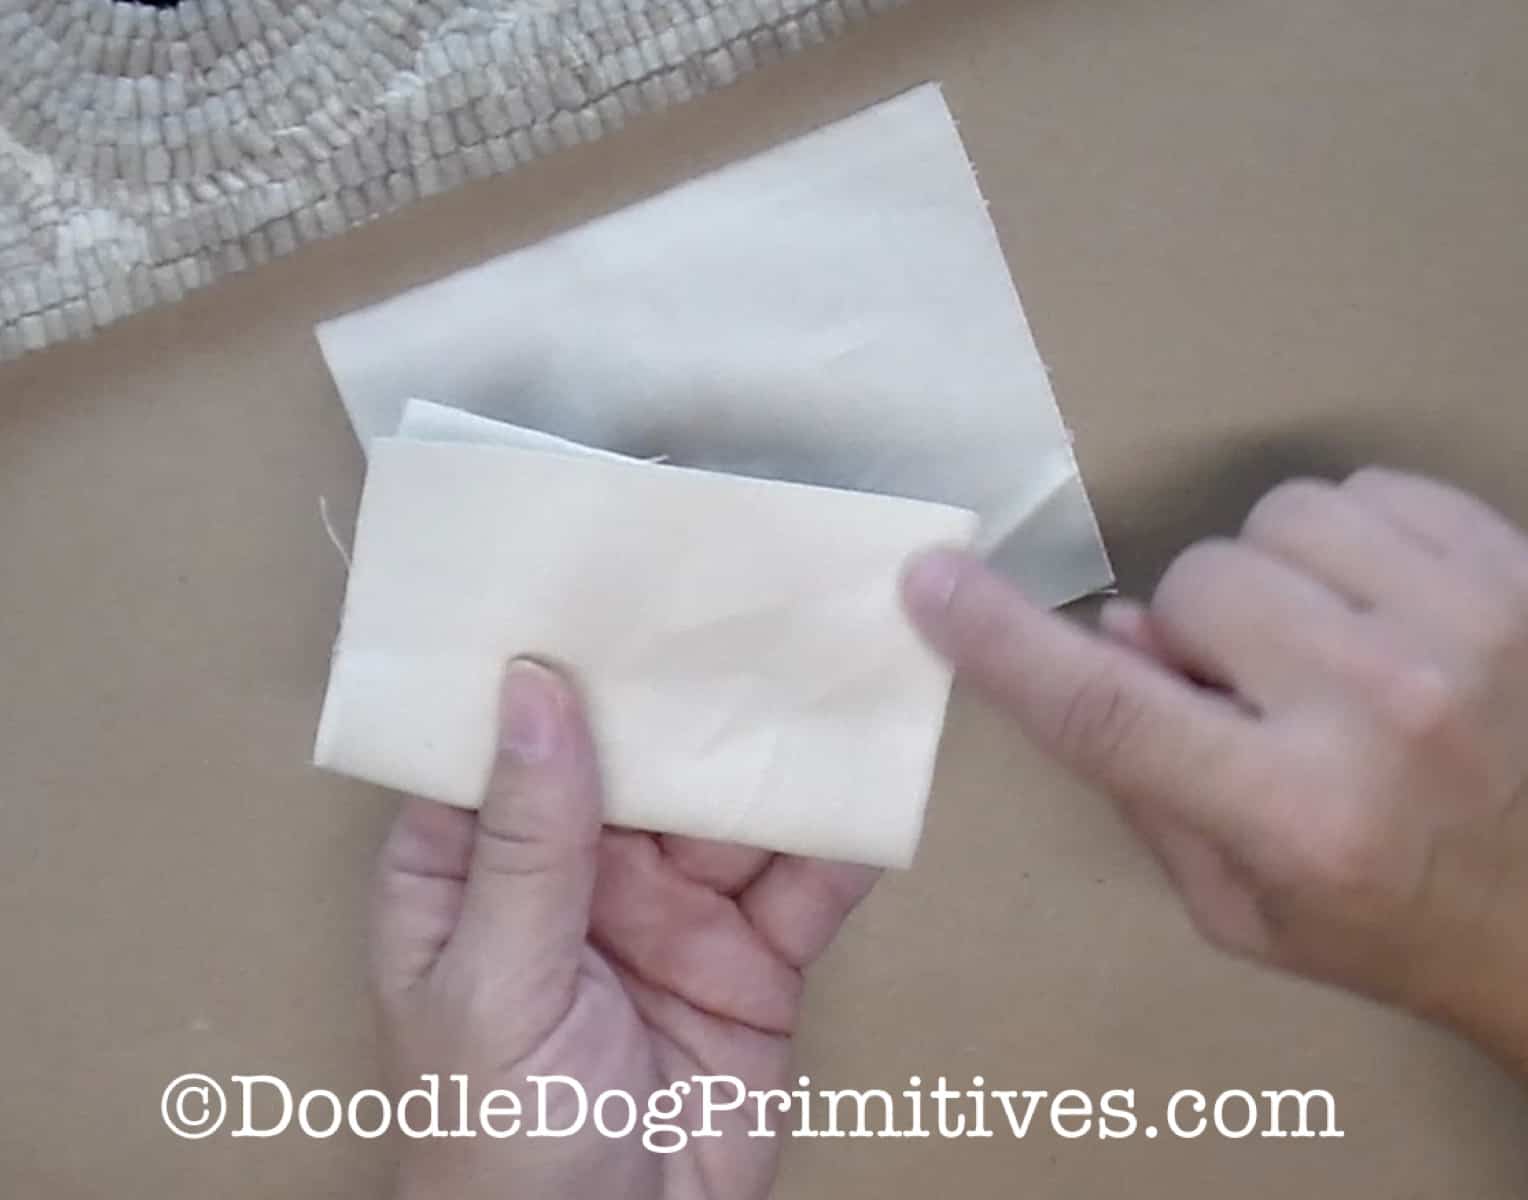
Sew a quarter inch seam along each short side.
Clip the corners off on the folded side,
turn right side out and press.
Finish the raw edge by serging or turn it under a quarter inch and hem.
Repeat for other fabric rectangle.
Cut the Dowel Rod:
Cut a dowel rod a few inches shorter than the width of the hooked rug.
The diameter of the wooden dowel rod
can be determined by the size of your project.
I am using a 3/8″ dowel rod for a project that measures 12″ x 15″.
3/8″ works well, but you could probably
use a smaller diameter dowel rod for a smaller project
and you might want a larger dowel rod for a large project.
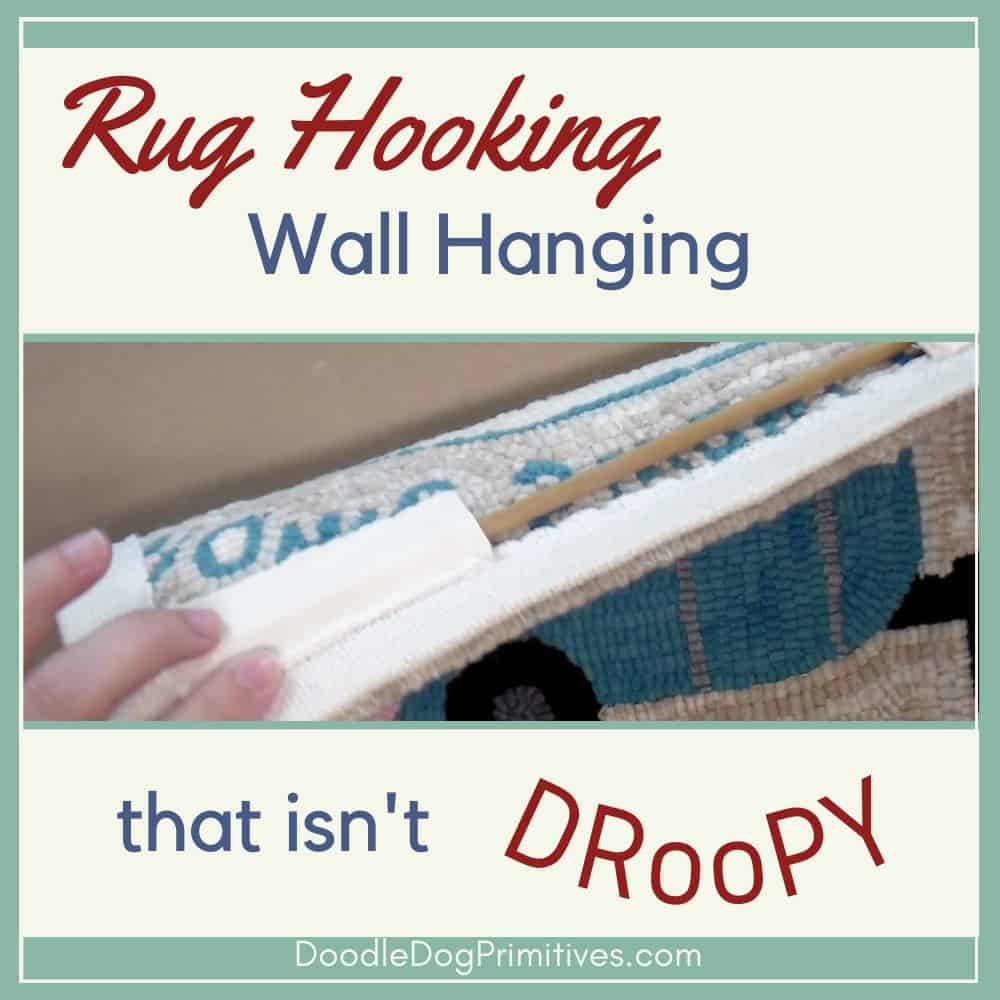
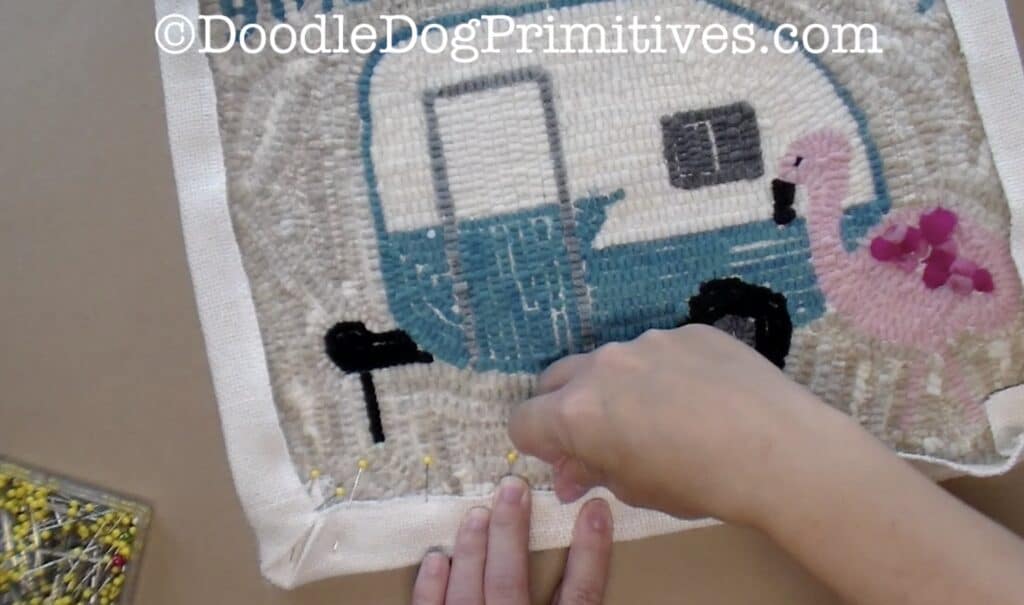
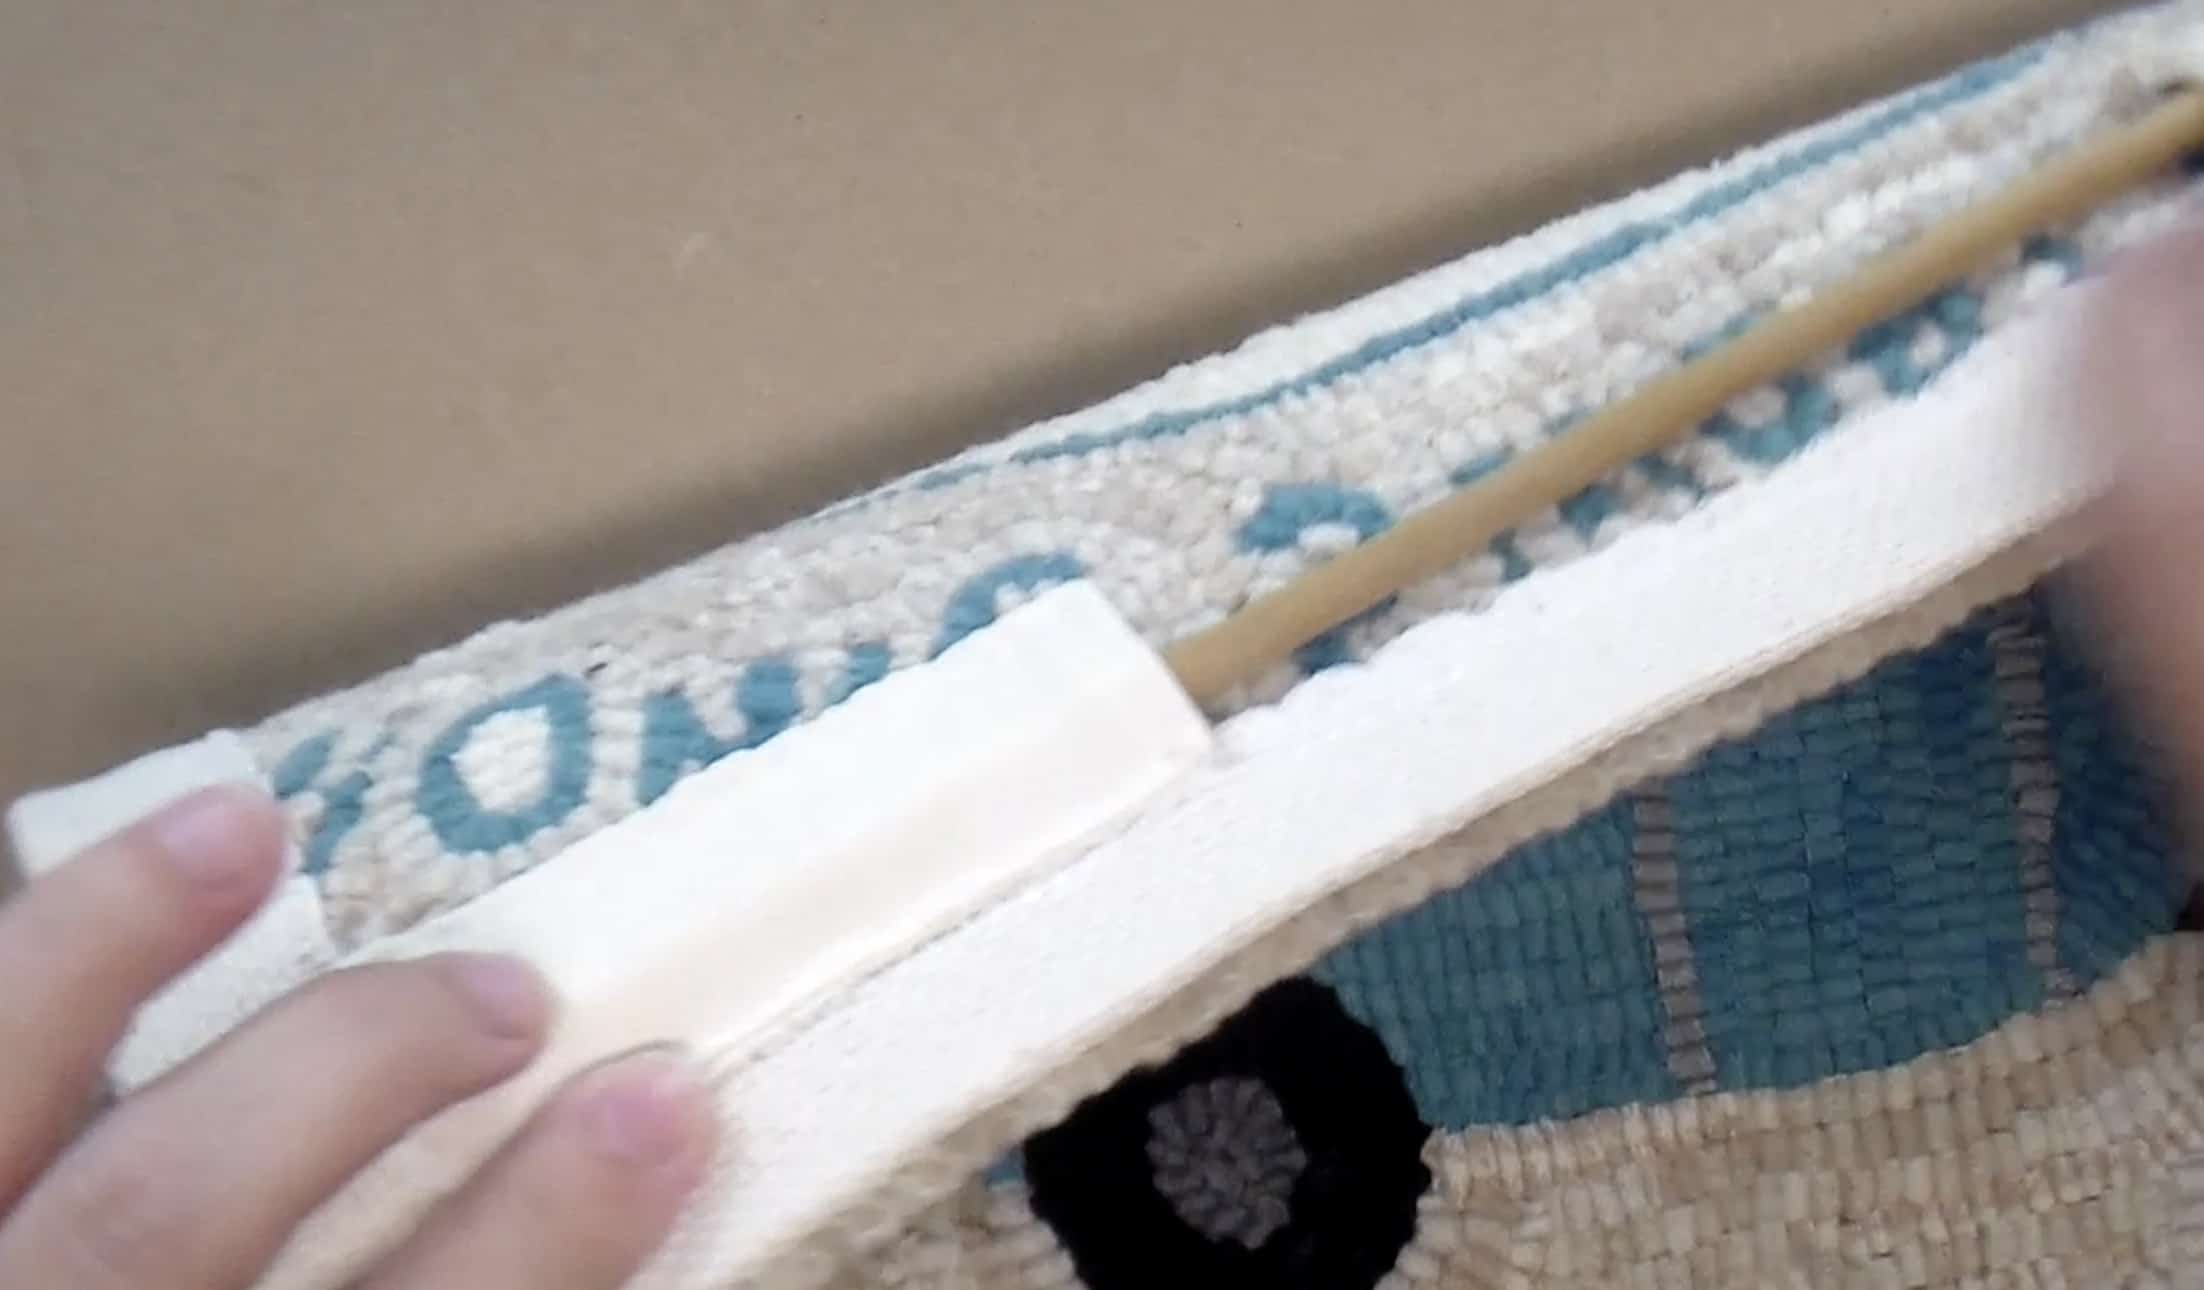
Sew the Pockets onto the Rug:
Place the two fabric pockets on the back of the hooked rug
at the two top corners with the serged edge at the top.
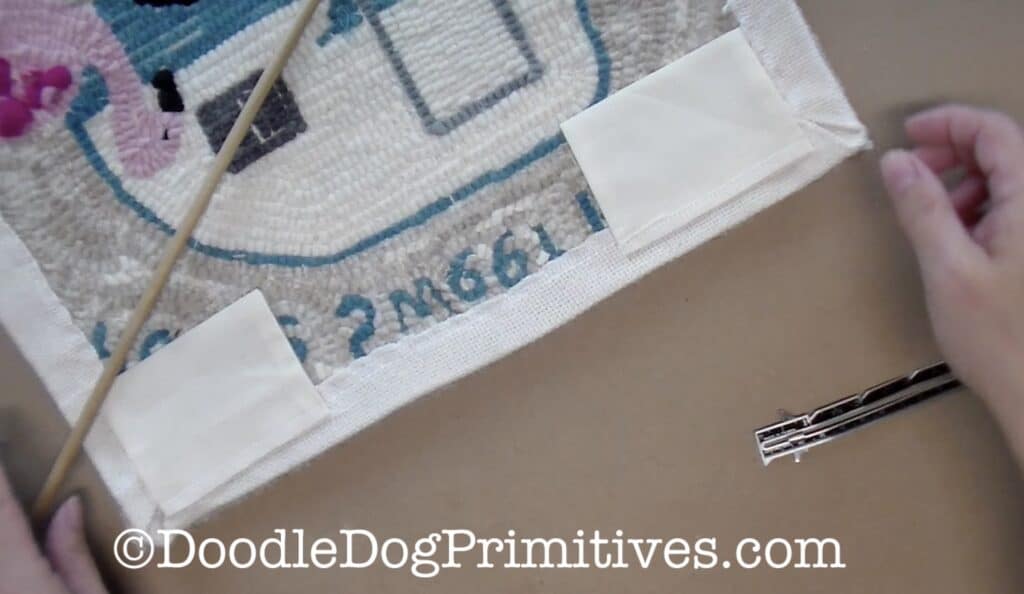
Place the dowel rod on top of the fabric pockets.
Center the dowel rod on the back of the hooked rug.
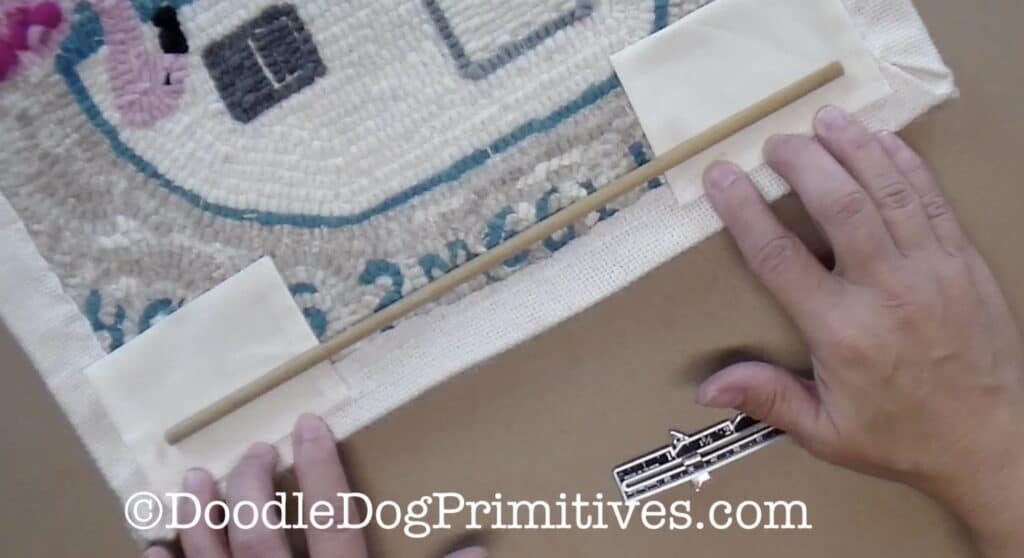
Make sure both pockets are the same distance from the top
and from the sides.
Fold each pocket in half.
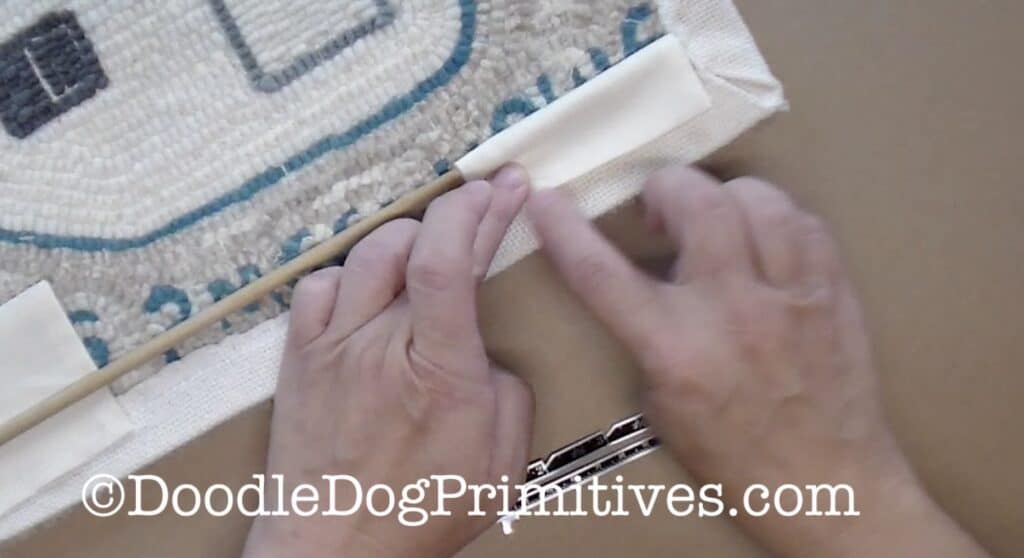
Pin each pocket to the rug.
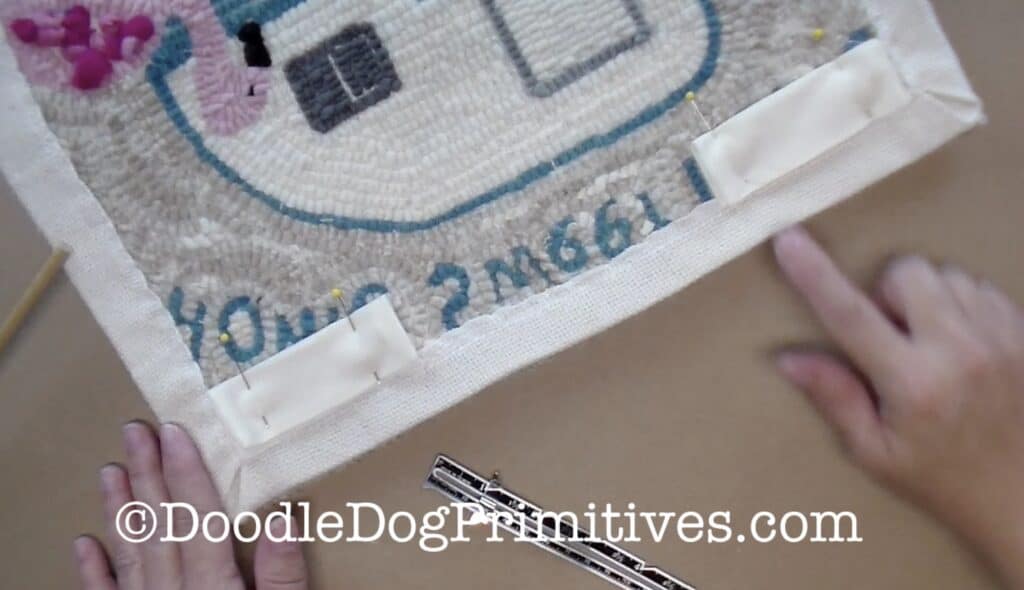
Hand stitch one pocket to the hooked rug along three edges,
leaving the side towards the middle open.
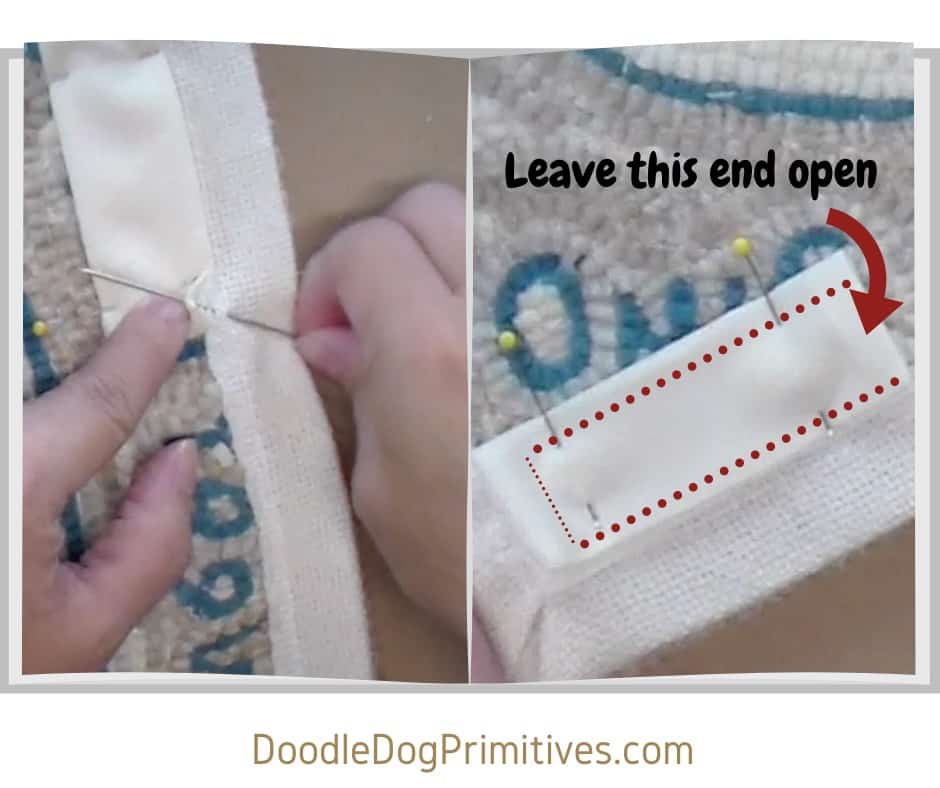
Repeat for other pocket,
but stop sewing BEFORE you sew the bottom edge.
Insert the wooden dowel rod into the completely sewn pocket
and lift up the unsewn sides of the other pocket to insert the dowel rod.
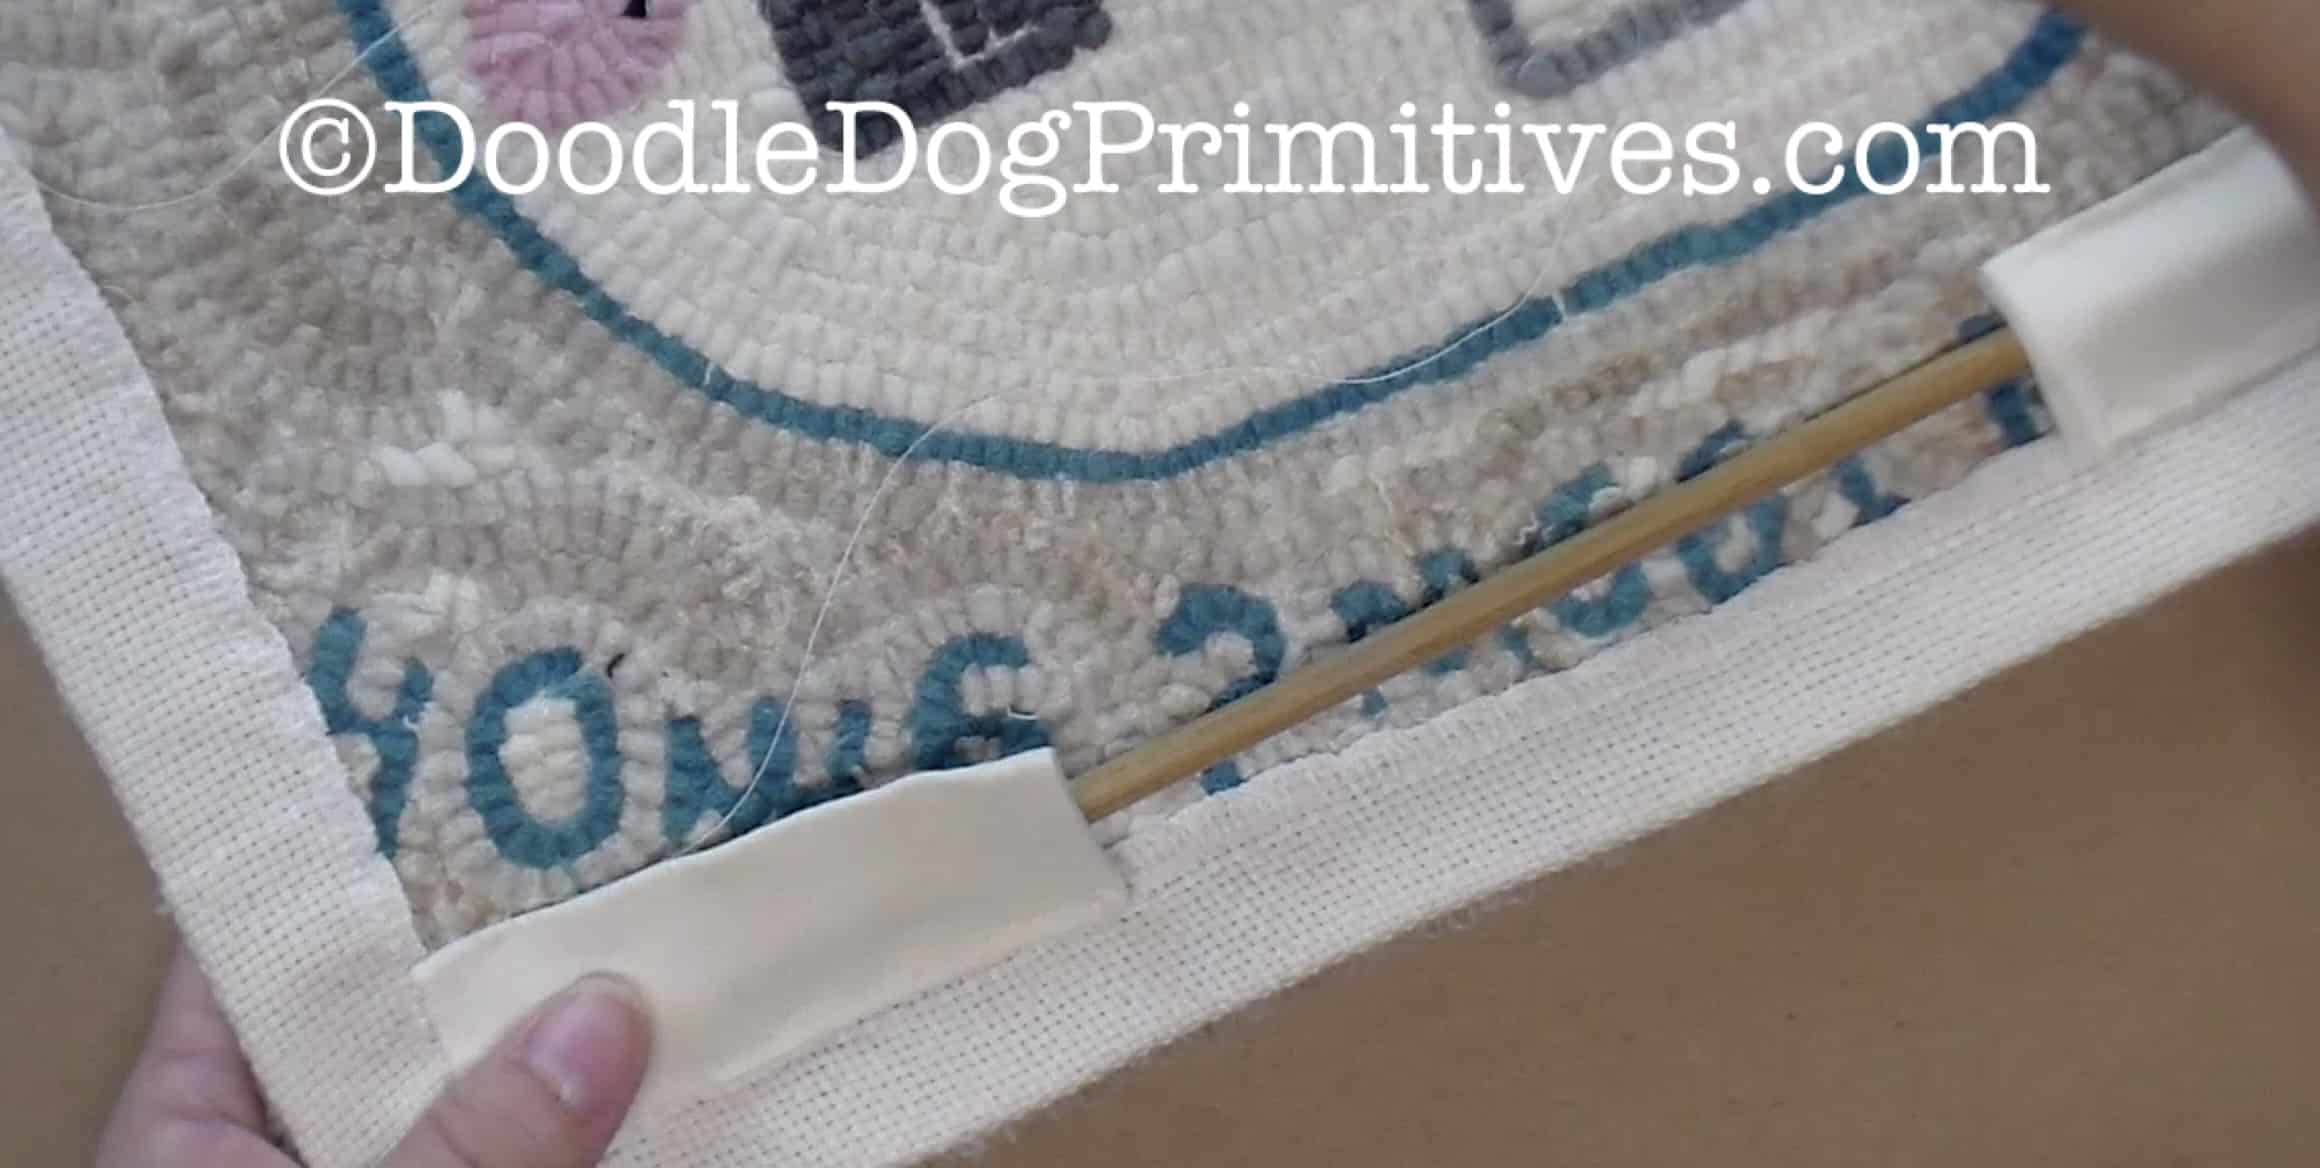
Finish sewing the pocket to the rug with the dowel rod IN the pocket.
Now you have a hooked rug project you can hang on the wall
without it getting droopy in the middle!
I hope you enjoyed learning how to create a hooked rug wall hanging that isn’t DRooPY!
Blessings~
Amy
Be sure to Pin this Rug Hooking Tutorial: