Sometimes, I struggle to figure out how to display my punched pieces after I finish punching them.
So, I decided to start at the beginning this time
and figure out how to display a project before I started designing and punching.
My husband made this cute little hanger for me from some rustic wire
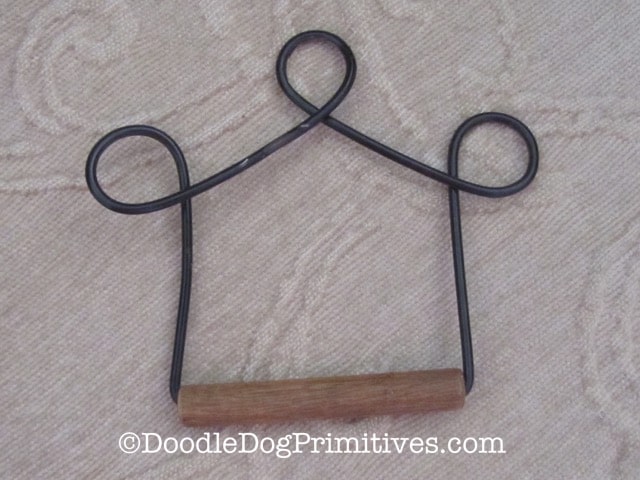
and I set out to design some banners.
Initially, I was going to do one for each season.
But, it was just too much fun to stop there.
I am working on one for every month.
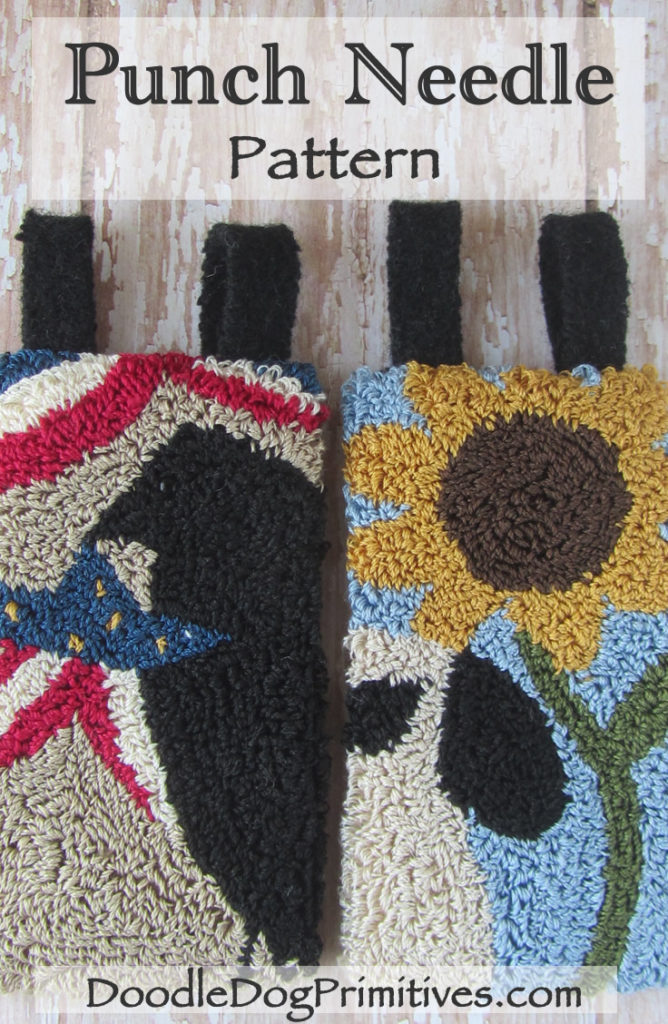
The first one is for the July & August Punch Needle Banners.
July & August Banners Pattern:
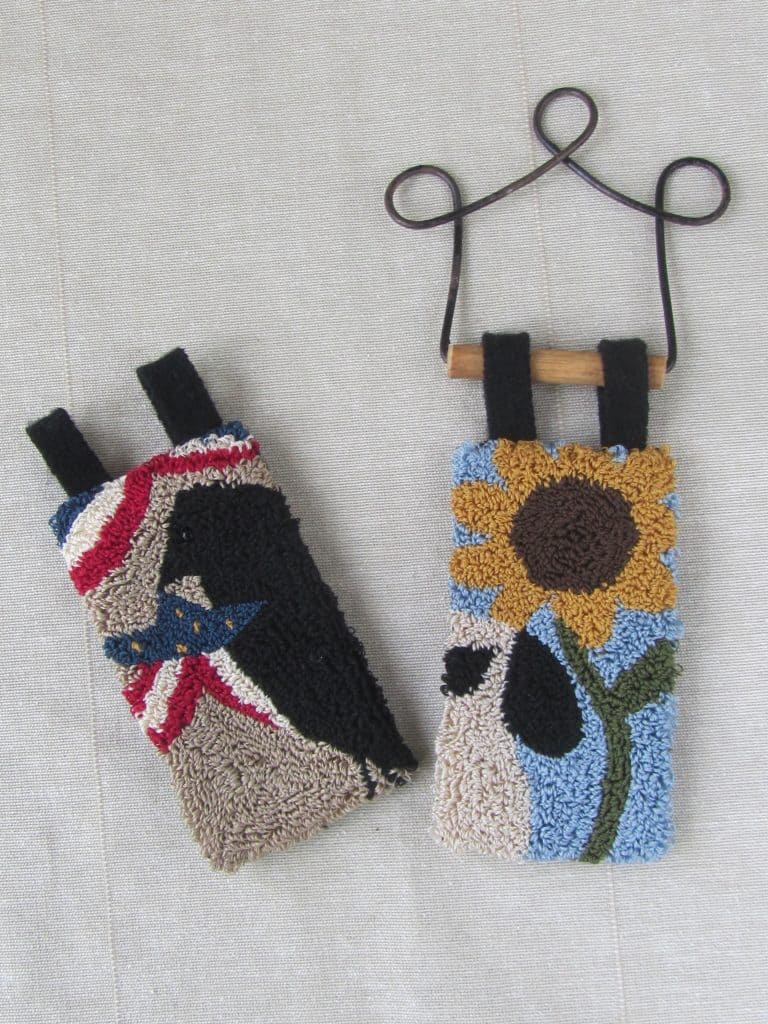
July’s punch needle banner features a primitive crow
holding a primitive American flag colored star.
Across the top of the banner is some flag bunting.
The August banner has a primitive sheep standing beneath a beautiful sunflower.
Each banner measures about four and a half inches tall
and about two and a half inches wide.
They have been punched using three strands of DMC embroidery floss.
The prim crow’s eye has been stitched on as a glass bead.
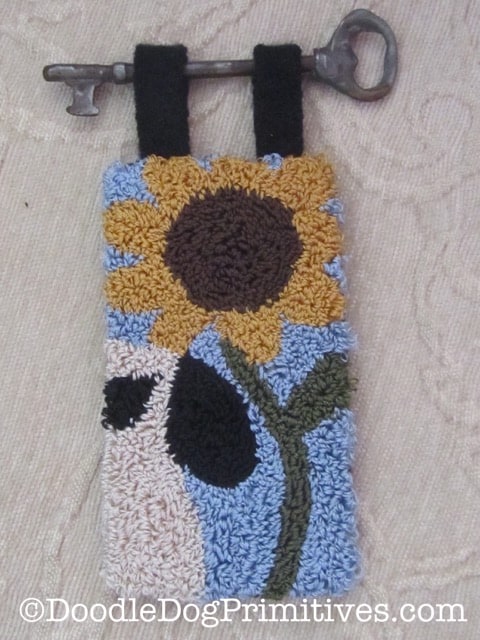
These would also look cute hanging from a vintage skeleton key.
This key is about 4″ long.
Get the Punch Needle Pattern:
This punch needle pattern is available in my Etsy shop as an instant downloadable pattern.
This comes in a convenient pdf file format and allows you to start punching right away.
Get the pdf punch needle pattern.
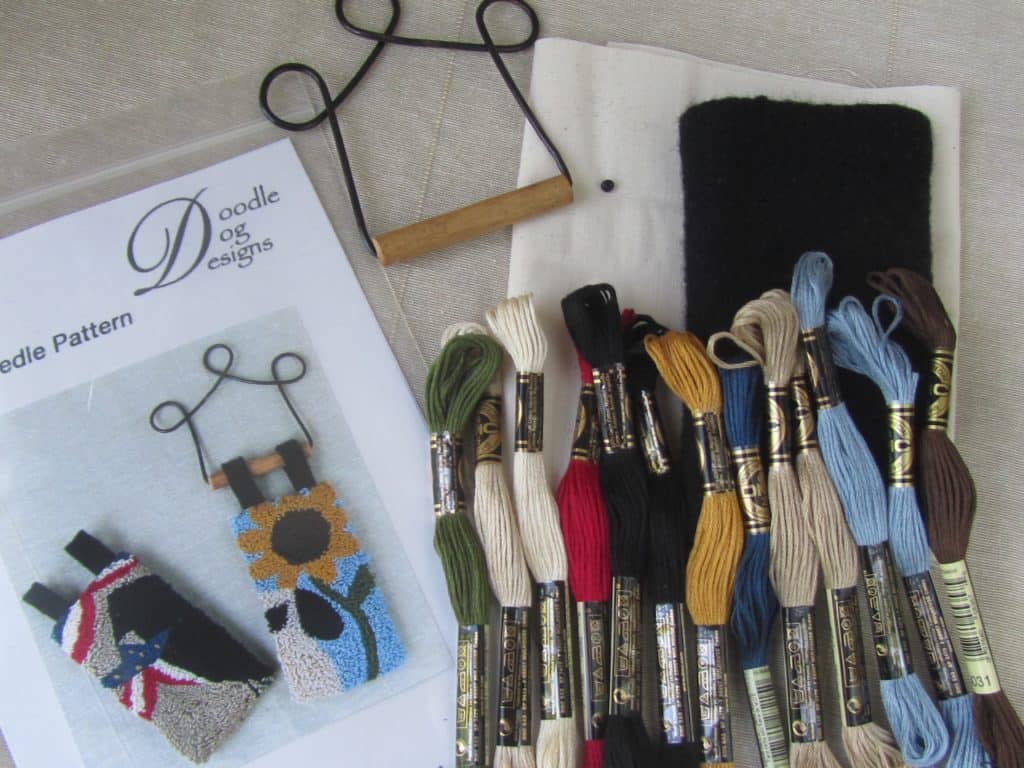
You can also choose a paper punch needle pattern or kit.
The punch needle kit includes the reusable paper pattern,
weavers cloth, black wool for the backing and hanging tabs,
DMC embroidery floss, a black bead for the crow’s eye,
and an optional hand made hanger.
Get the punch needle kit for the July & August Punch Needle Banners.
Blessings~
Amy
Pin this Summer Punch Needle Pattern: