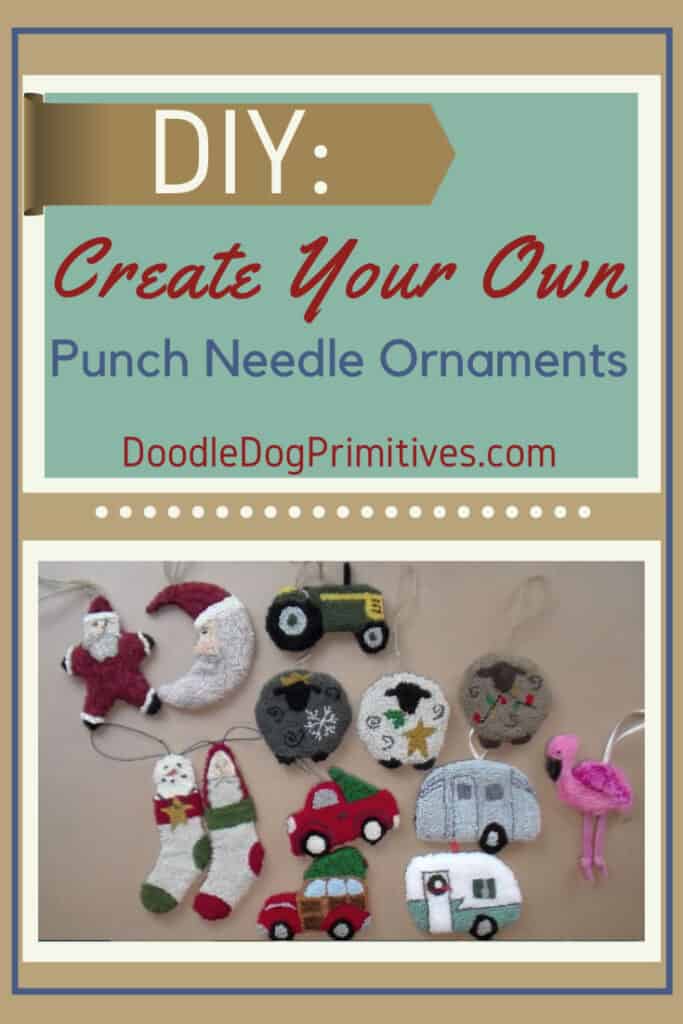
Today I want to show you how easy it is to make a punch needle ornament.
I have several punch needle ornament patterns available.
(I just released two new ones this week.)
They are all created using this same easy method.
Supplies Needed to Create a Punch Needle Ornament:
- Finished Punch Needle Project
- Heavy Weight Interfacing or Thin Cardboard
- Felted Wool
- 8 inches of ribbon or jute
- Basic Sewing Supplies
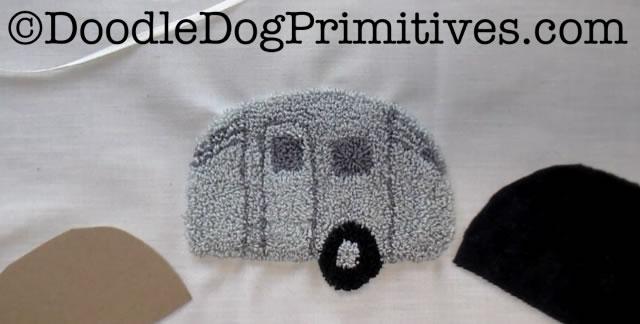
Prepare the Ornament Pieces:
Trace the ornament pattern onto a piece of tracing paper
and cut out a piece of black felted wool
in the same shape and size as the punched piece.
This will be the back of the punch needle ornament.

Cut a piece of heavy weight interfacing
or thin cardboard slightly smaller than the piece of wool.
This will be placed inside the ornament to add stability.
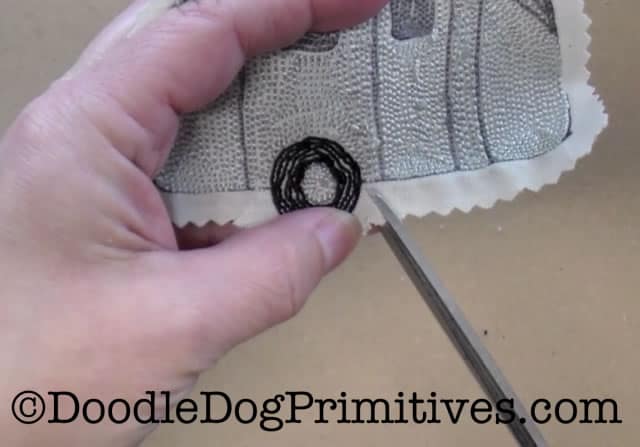
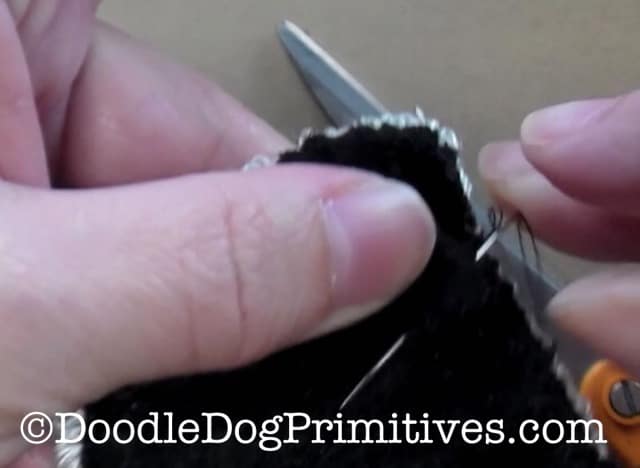
Trim the empty weavers cloth
to 1/4 inch all the way around the punched edge.
Clip slits in the weavers cloth at the inside corners.
Carefully press the empty weavers cloth to the back.
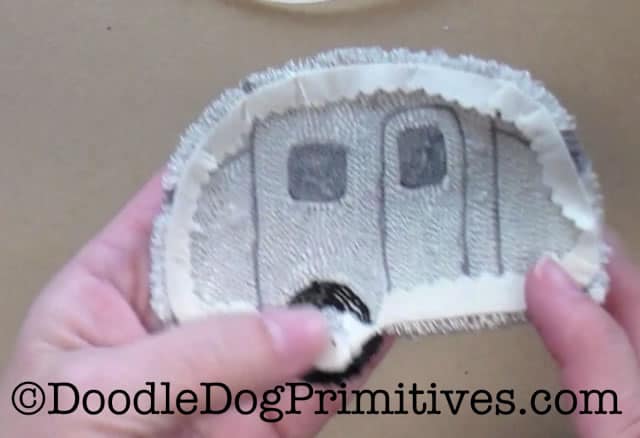
Watch how I made it here:
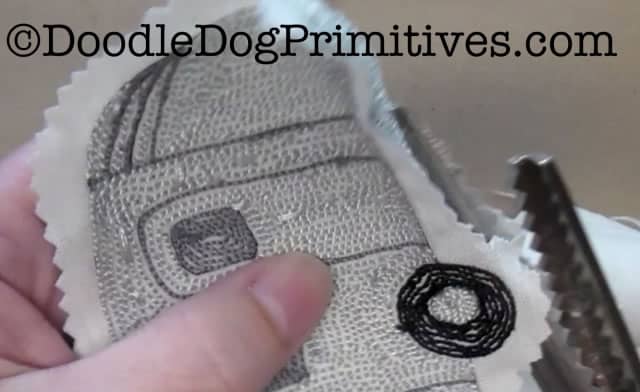
Sew the Punch Needle Ornament:
Thread your needle with thread to match the wool backing.
I am using a black backing and black thread.
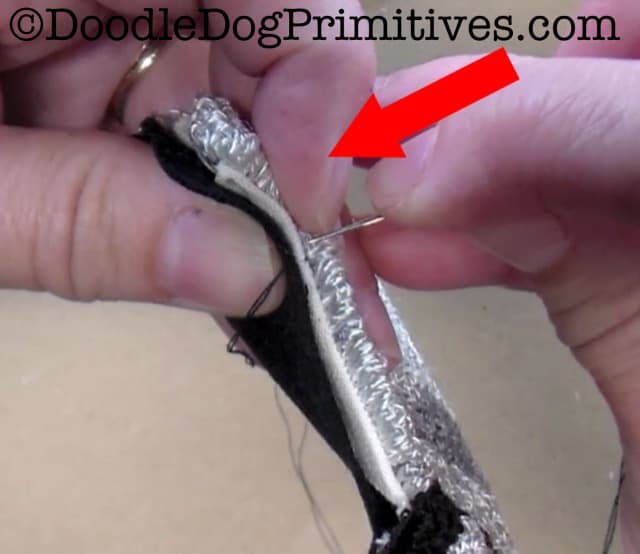
Layer the punched piece and wool backing, wrong sides together.
To start, bring the needle through underneath the weavers cloth.
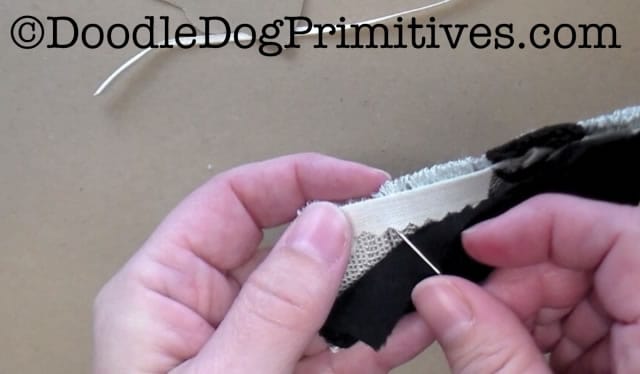
Put the needle through the edge of the weavers cloth
and pick up the edge of the wool backing.
Pull the needle through.
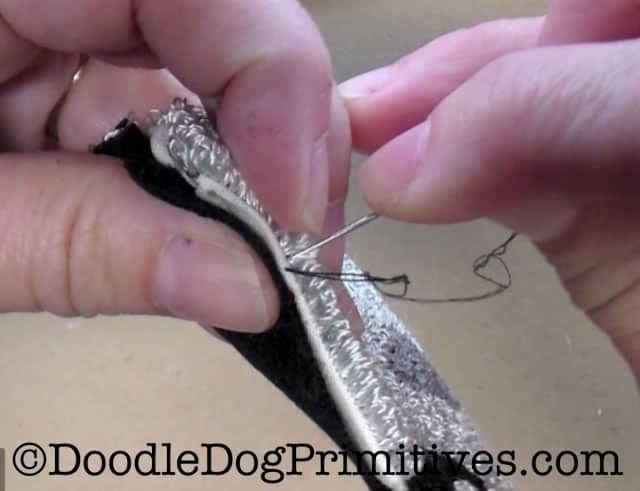
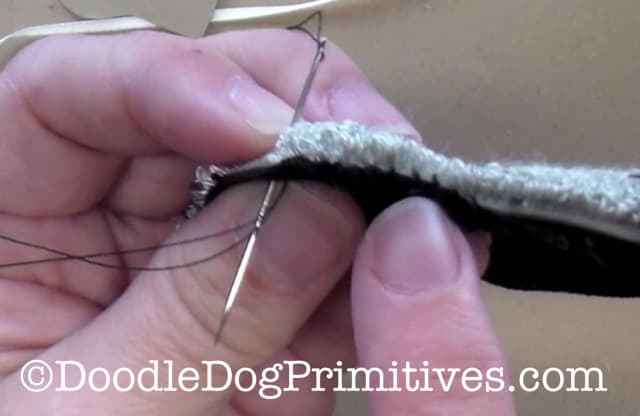
Bring the needle back over and repeat close to the previous stitch.
Continue whipstitching around the edge.
This is very similar to how I create punch needle bowl fillers.

While you are stitching,
use a finger on your other hand to hold back the punch needle loops
so they don’t get caught in the stitching.
The stitches will bring the edge of the wool over
to cover the edge of the weavers cloth.
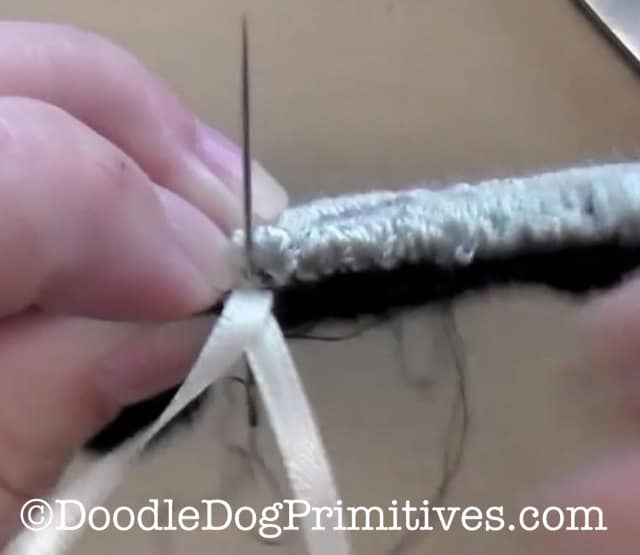
When you get to the middle of the top,
fold the ribbon in half and place the ends
one fourth inch inside the front and back of the ornament.
Stitch back and forth to attach the ribbon.
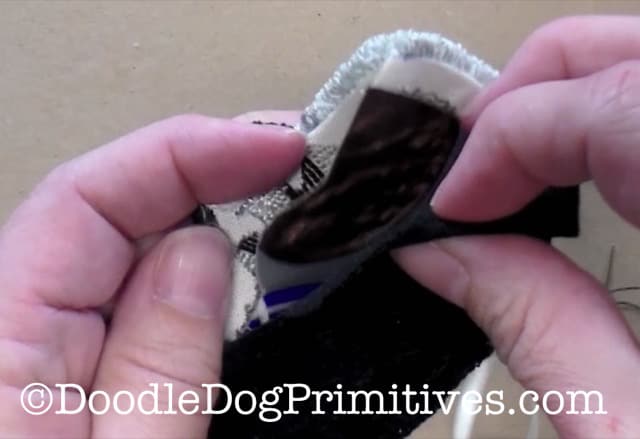
When you have all but one end sewn,
slide the cardboard into the middle of the layers.
Continue sewing until you get back to where you started.
Tie off the thread and bring the needle and thread
out through the wool backing.
Snip off the thread.
This will eliminate any loose thread at the edge.
The ornament is finished!
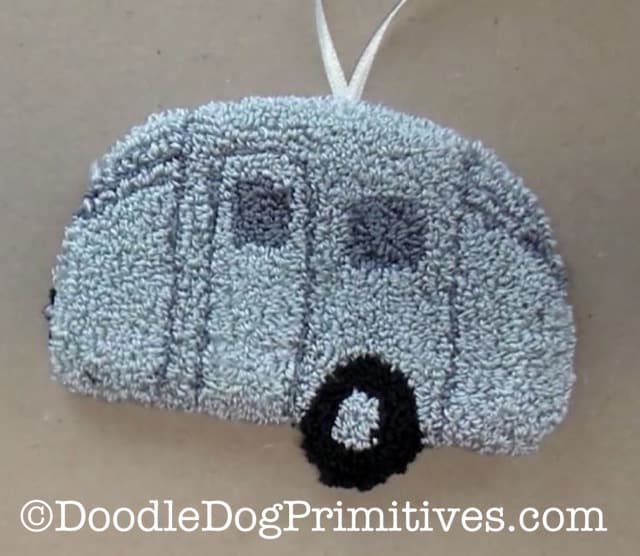
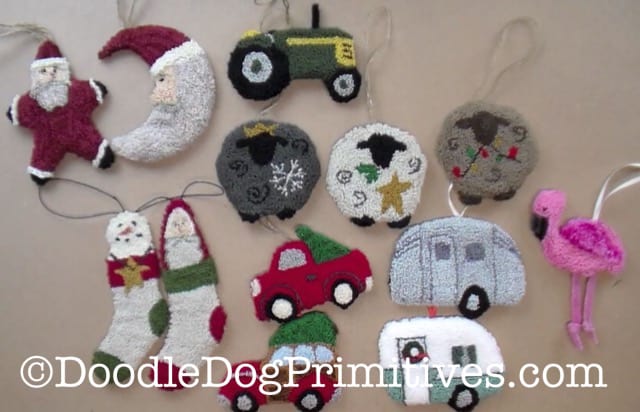
Here are some other punch needle ornaments I have created.
You can find the patterns for all of them in my Etsy shop.
Blessings~
Amy
Pin this Punch Needle Tutorial!